This Article explains about-
i) adding the Aruba controller as NAD device.
ii) Integrating Aruba Controller with CPPM to perform Captive Portal authentication.
iii) Configuring service on CPPM to handle this request.
Environment : This Article is written for CPPM 6.2.0 and greater.
Below are the detailed steps.
1: Adding Aruba Controller as NAD device on CPPM.
Navigate to Configuration > Network > Devices
Click Add Device
Add the device as shown below.
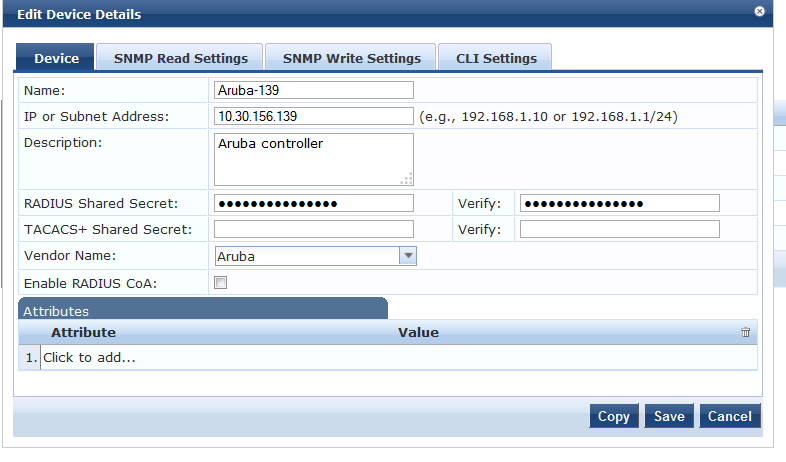
Make sure that we configure the same Radius Shared secret on the controller as well.
2: Integrate Aruba Controller with CPPM to perform Captive Portal.
-> Add a server group on the Controller
Navigate to Security > Authentication > Servers
Add a new Radius Server.
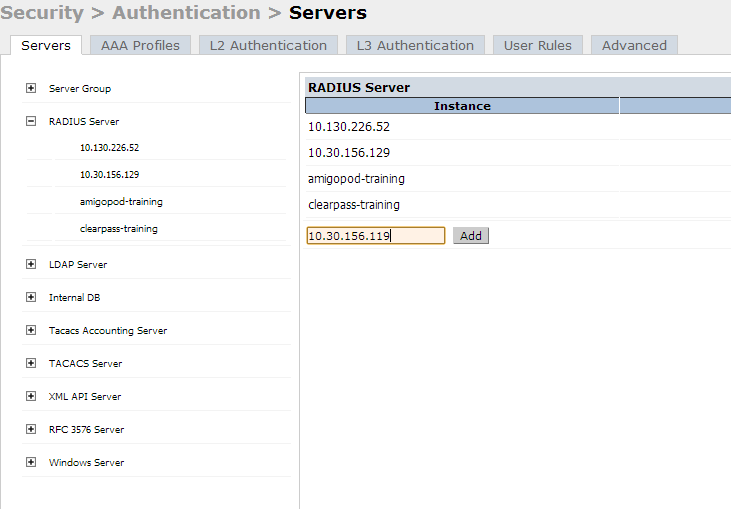
Enter the IP of the CPPM or a generic name to identify the CPPM server and hit " Add"
After adding, the CPPM server will show in the list.
Click on the entry and modify the below.

Make sure that the Host field has the IP/host name of the CPPM and the Key is same as radius secret key in step 1.
-> Map this server to a server group.
Create a new Server group and add the entry of CPPM to it.
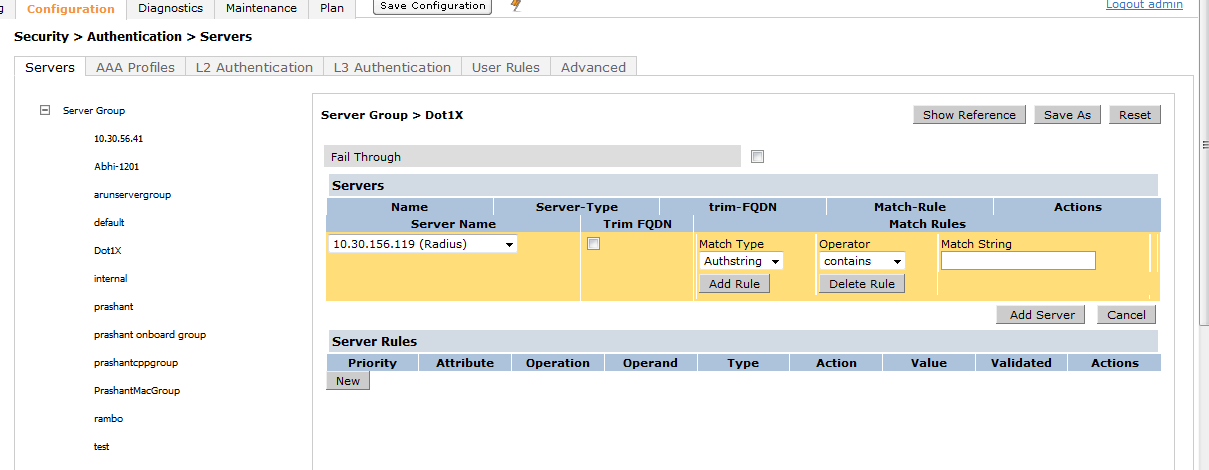
The next step is to add an RFC 3576 server entry for ClearPass.
Navigate to Security > Authentication > Servers and Click on RFC 3576 Server.
Make sure we use the same keys as used while adding the Radius server.
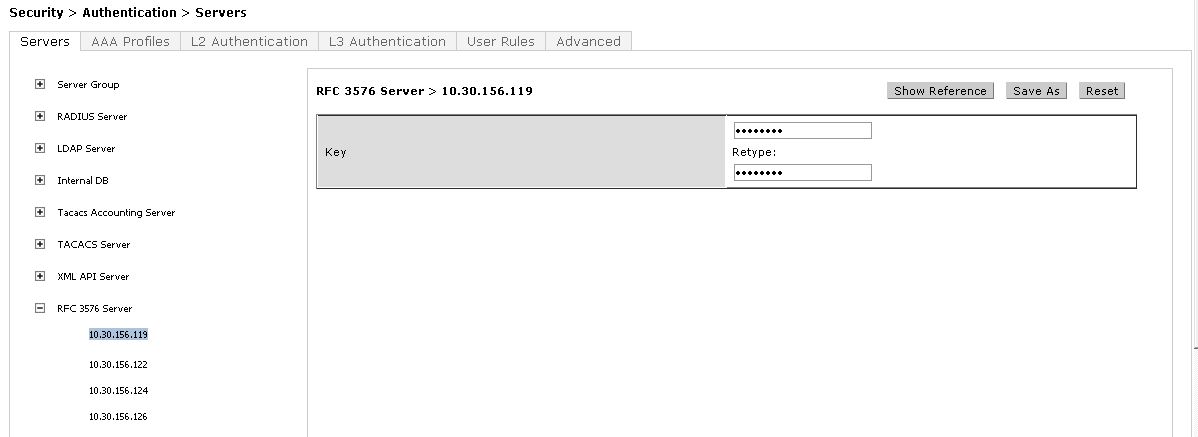
Add a Captive portal profile now.
Navigate to Security > Authentication > L3 Authentication and click on Add.
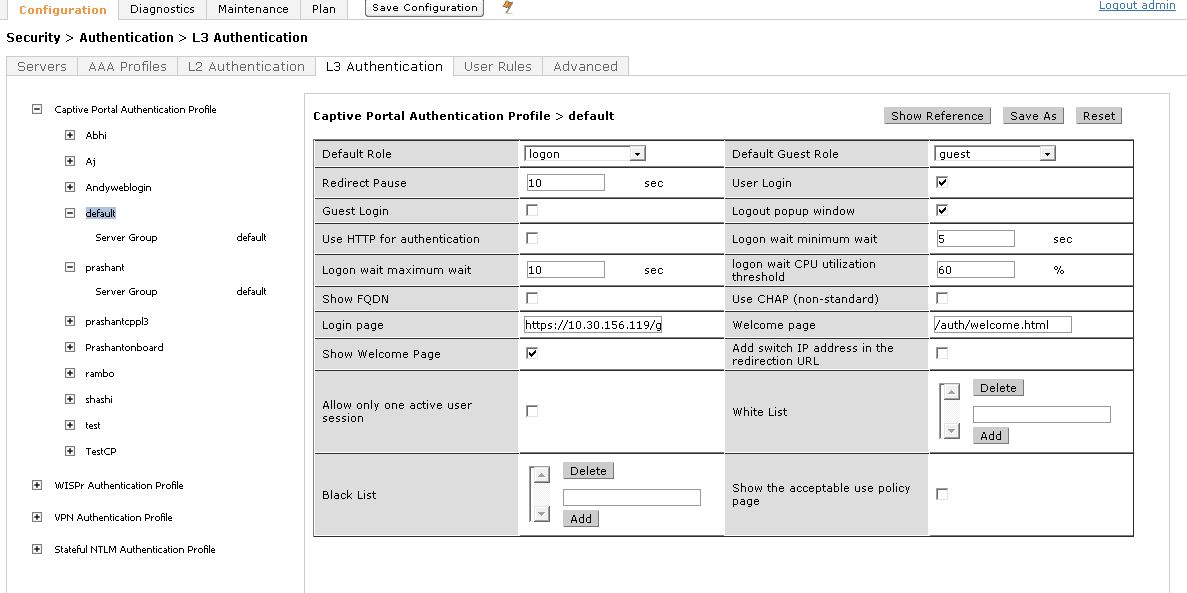
Select the specific Roles from drop down and map the login page as"https://x.x.x.x./guest/guest_register.php"
Click Apply at the bottom to save the changes.
Click on Server Group under the Captive Portal Authentication Profile and change the Server Group from default to the Server Group that you created for ClearPass in the previous steps and click Apply at the bottom of the page to save the changes.

Create a Captive Portal role
Now we have to create our Captive Portal role, which is the role that clients will receive when they connect to the Guest SSID.
Navigate to Configuration->Security->Access Control->UserRoles tab and Click Add to create a New User Role.

For the first policy, it is essentially important that we add an ACL that will allow our Guest user to access ClearPass 6, which is where the Captive Portal webpage will be hosted. Choose the radio button for Create New Policy, and click the Create button:
Enter and select the following information:
Policy Name: <CPG-Web-ACL>
Policy Type: <Session>
Click Add.

Add HTTP and HTTPS reachability to the CPPM server.

Click Done, and you will be redirected to the page where we created the Role.
Hit Add firewall policies again and add the predefined "Logon-control" and " Captive Portal" policy.
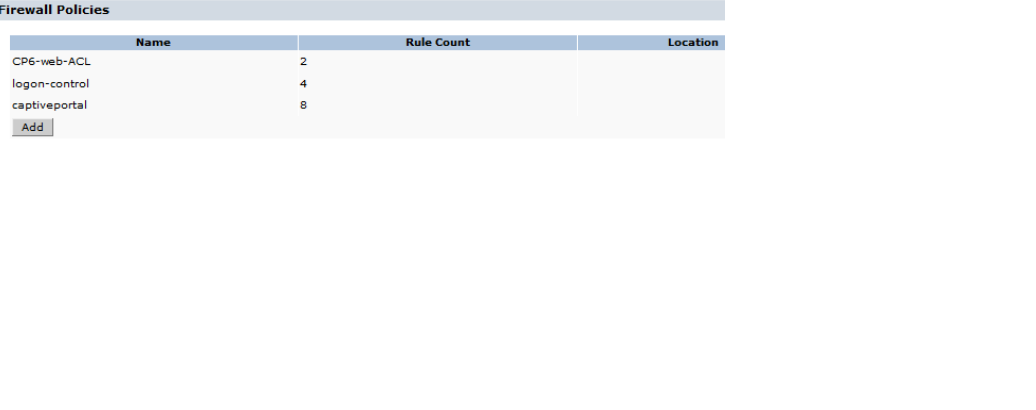
Scroll down this screen and map this Role to our Captive Portal Profile.

Add a AAA profile:
Navigate to "Security > Authentication > Profiles" and click on ADD.
Give a generic name to the AAA profile and map the "802.1X Authentication Server Group" on this profile to the CPPM server group.
Create a new "802.1X Authentication Profile" as below.
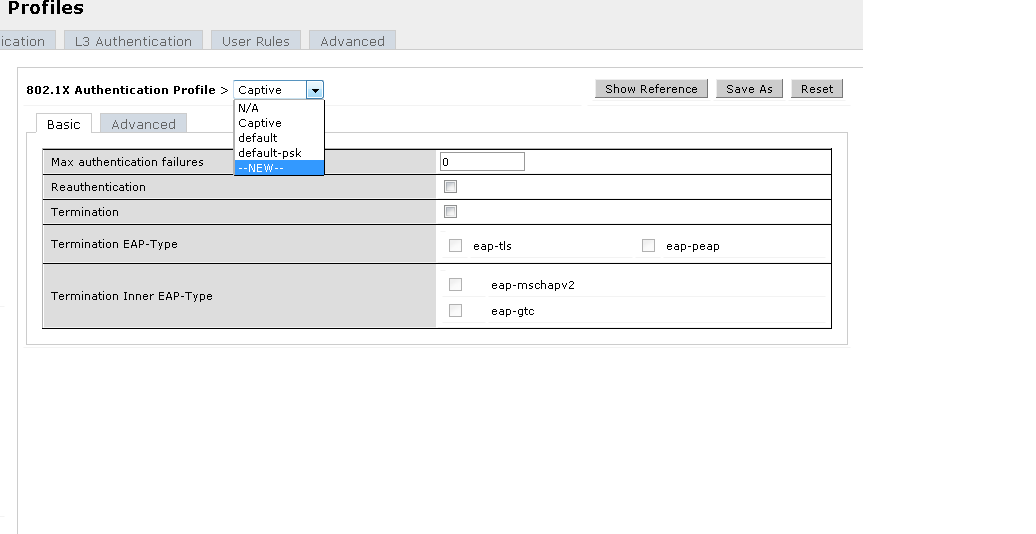
Hit ""New" and add a new dot1X profile.
Add a new SSID.
Once done, navigate to "Configuration > AP Group" and goto the specific AP group where we would want to add the new SSID and edit that group.
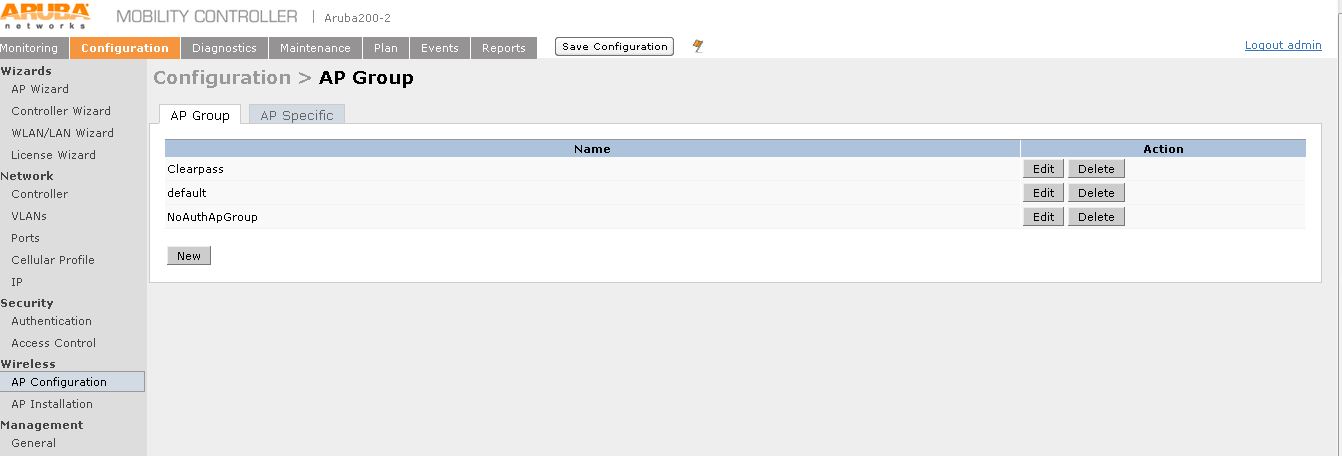
It will take us to the below page.

Add a new Virtual AP profile as shown above.
And map the VAP with the already added AAA profile.
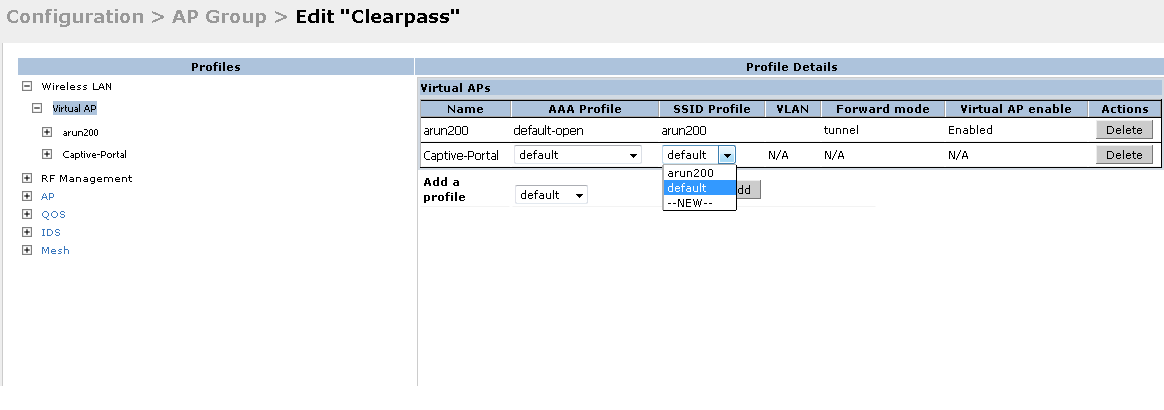
Map this VAP to a SSID profile, select "New" from the drop down and add a new SSID profile as below.
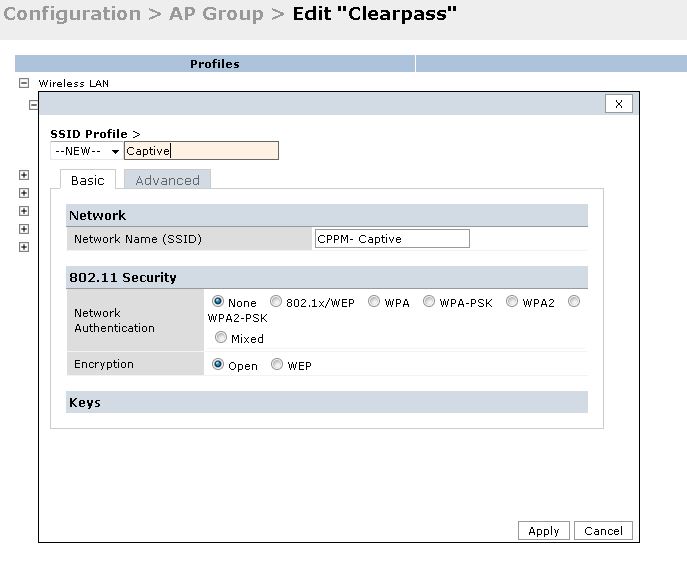
Once done, we should have the Captive portal SSID on the Controller. This completes the configuration on the Controller.
3: Configuration of CPPM
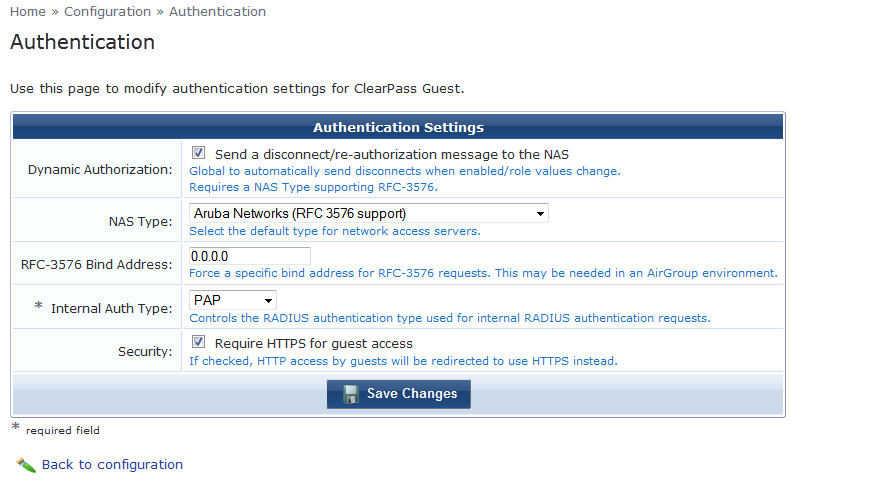
Login to Clear Pass Guest and navigate to Home » Configuration » Authentication and enble the HTTPS for Guest access as below.
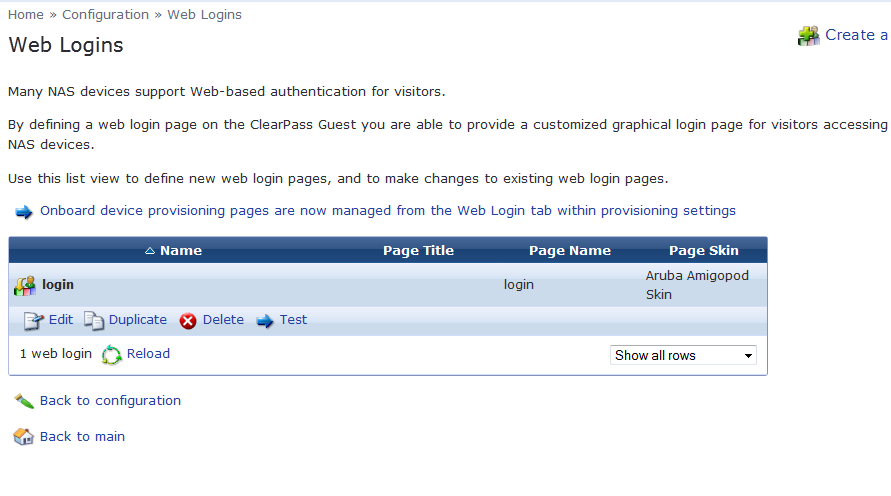
Navigate to Home » Configuration » Web Logins on CPG and create a new page.
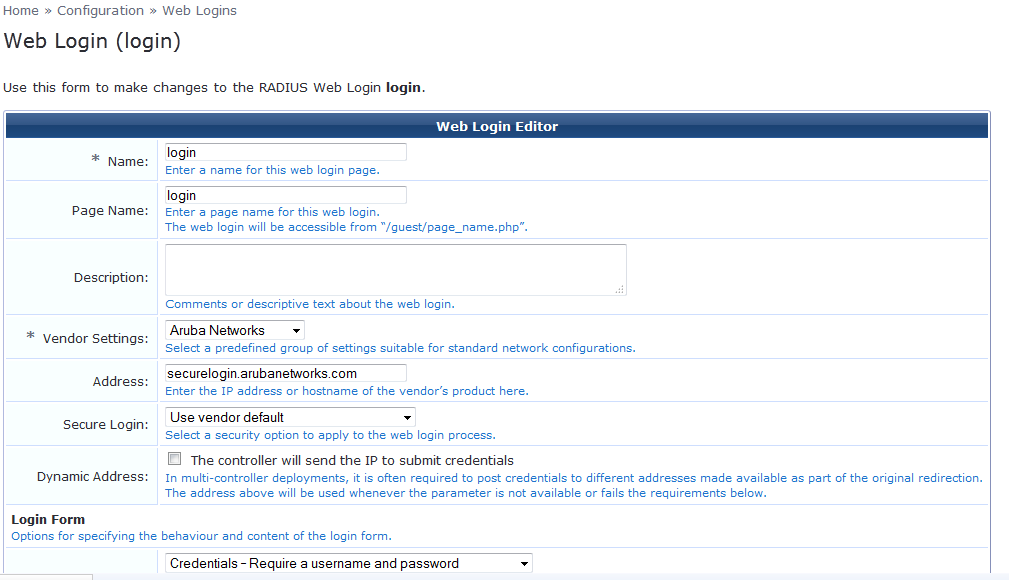
The name should be exactly same as the name provided in the IAP configuration.
We can leave the other configuration items as default on this page apart from inserting the Guest self registering link in the header or footer and save the page.
Click on the page and hit test to check the page look and view.
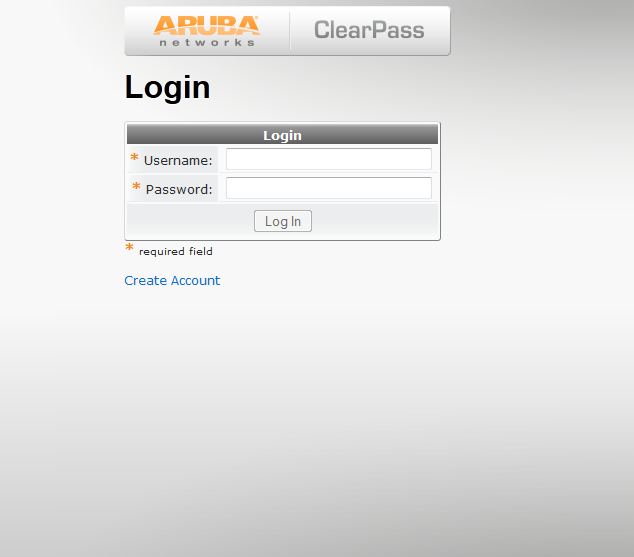
This completes the configuration on the CP Guest.
Now, we will add a Service to handle this request.
Navigate to "Configuration » Service Templates" use the template for "Guest Access".
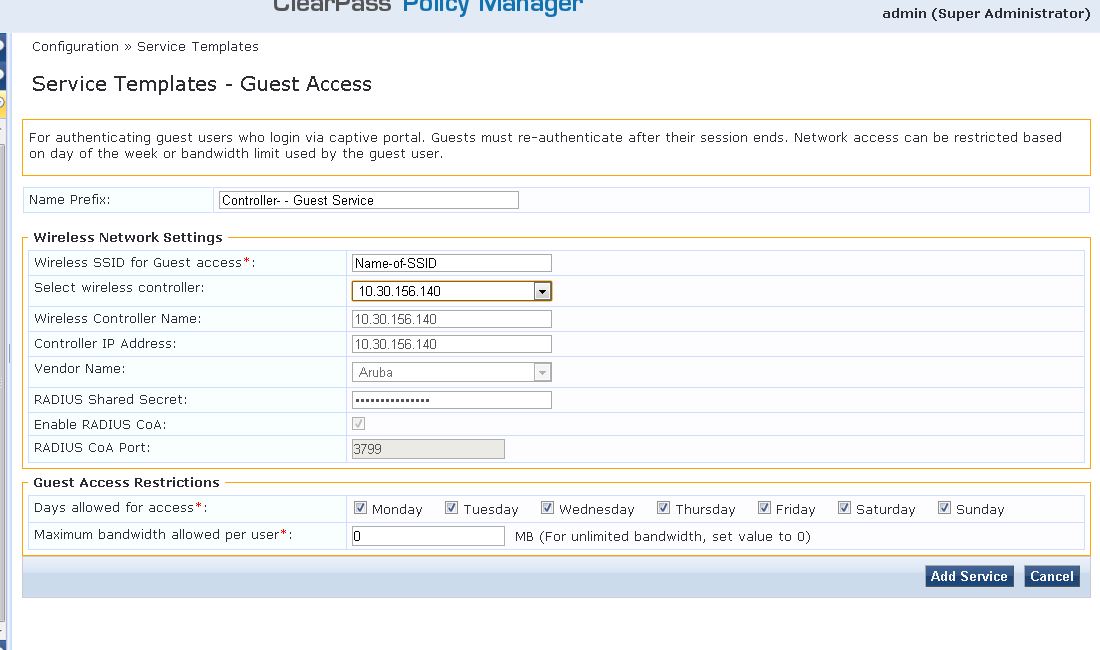
Hit "Add Service" and the service is added.
We can then connect a client and check.