This article talks about configuring a Hotspot Manager using CPPM.
Environment : This article implies to CPPM 6.2.
The Hotspot Manager controls self-provisioned guest or visitor accounts. This is where the customer is able to create his or her own guest account on your network for access to the Internet.
Login to Clear Pass Guest and navigate to Configuration > Hotspot Manager.
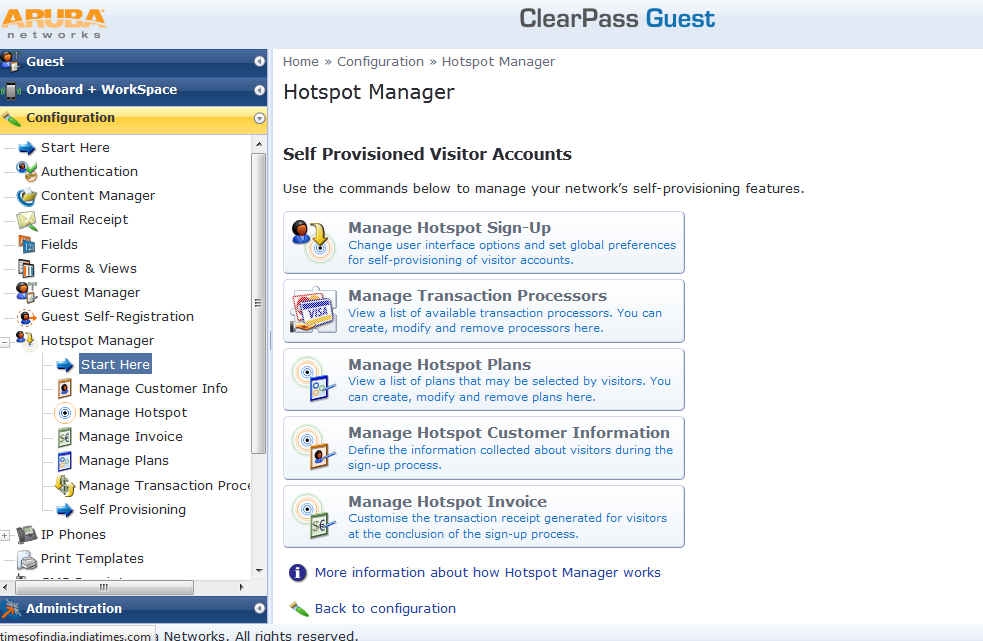
Step 1: Create a payment gateway.
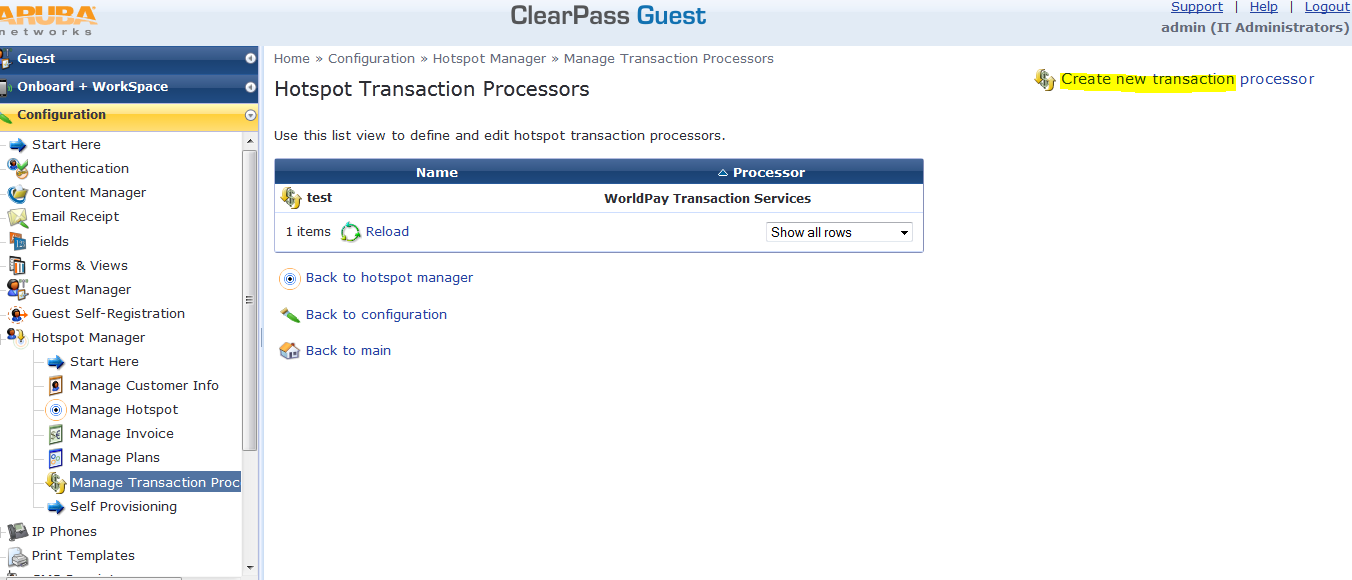
Click on "Manage Transaction Process" and add a new entry.
Provide a name to the transaction process and select the payment gateway.
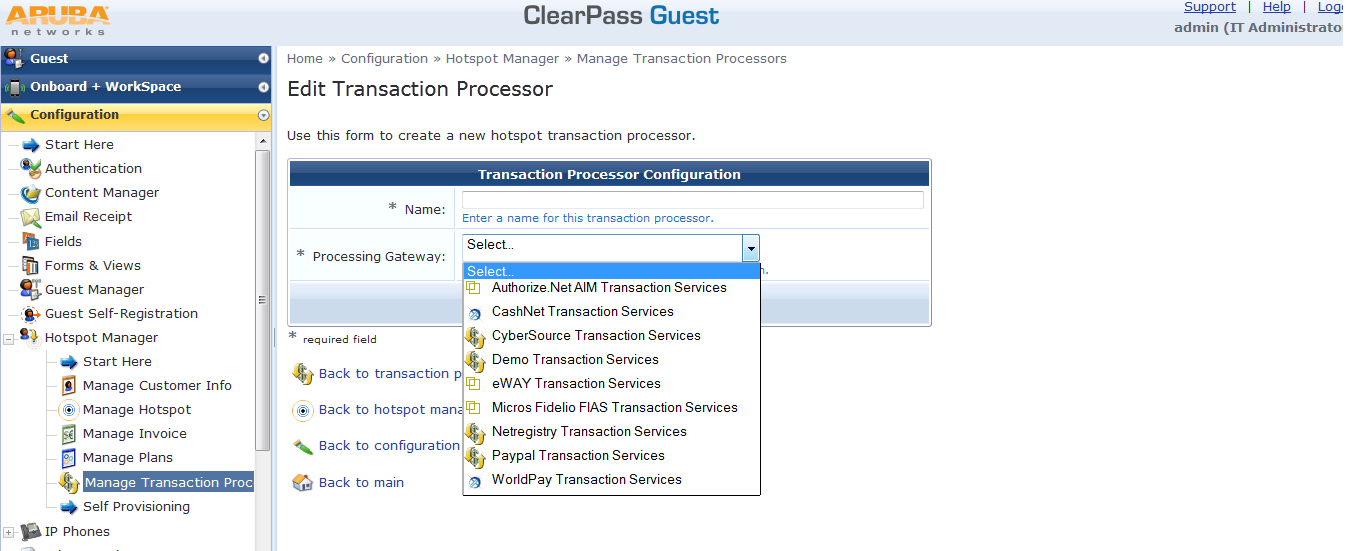
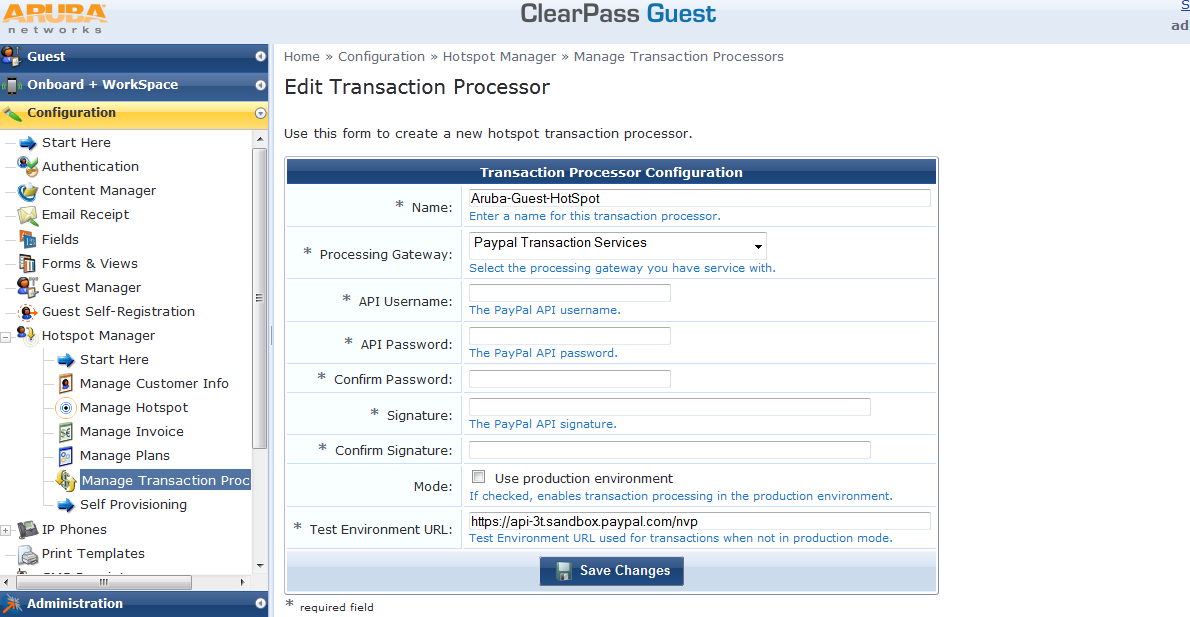
Each transaction processing gateway type requires unique merchant identification, password, and configuration information. Depending on the gateway provider, these configuration items will include some of the following:
* API Login
* API Password
* API Username
* Auto Email
* Beagle Anti-Fraud
* Business Center Login
* Customer ID
* Installation ID
* Logging
* Merchant ID
* Mode
* Production Environment URL
* Shared Secret
* Signature
* Test Environment URL
* Test WSDL
* Transaction Key
* Transaction Password
* Transactions Timeout
If your transaction processor requires visitors to enter their address, ClearPass Guest will automatically include address fields in the guest self-registration forms that use that transaction processor.
Step 2: Manage Hotspot Plans
Navigate to "Home » Configuration » Hotspot Manager » Manage Plans".
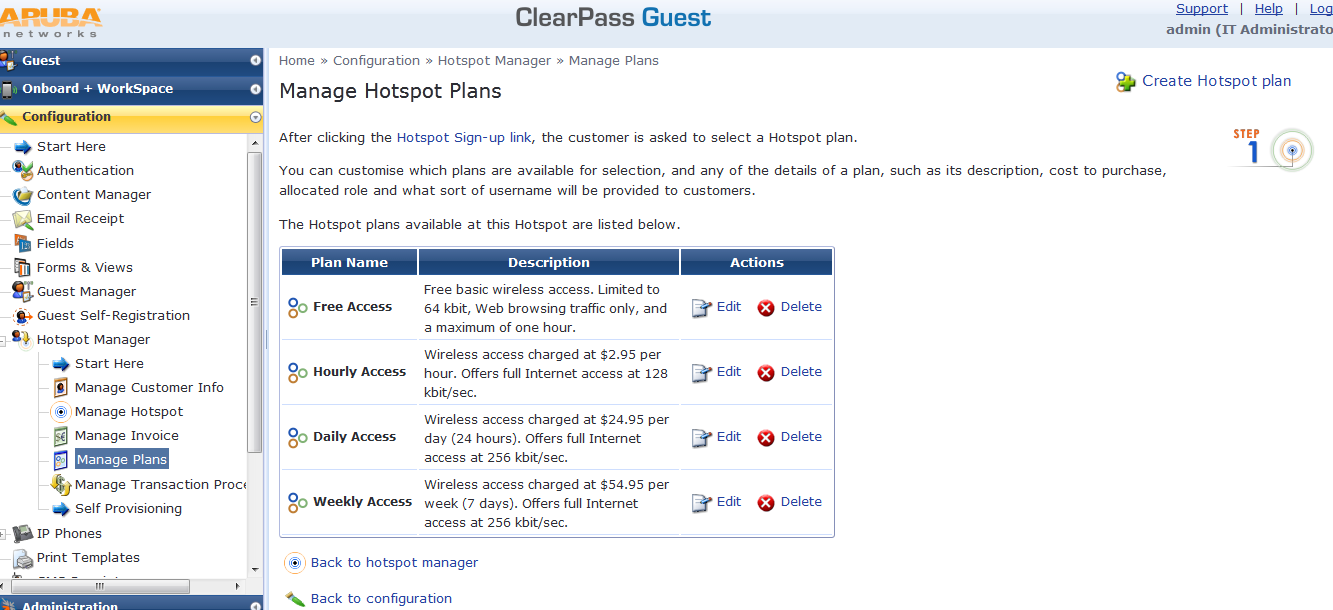
We can add a new plan or edit an existing plan based on our requirements.
If we would want to give free access for 15 minutes, we can edit the "Free Access" plan as shown below.
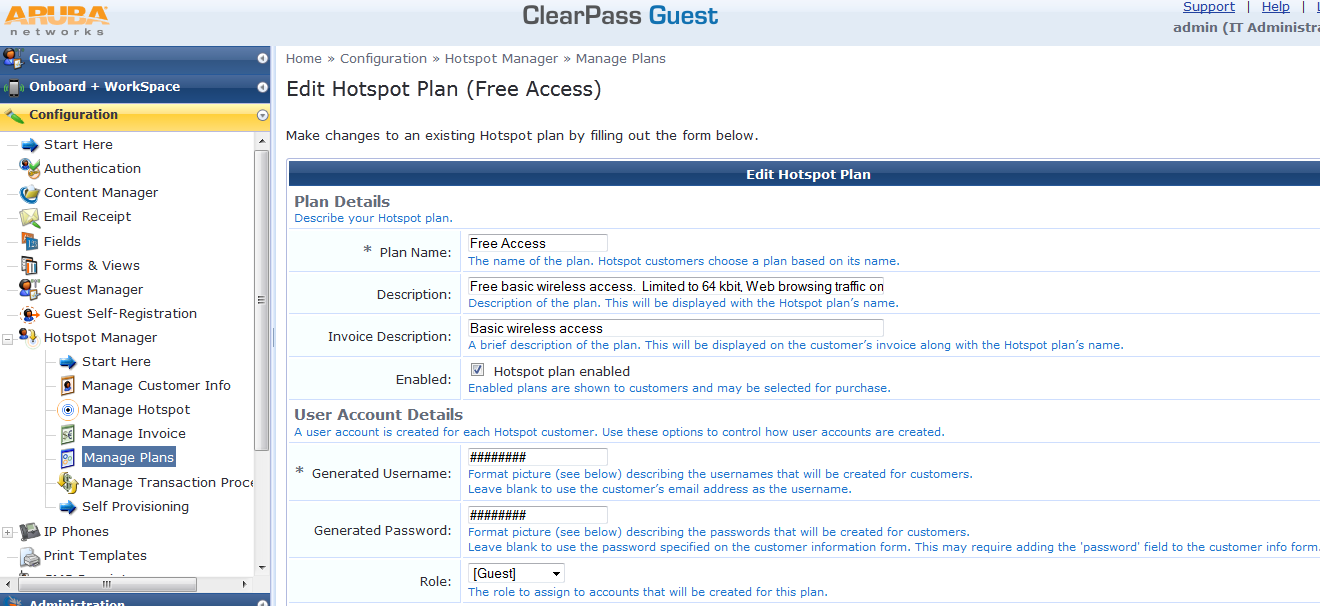

In the Plan Details area, enter a name for the plan and descriptions to display in the UI and the customer invoice.
To enable the plan, leave the Enabled check box marked. To disable the plan, unmark this check box. Disabled plans are not displayed to customers.
In the User Account Details area, you can specify the usage of numbers, letters, and symbols in the generated username and password. To use only digits, leave the value in the Generated Username and Generated Password fields set to ######. To indicate a different combination of numbers, letters, or symbols, use the following parameters:
* The number or hash symbol (#) is replaced with a random digit (0-9)
* The dollar symbol ($) is replaced with a random letter
* The underscore symbol (_) is replaced with a random lowercase letter
* The carat symbol (^) is replaced with a random uppercase letter
* The asterisk symbol (*) is replaced with a random letter or digit
* The “at” symbol (@) is replaced with a random letter or digit, excluding vowels
* The exclamation symbol (!) is replaced with a random punctuation symbol
* The ampersand symbol (&) is replaced with a random character (letter, digit, or punctuation symbol)
* All other characters are used without modification
Complete the rest of the fields appropriately for your organization’s needs, then click Create Plan or Edit Plan. The Manage Hotspot Plans list opens with the new plan displayed.
To provide free access for 15 minutes, we would need to set "Unit Time" = 60*15 = 900.
Step 3: Managing Hotspot Invoices
After the customer’s transaction has been processed successfully, the customer receives an invoice containing confirmation of their transaction and the details of their newly created hotspot user account. You can customize the title shown on the invoice and how the invoice number is created. You can also customize the currency displayed on the invoice.
To customize the hotspot invoice:
1. Go to Configuration > Hotspot Manager > Manage Hotspot Invoice. The Manage Hotspot Invoice form opens.
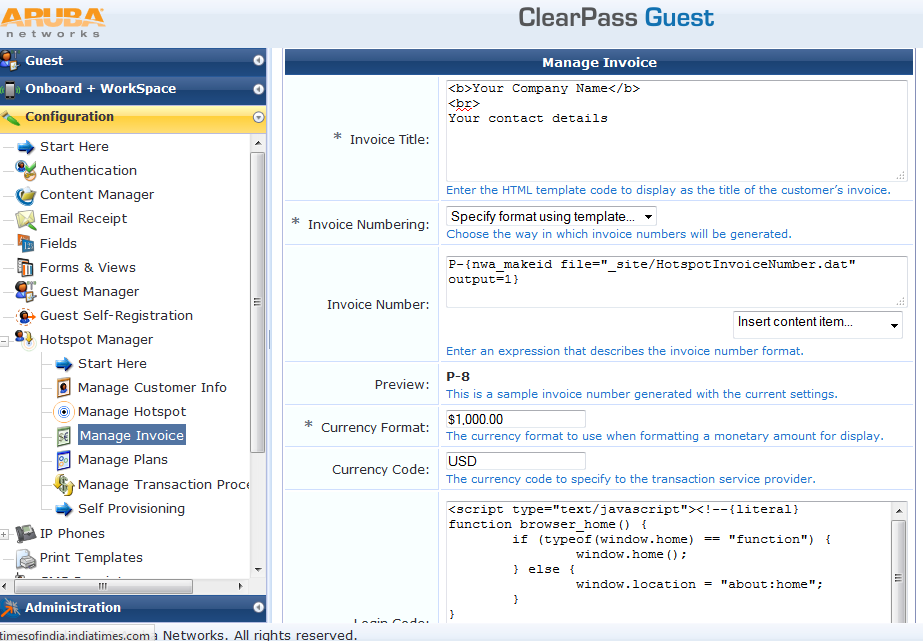
2.The Invoice Title must be written in HTML.
3.Complete the rest of the fields appropriately.You can also insert content items such as logos or prepared text.
4.Click Save Changes.
Step 4: Manage Hotspot Sign-Up
We can enable visitor access self provisioning by navigating to Configuration > Hotspot Manager and selecting the Manage Hotspot Sign-up command.
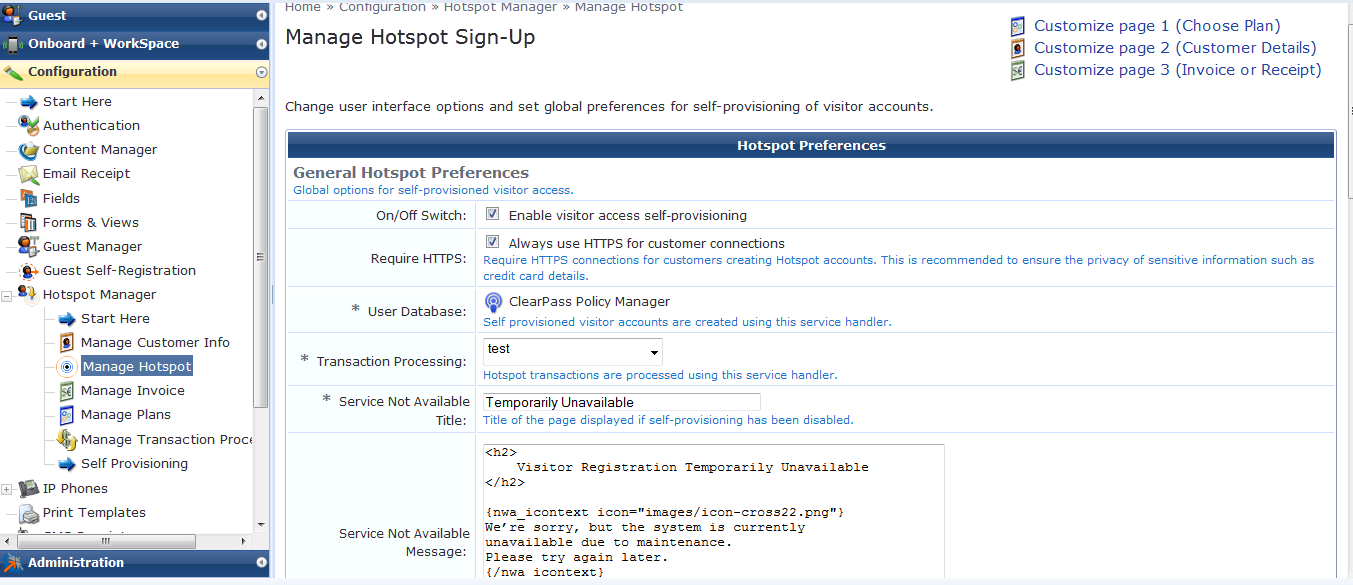
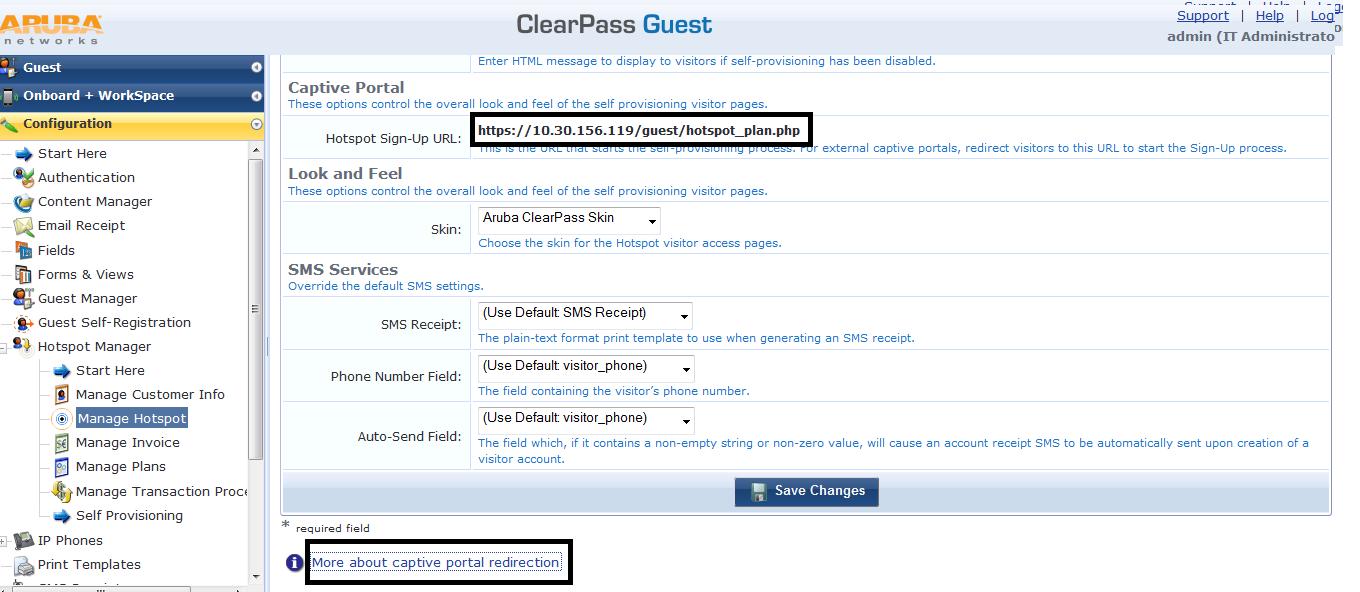
The Enable visitor access self-provisioning check box must be ticked for self-provisioning to be available.
The Require HTTPS field, when enabled, redirects guests to an HTTPS connection for greater security.
The Service Not Available Message allows a HTML message to be displayed to visitors if self-provisioning has been disabled. See Smarty Template Syntax in the Reference chapter for details about the template syntax you may use to format this message.
Click the Save Changes button after you have entered all the required data.
We can click on the "More about Captive portal redirection" to understand how to integrate it with Captive Portal
Captive Portal Integration
To start the visitor self-provisioning process, new visitor registration is performed by redirecting the visitor to the URL specified on the Hotspot Preferences page; for example: https://guest.example.com/hotspot_plan.php. The Hotspot Sign-Up page opens to the first page of the wizard, Choose Plan.
The hotspot_plan.php page accepts two parameters:
* The source parameter is the IP address of the customer.
* The destination parameter is the original URL the customer was attempting to access (that is, the customer’s home page). This is used to automatically redirect the customer on successful completion of the sign-up process.
For browsers without JavaScript, you may use the <noscript> tag to allow customers to sign up:
<noscript>
<a href="https://guest.example.com/ hotspot_plan.php">Hotspot Sign-Up</a>
</noscript>
However, in this situation the MAC address of the customer will not be available, and no automatic redirection to the customer's home page will be made. You may want to recommend to your customers that JavaScript be enabled for best results.
Managing Customer Information
We can customize the fields that the customer sees, the details of these fields, and the order in which they are presented. To customize the fields, go to Configuration > Hotspot Manager > Manage Hotspot Customer Information.