Requirement:What is the best way to define multiple DNS entries in Subject Alternative Name when creating CSR(certificate signing request)?
Consider that you have a requirement to use single SSL certificate on two ClearPass nodes in same cluster with VIP enabled between both the nodes.
For ex:
We need a certificate that should be trusted for three different DNS/URLs which will be resolved to both the nodes management IPs and Virtual IP.
Like,
VIP resolves to >> cppmvip.arubanetworks.com
node1 mgmt IP resolves to >> cppm01.arubanetworks.com
node2 mgmt Ip resolves to >> cppm02.arubanetworks.com
Solution:You can define multiple DNS entries in SAN, so that the certificate trust will be extended to more than one fully qualified domain names.
Please follow the below format to define multiple DNS entries in SAN.
DNS:cppmvip.arubanetworks.com,DNS:cppm01.arubanetworks.com,DNS:cppm02.arubanetworks.com
Notes:
- Please use fully qualified domain names in CN/SAN when you generate CSR, because the public certificate authorities will not accept any local domain name or alias effective from 1st NOV, 2015.
- DNS name should be specified with ":" and separated with comma by leaving no space between 2 entries as shown above.
- Repeat the CN(certificate common name) in SAN along with the other DNS entires.
Configuration:To create a new CSR with multiple DNS entries in SAN,
login to ClearPass policy manager UI and navigate to Administration >> Certificates >> Server Certificate >> Create Certificate Signing Request and create a CSR with SAN entries as shown below.

VerificationSubmitting the CSR request will let you to download the generated CSR and private key files. Download both the files and send the CSR file alone to the certificate authority to get it signed.

The signed certificate can be installed by navigating to Administration >> Certificates >> Server Certificate >> Import Server Certificate.
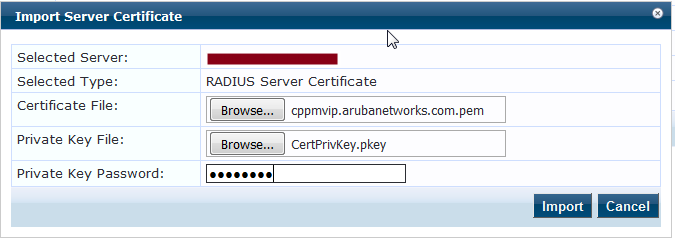
Note: The certificate import/install has to be done on Publisher. You can select the subscribers from the drop down "Select Server" in the same page and repeat the certificate installation.
Please find below the SAN entries from the signed/installed certificate on ClearPass for your reference.
