I have created this tutorial to show how easy it is to power Aruba mesh points using a store bought solar kit. This is written with the topic of Enterprise WLAN Design Stratagies in mind and with the hope that this will inspire more discussions about the use of alternative energy in WLAN designs.
Utilizing Solar Energy for Outside WLAN Applications
I'm sure that anyone who works as a wireless engineer for an institution of higher learning or a large corporation has been asked to provide one-off wireless solutions for outdoor applications. In fact, I was asked to provide our WLAN to an outdoor event that drew in 6,000 students to Dunn Meadow here on the Indiana University campus. Normally this isn't a big deal; you figure that you can set up a mesh network and deploy mesh points where needed. However, what do you do when there are no utlities available to use in this task?
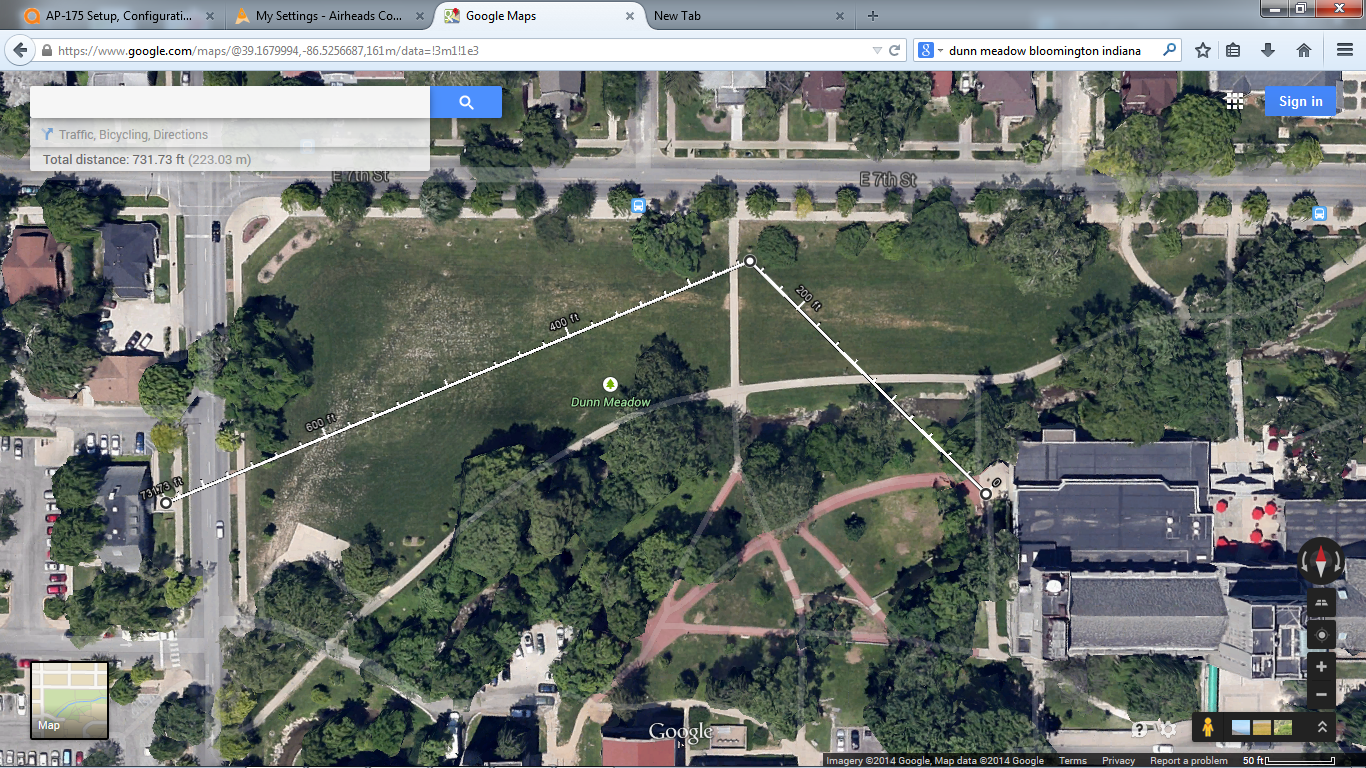
First, let's look at the situation at hand. Below is an aerial photo of Dunn Meadow. You can see from the photo that Dunn Meadow is quite large with not one utility pedestal in sight. Given this fact, I decided to try to power a mesh portal with solar energy as it was the only readily available power source. I figured I would need to take the following steps to get this project completed.
- Find a point to place my mesh portal, preferably near a building with a LAN drop.
- Figure out how to power mesh points using solar energy.
- Build an outdoor SSID that I could control connection to.
- Build a mesh group to use in conjunction with the SSID.
- Test the design.
- Implement the design
Step 1. Mesh portal placement.
If you look at the aerial photo below you can see an angled line starting from near a building on the right side of the picture. That building is known as the IMU and has an IDF closet close to the northwest corner. Given the proximity of the IDF to Dunn Meadow this seemed the obvious choice to grab a LAN connection to use for my mesh portal.
I asked our Layer 1 group install a permanent data drop on the outside of the building on the northwest corner. They placed the drop in a watertight, locked box with plenty of grounding and lightning protection. On to step 2.
Step 2. Solar energy sizing and components.
Having worked as an electrician before working as a wireless enigineer, I remember that one of the most important things you need to take into account when engineering power is to figure out the load. In other words, you need to figure out how much power you need to deliver. Since we are dealing with power you need to figure out how many watts you're going to consume. You need to take all of your equipment that will be powered and figure out the total watts.
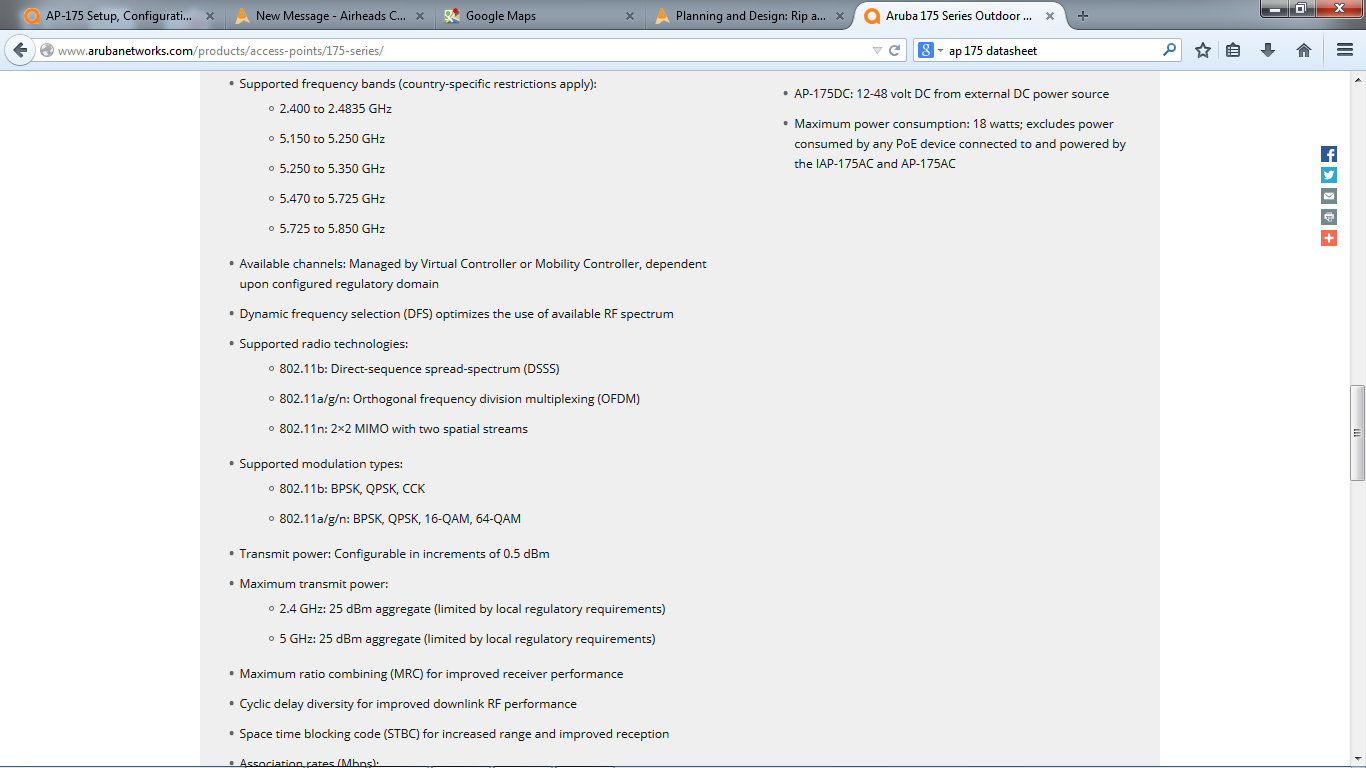
I figured I would use one AP175P as a mesh point and a POE switch to power the AP. With only 2 devices requiring power I knew that my watt usage would be low. I found the power rating of the AP175 on the product sheet provided by Aruba. If you look at the picture below you will see the power specs on the top right.
So now you can figure out the total watts with simple math:
18 watts (AP175) + 8 watts (POE switch) = 26 watts
We know that we will use 26 watts worth of power. Now we have to figure out the total power used for the event. The event will last 5 hours.
26 watts x 5 = 130 total watt hours.
With this power consumption, a 40 watt solar panel should do the trick. A 40 watt solar panel will provide 2.3 amp-hours for every hour of sun. With 5 hours of sun you can figure that you will add 11.5 amp-hours to your battery. To figure out how many total watt hours you will get use this equation: 11.5 amp-hours x 12.5V = 143 watt hours. We will use 130 watts of the143 watts available. Yes, that is cutting it close; however, since this solar array will only be used during the day I figured that this would be more than adaquate for our use.
With this information I figured that I could use a 40 watt solar panel and the smallest battery available, a 55 amp-hour battery. Now comes the problem, where do I buy it? With the proliferation of alternative power sources solar equipment can be purchased just about anywhere. To make things simpler, I decided that the best route was to buy a kit that had all of the componets available. It simplifies the process tremendously.
I chose to use a kit 40 watt do it yourself kit from a company called Sundance Solar. It comes with all of the components you need to set up a basic system for a pretty decent price ( http://store.sundancesolar.com/40-watt-do-it-yourself-solar-energy-kit/). The really nice thing about this kit is that all of the cables are provided in twist lock connections already wired to the solar panel, this kit contains:
- 40 Watt Framed Solar Panel
- Pair of 15 ft MC4 solar output cables
- SunSaver 6 amp charge controller
- 55 Amp-hr sealed lead-acid AGM battery
- 300 Watt DC to AC Power inverter
- Voltage meter
- 12V DC outlet with fuse
Another thing to keep in mind is that all of these components are loose and require you to assemble and place in an appropriate vessel. I used an old tote that we used to haul around APs and other small equipment in.
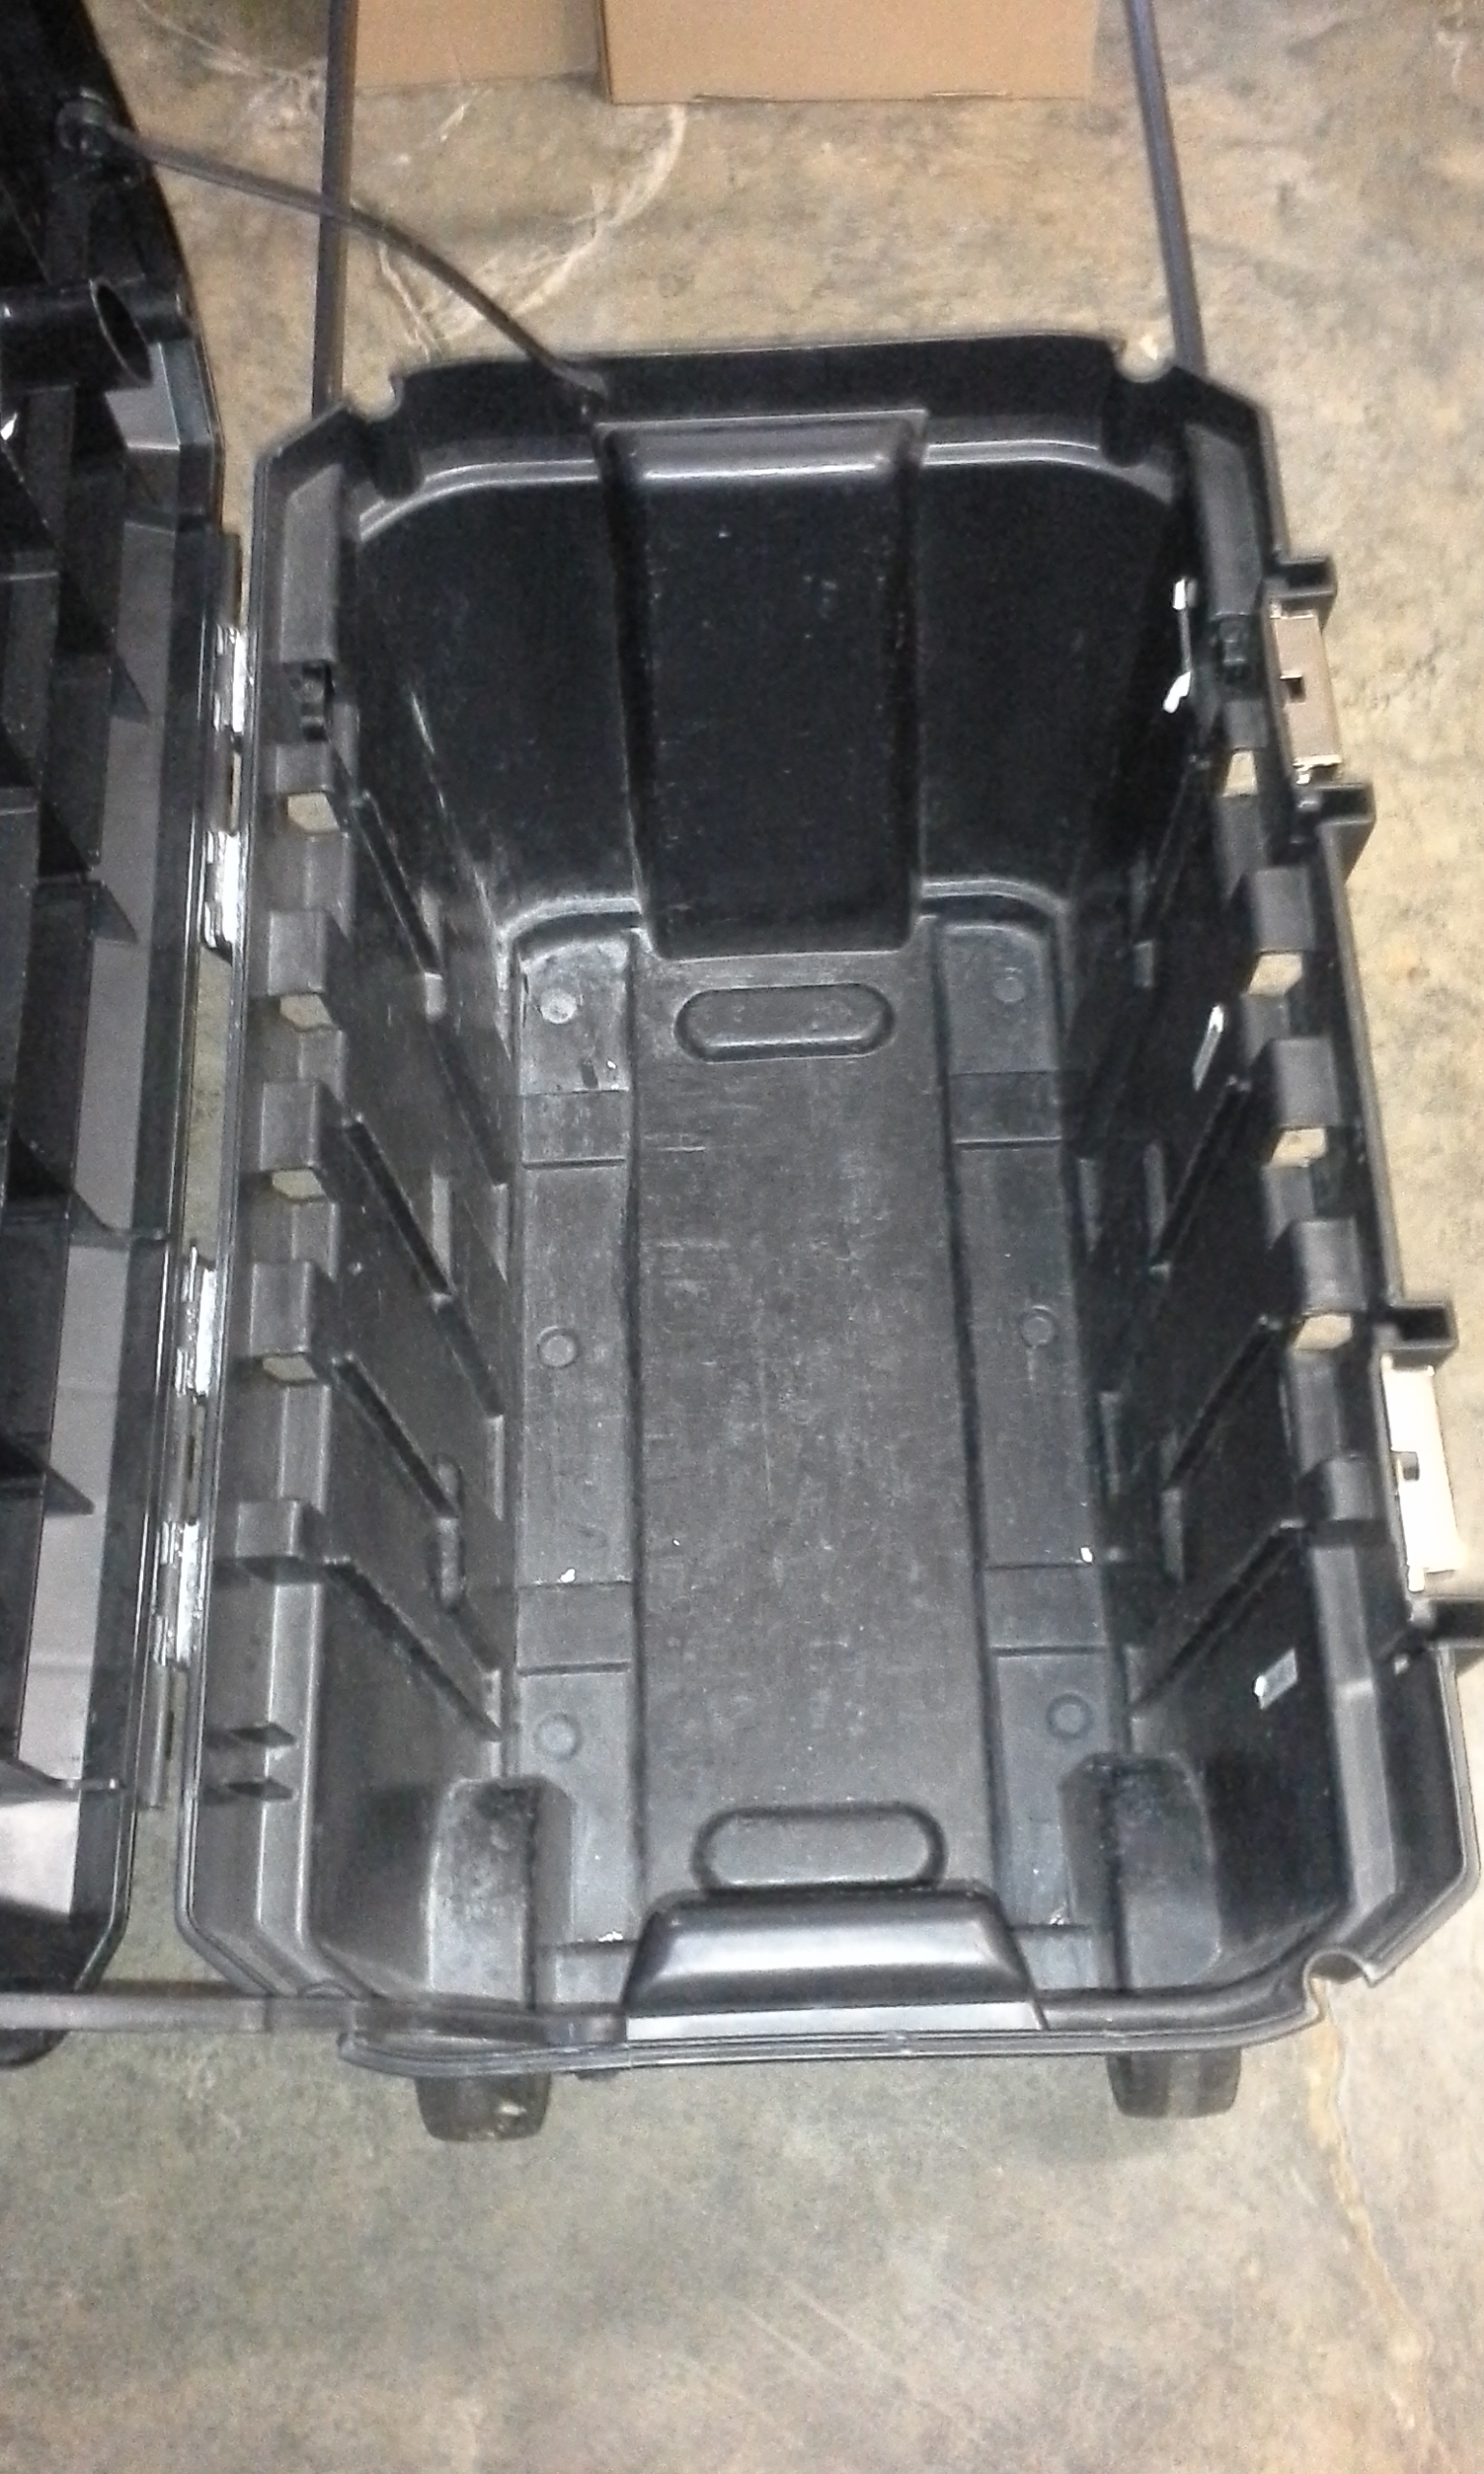
Not pretty, but it would do. It had a handle and wheels and is made of a sturdy plactic/resin compound that would be easy to modify.
Next it was time to place the solar equipment in the tote and fasten it so that it would not move around while it was being moved. The most important thing to remember is that you will have a charged battery rattling around you will want to make sure not to short across the postive and negative terminals. I mounted the battery, inverter, and the charge controller on the inside of the tote.
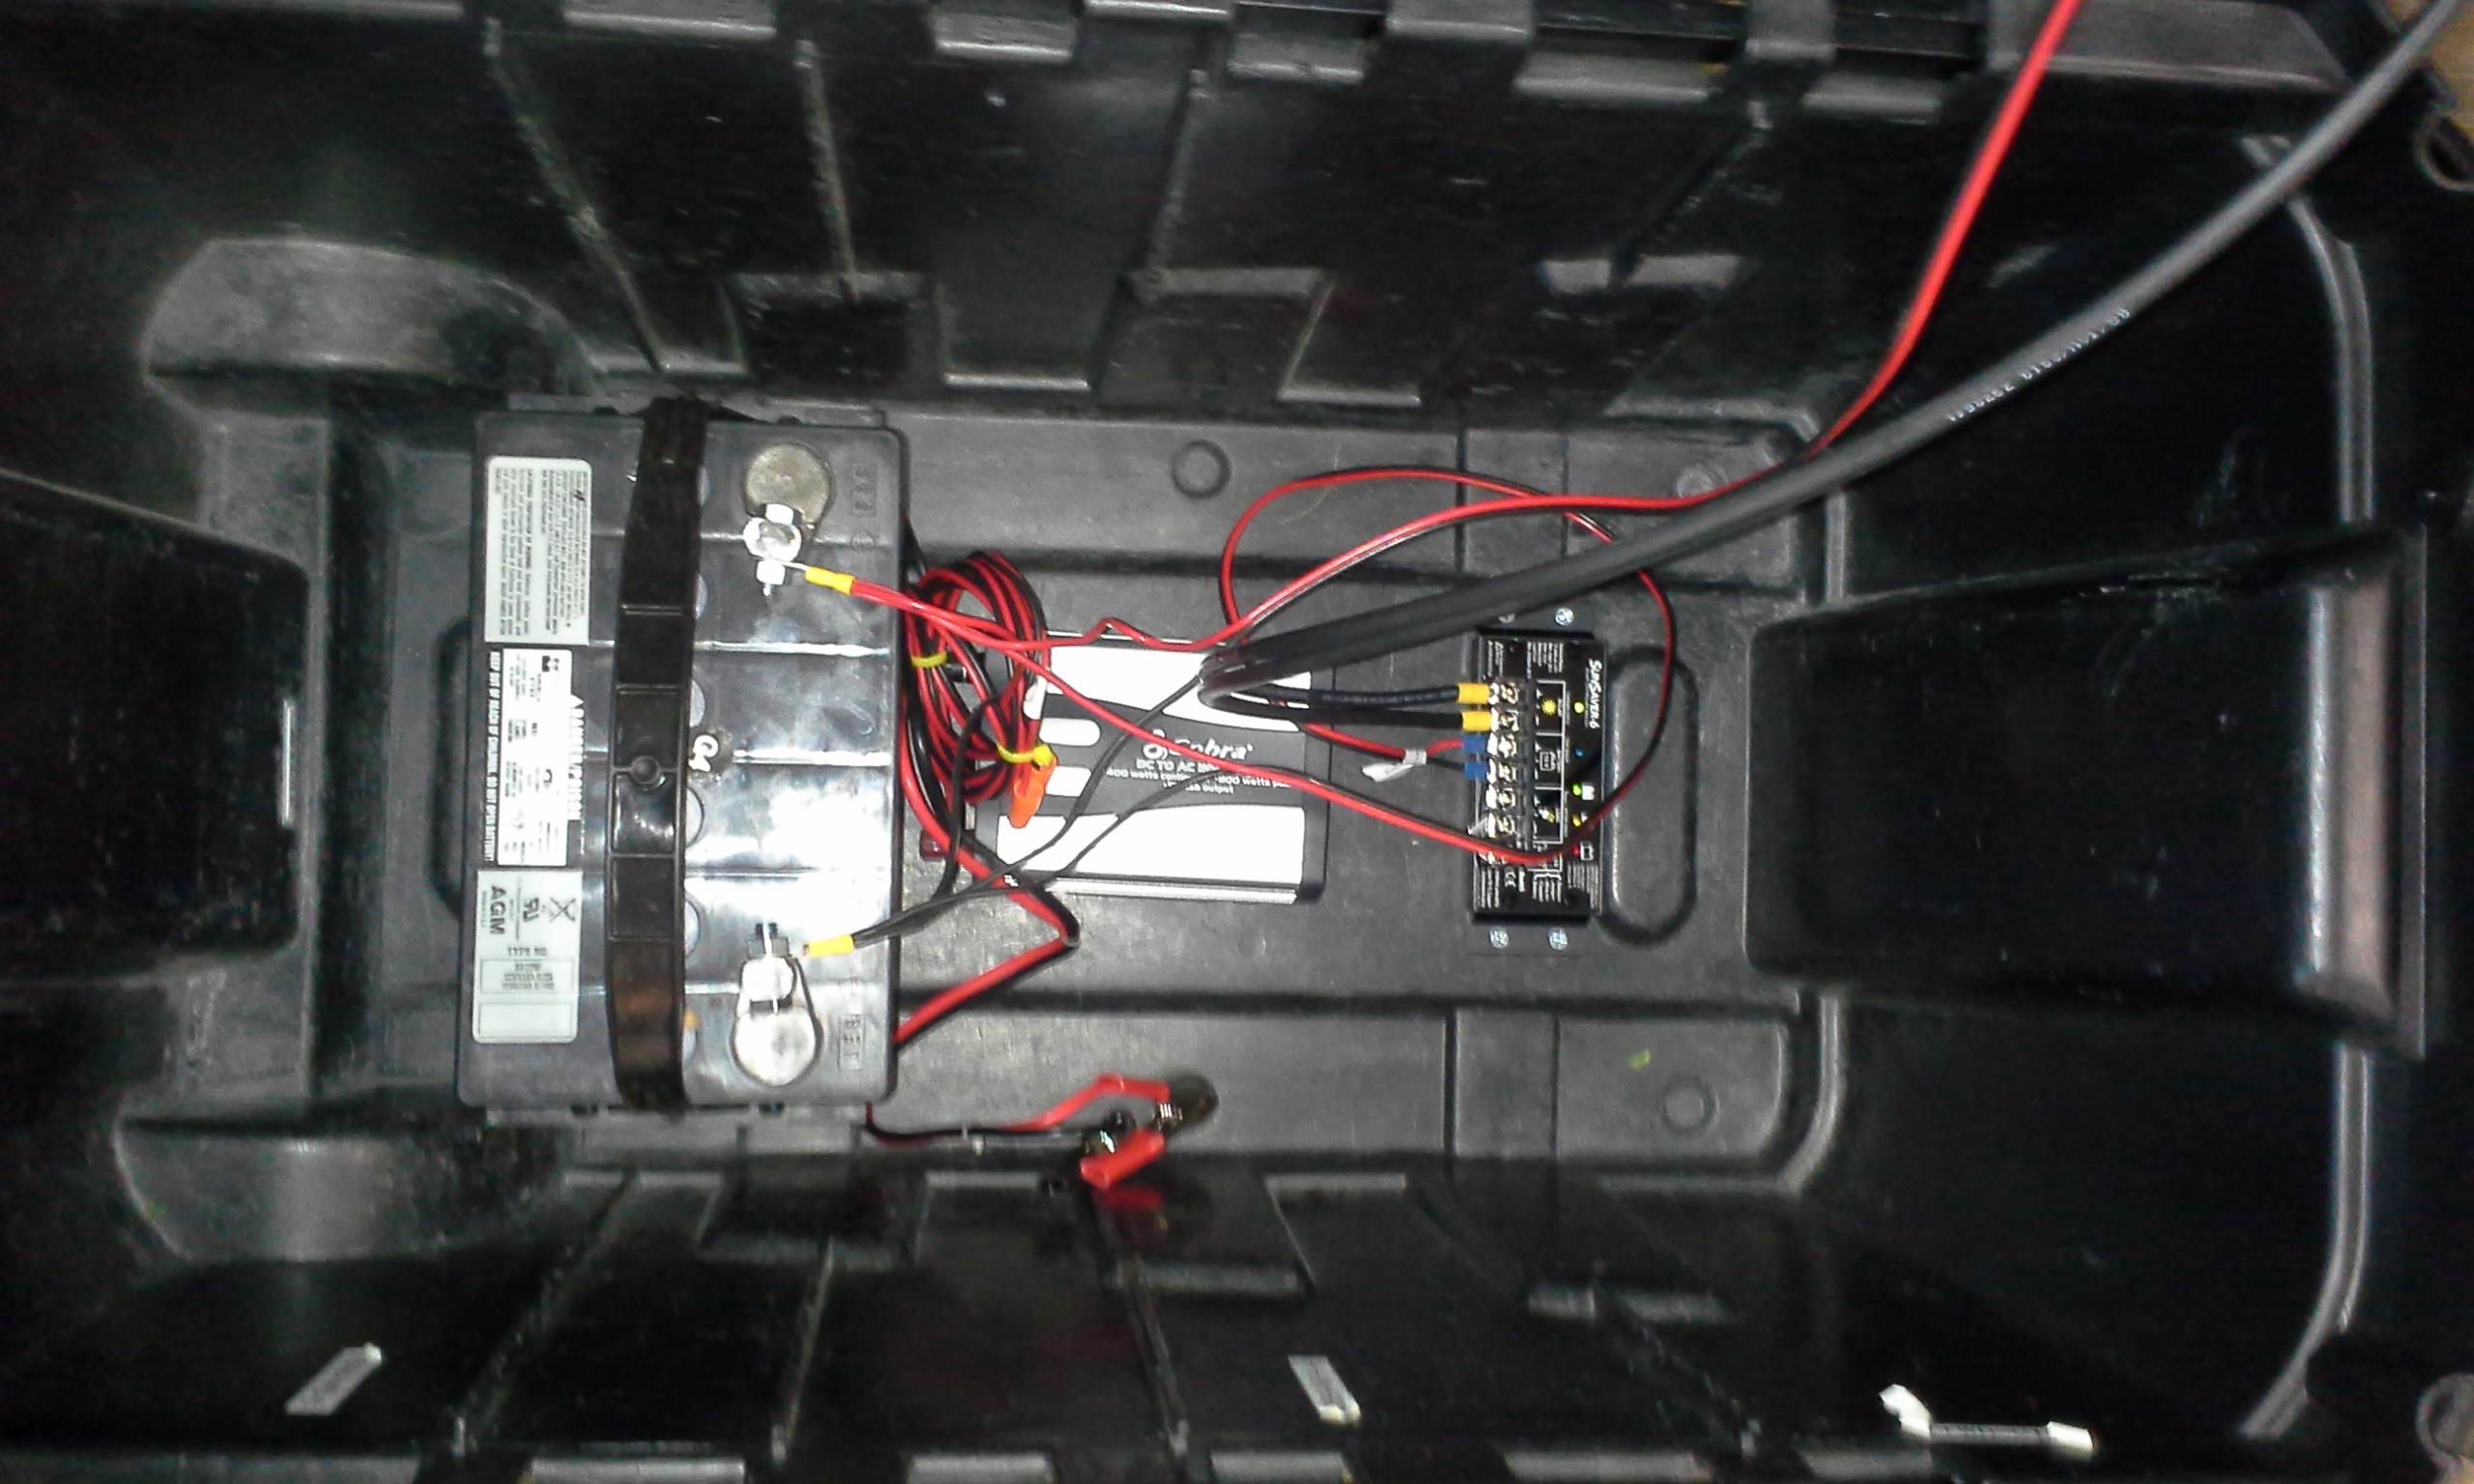
From left to right - battery, inverter, and charge controller.
Once that has been accoplished its now time to figure out how you want to mount the solar panel and the voltage meter. I wanted to mount the panel on the top of the tote and run the cables from the solar panel through the lid to the charge controller. I decided that I was also going to mount the voltage meter on the top and run the wires for the meter to the charge controller wiring harness. I mounted the solar panel to an old hinge so that I could adjust the angle to allow for movement of the sun.
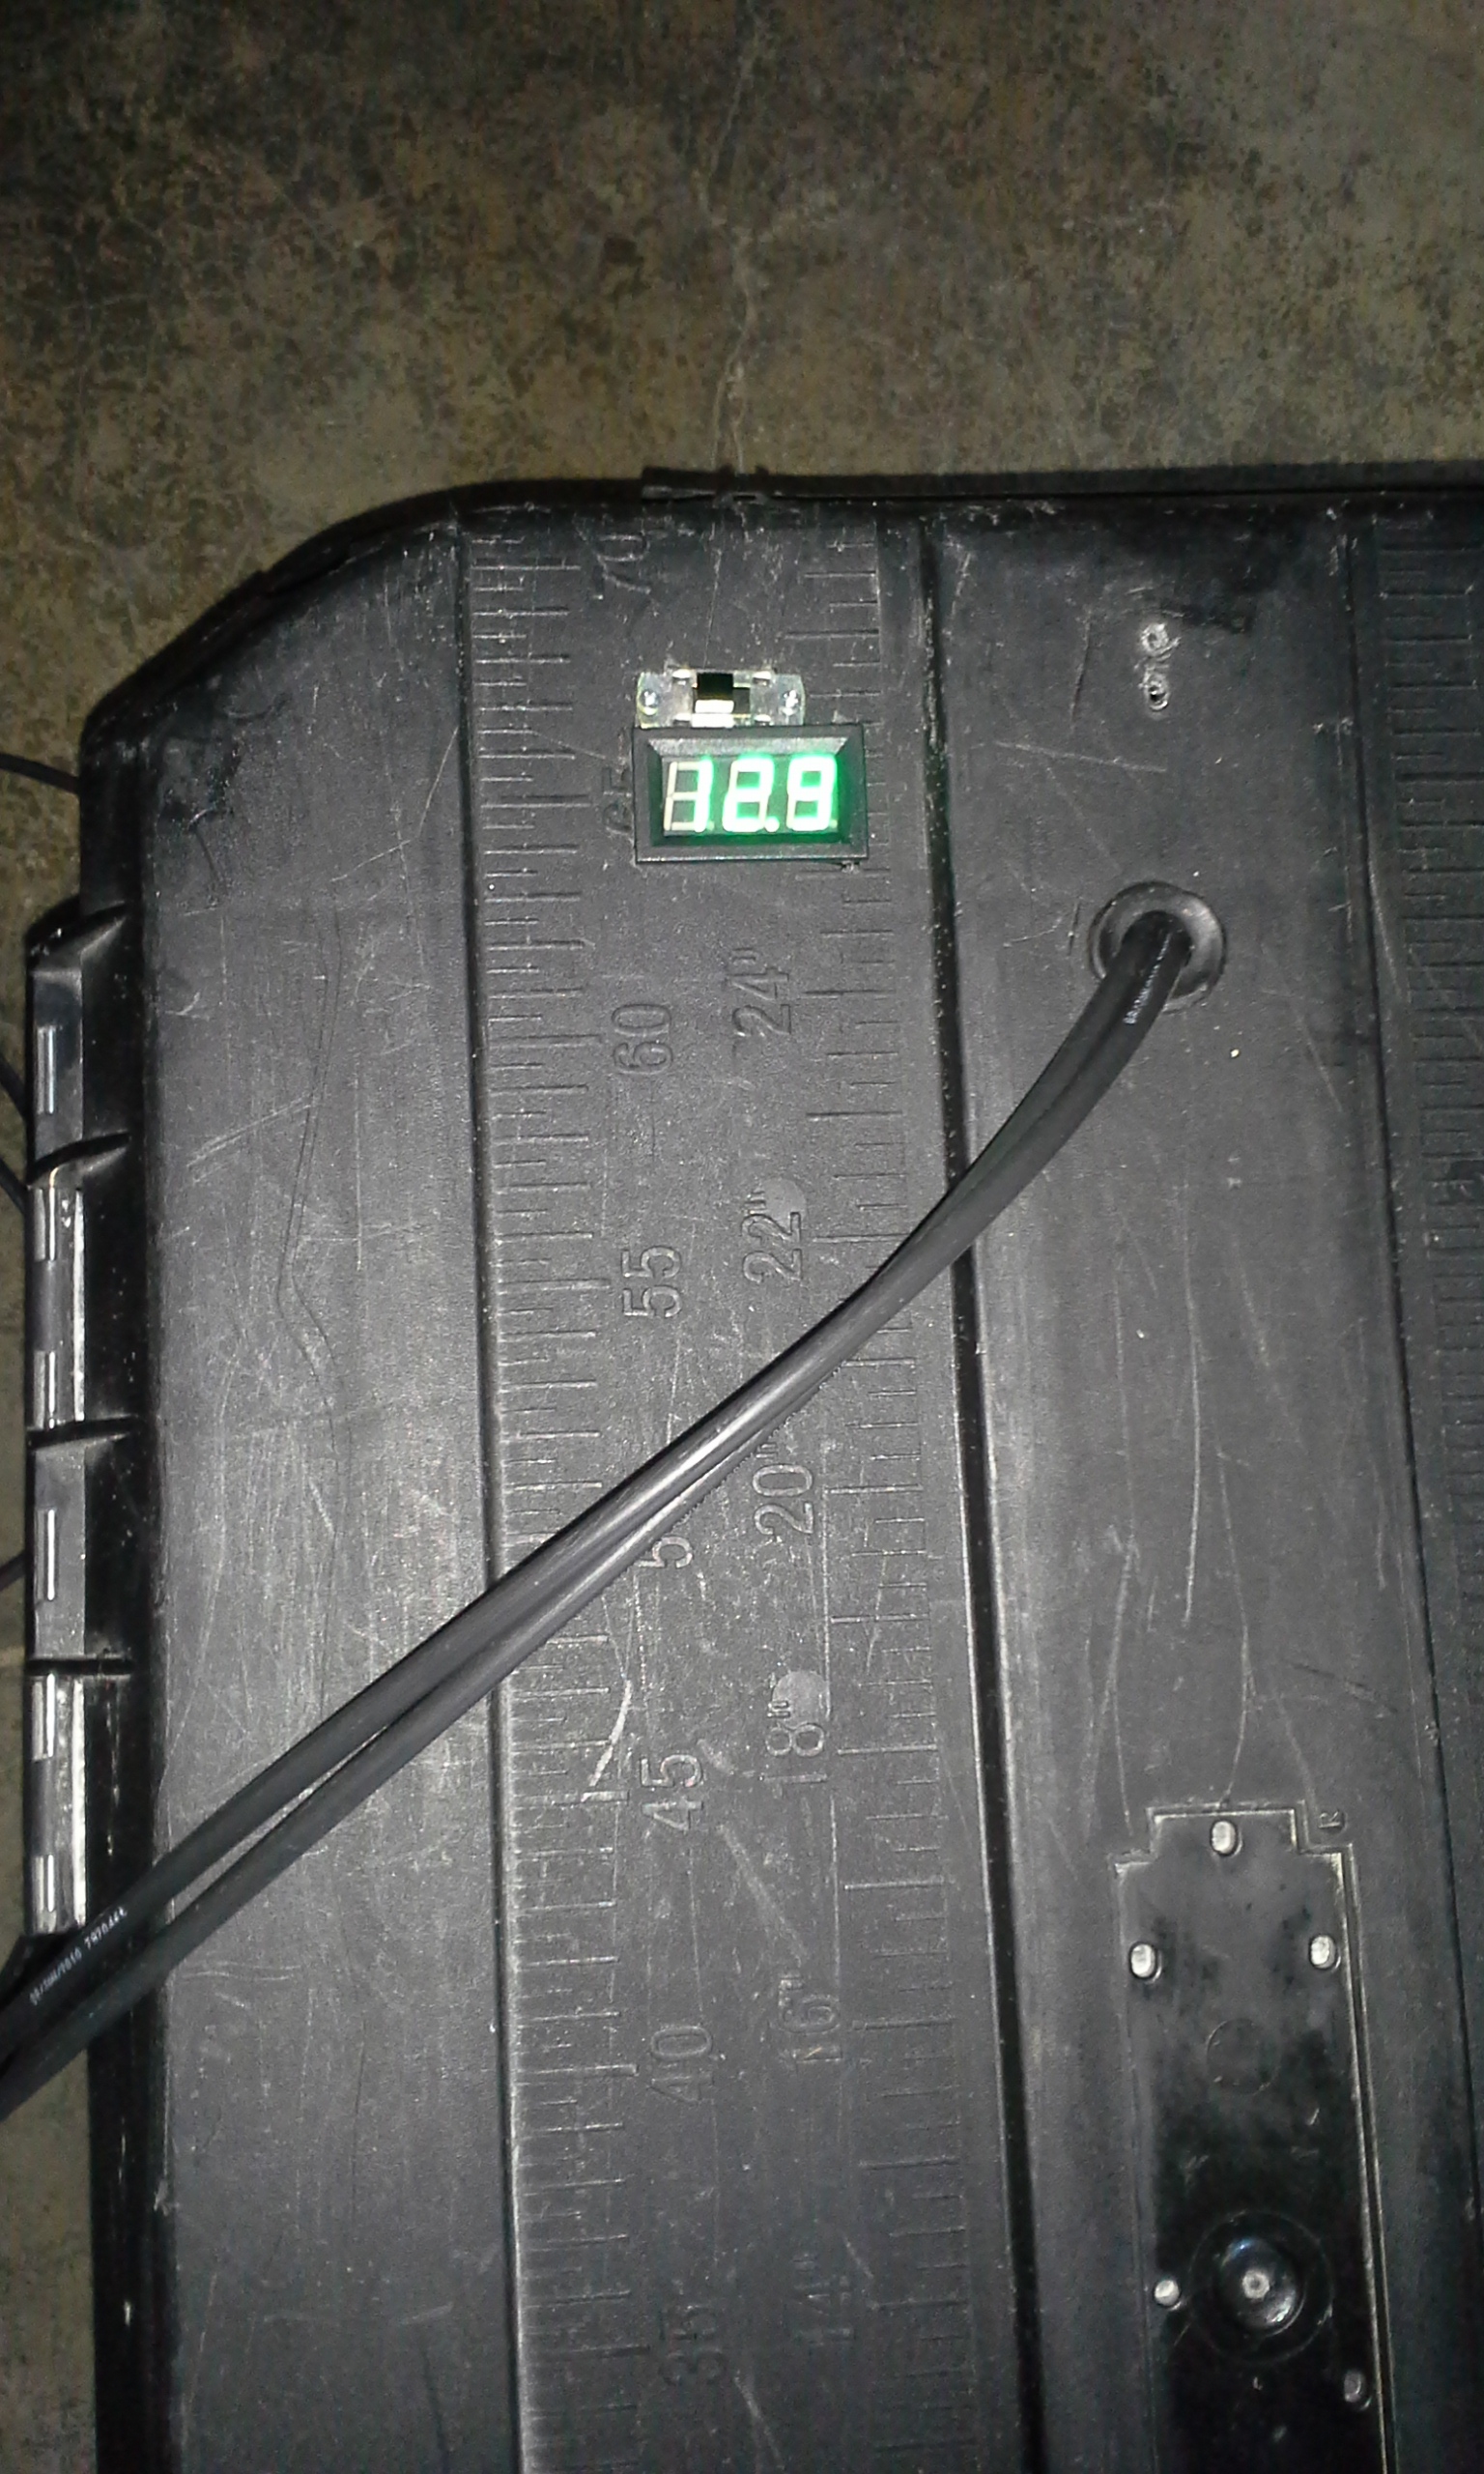
Top of the tote with the solar panel cables going through a grommit and voltage meter.
Another view from the side
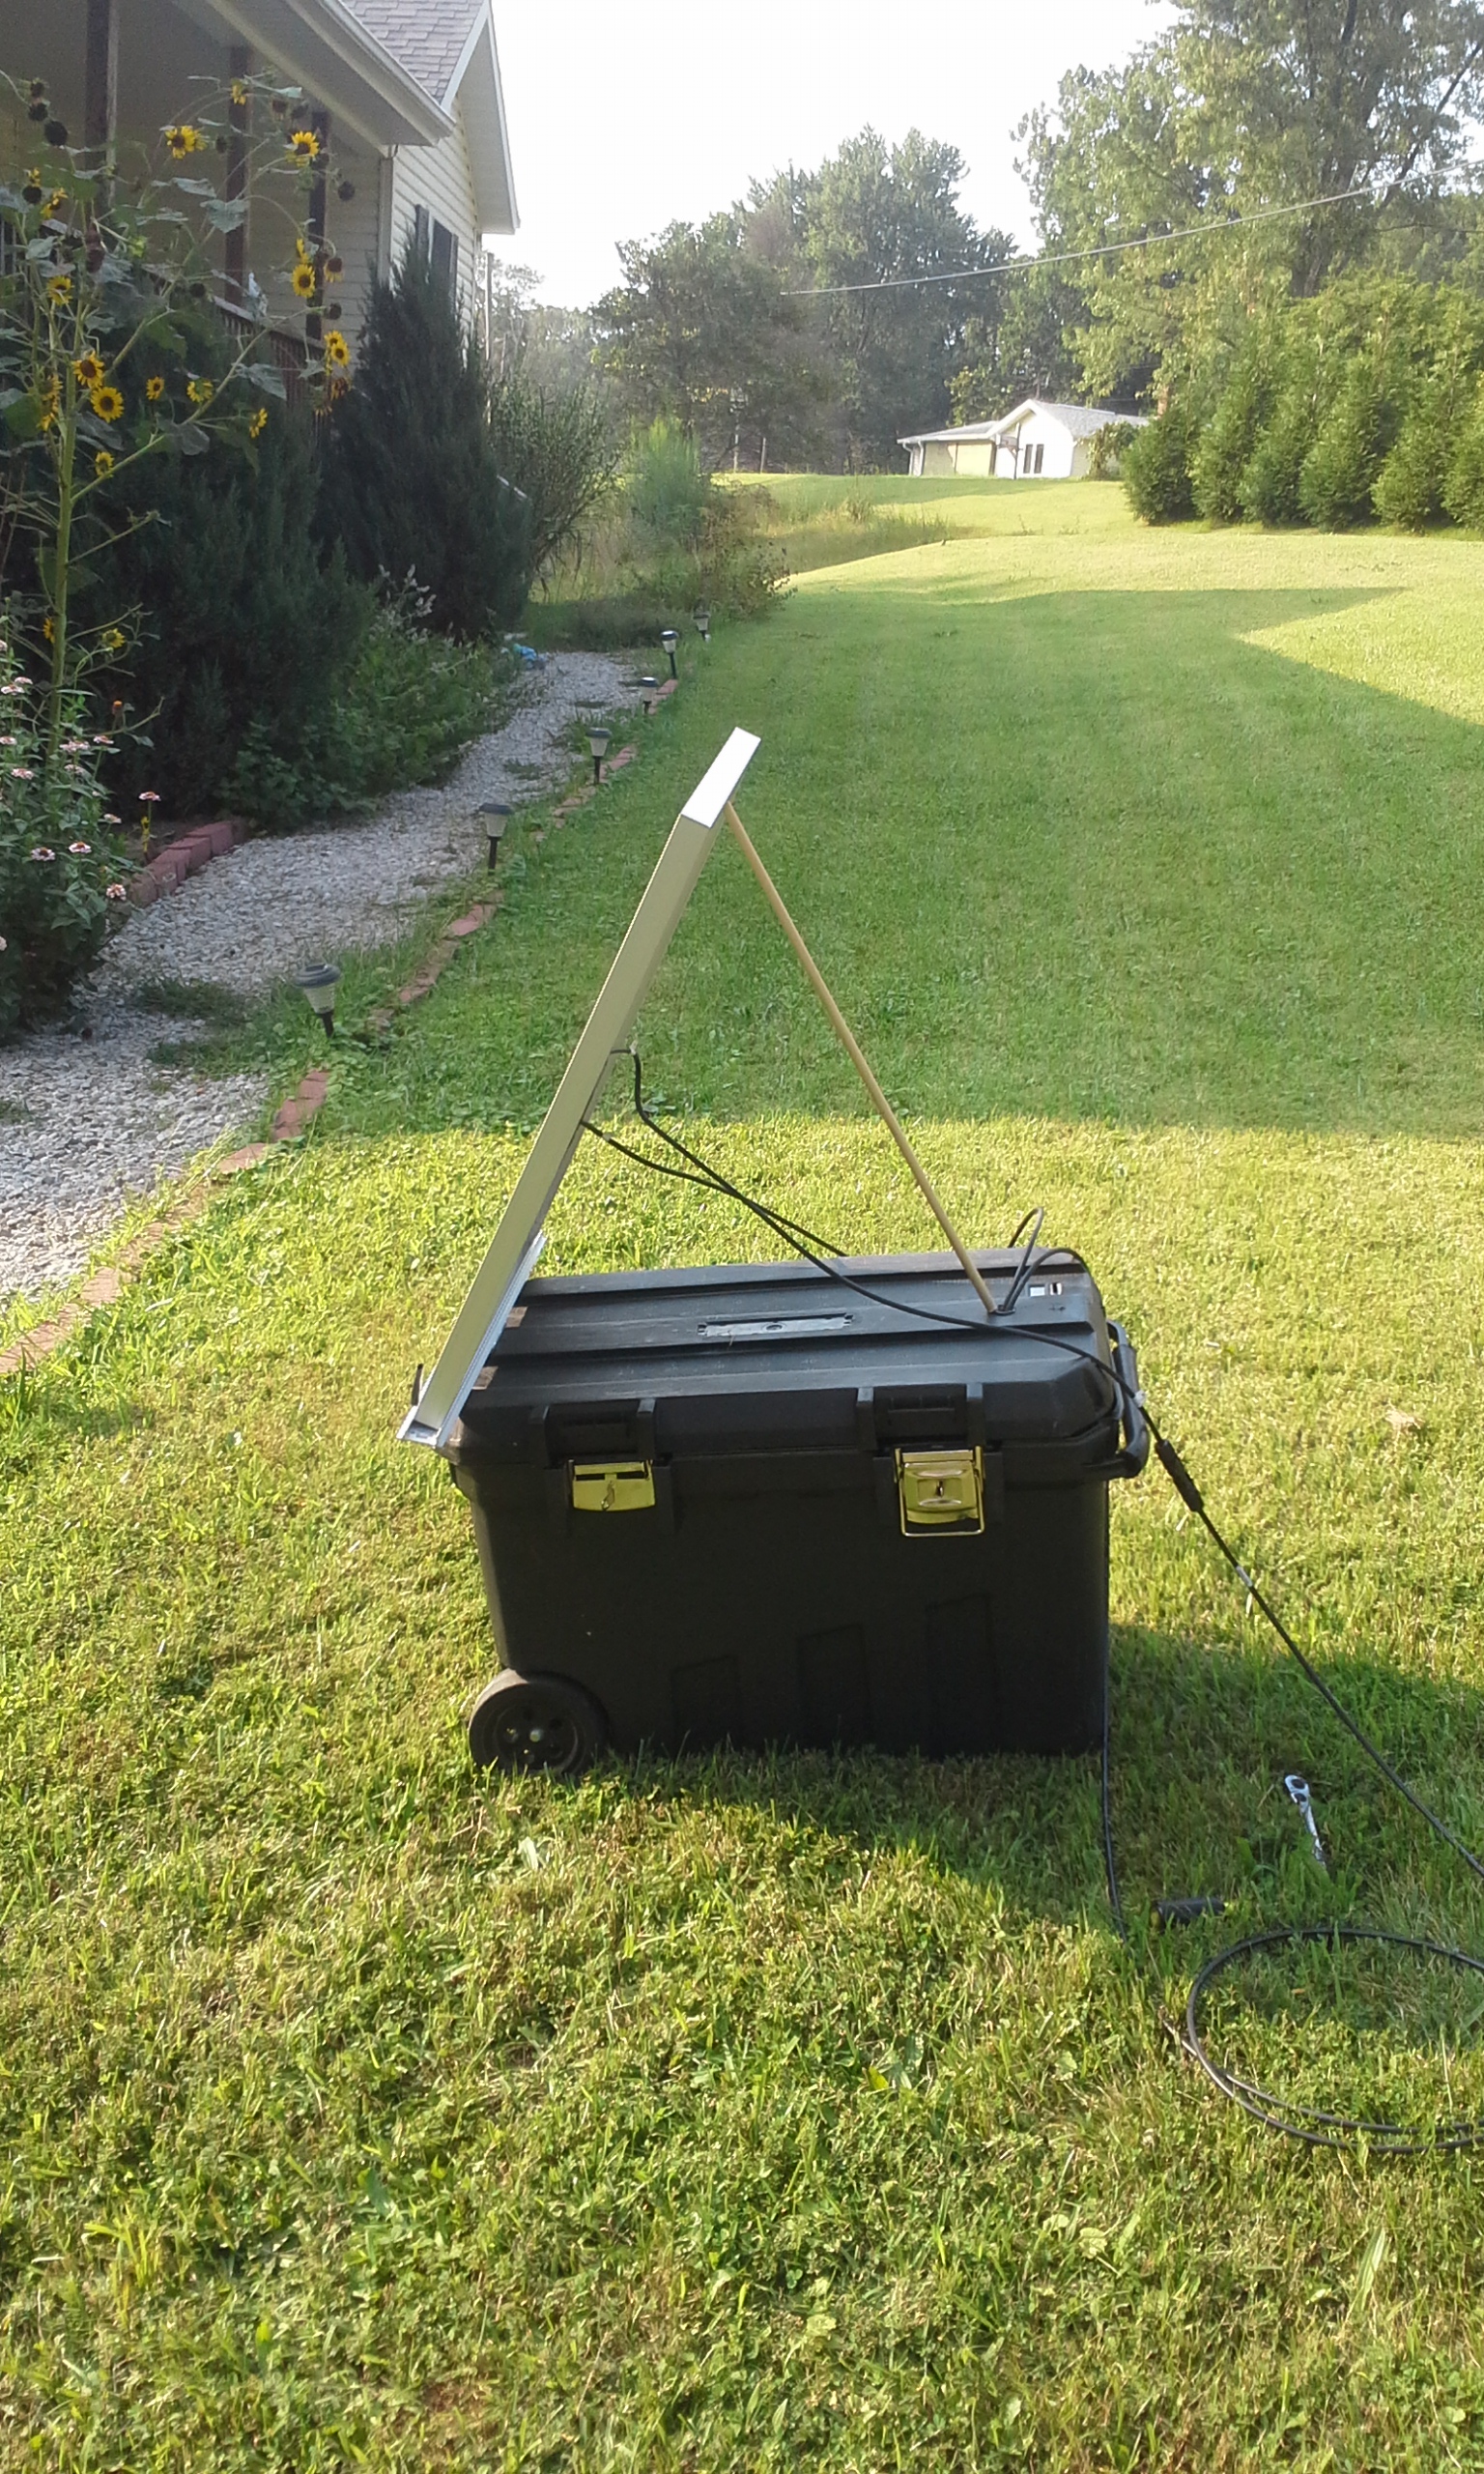
Note the high tech wooden dowel used to adjust the angle of the hinge.
After testing the set up to ensure that I was getting a proper charge and that the system was performing normally I needed to add one more piece to complete the project. To power the AP I needed a POE power source; there are a lot of small 8 port POE switches that are inexpesive and that's what I used.
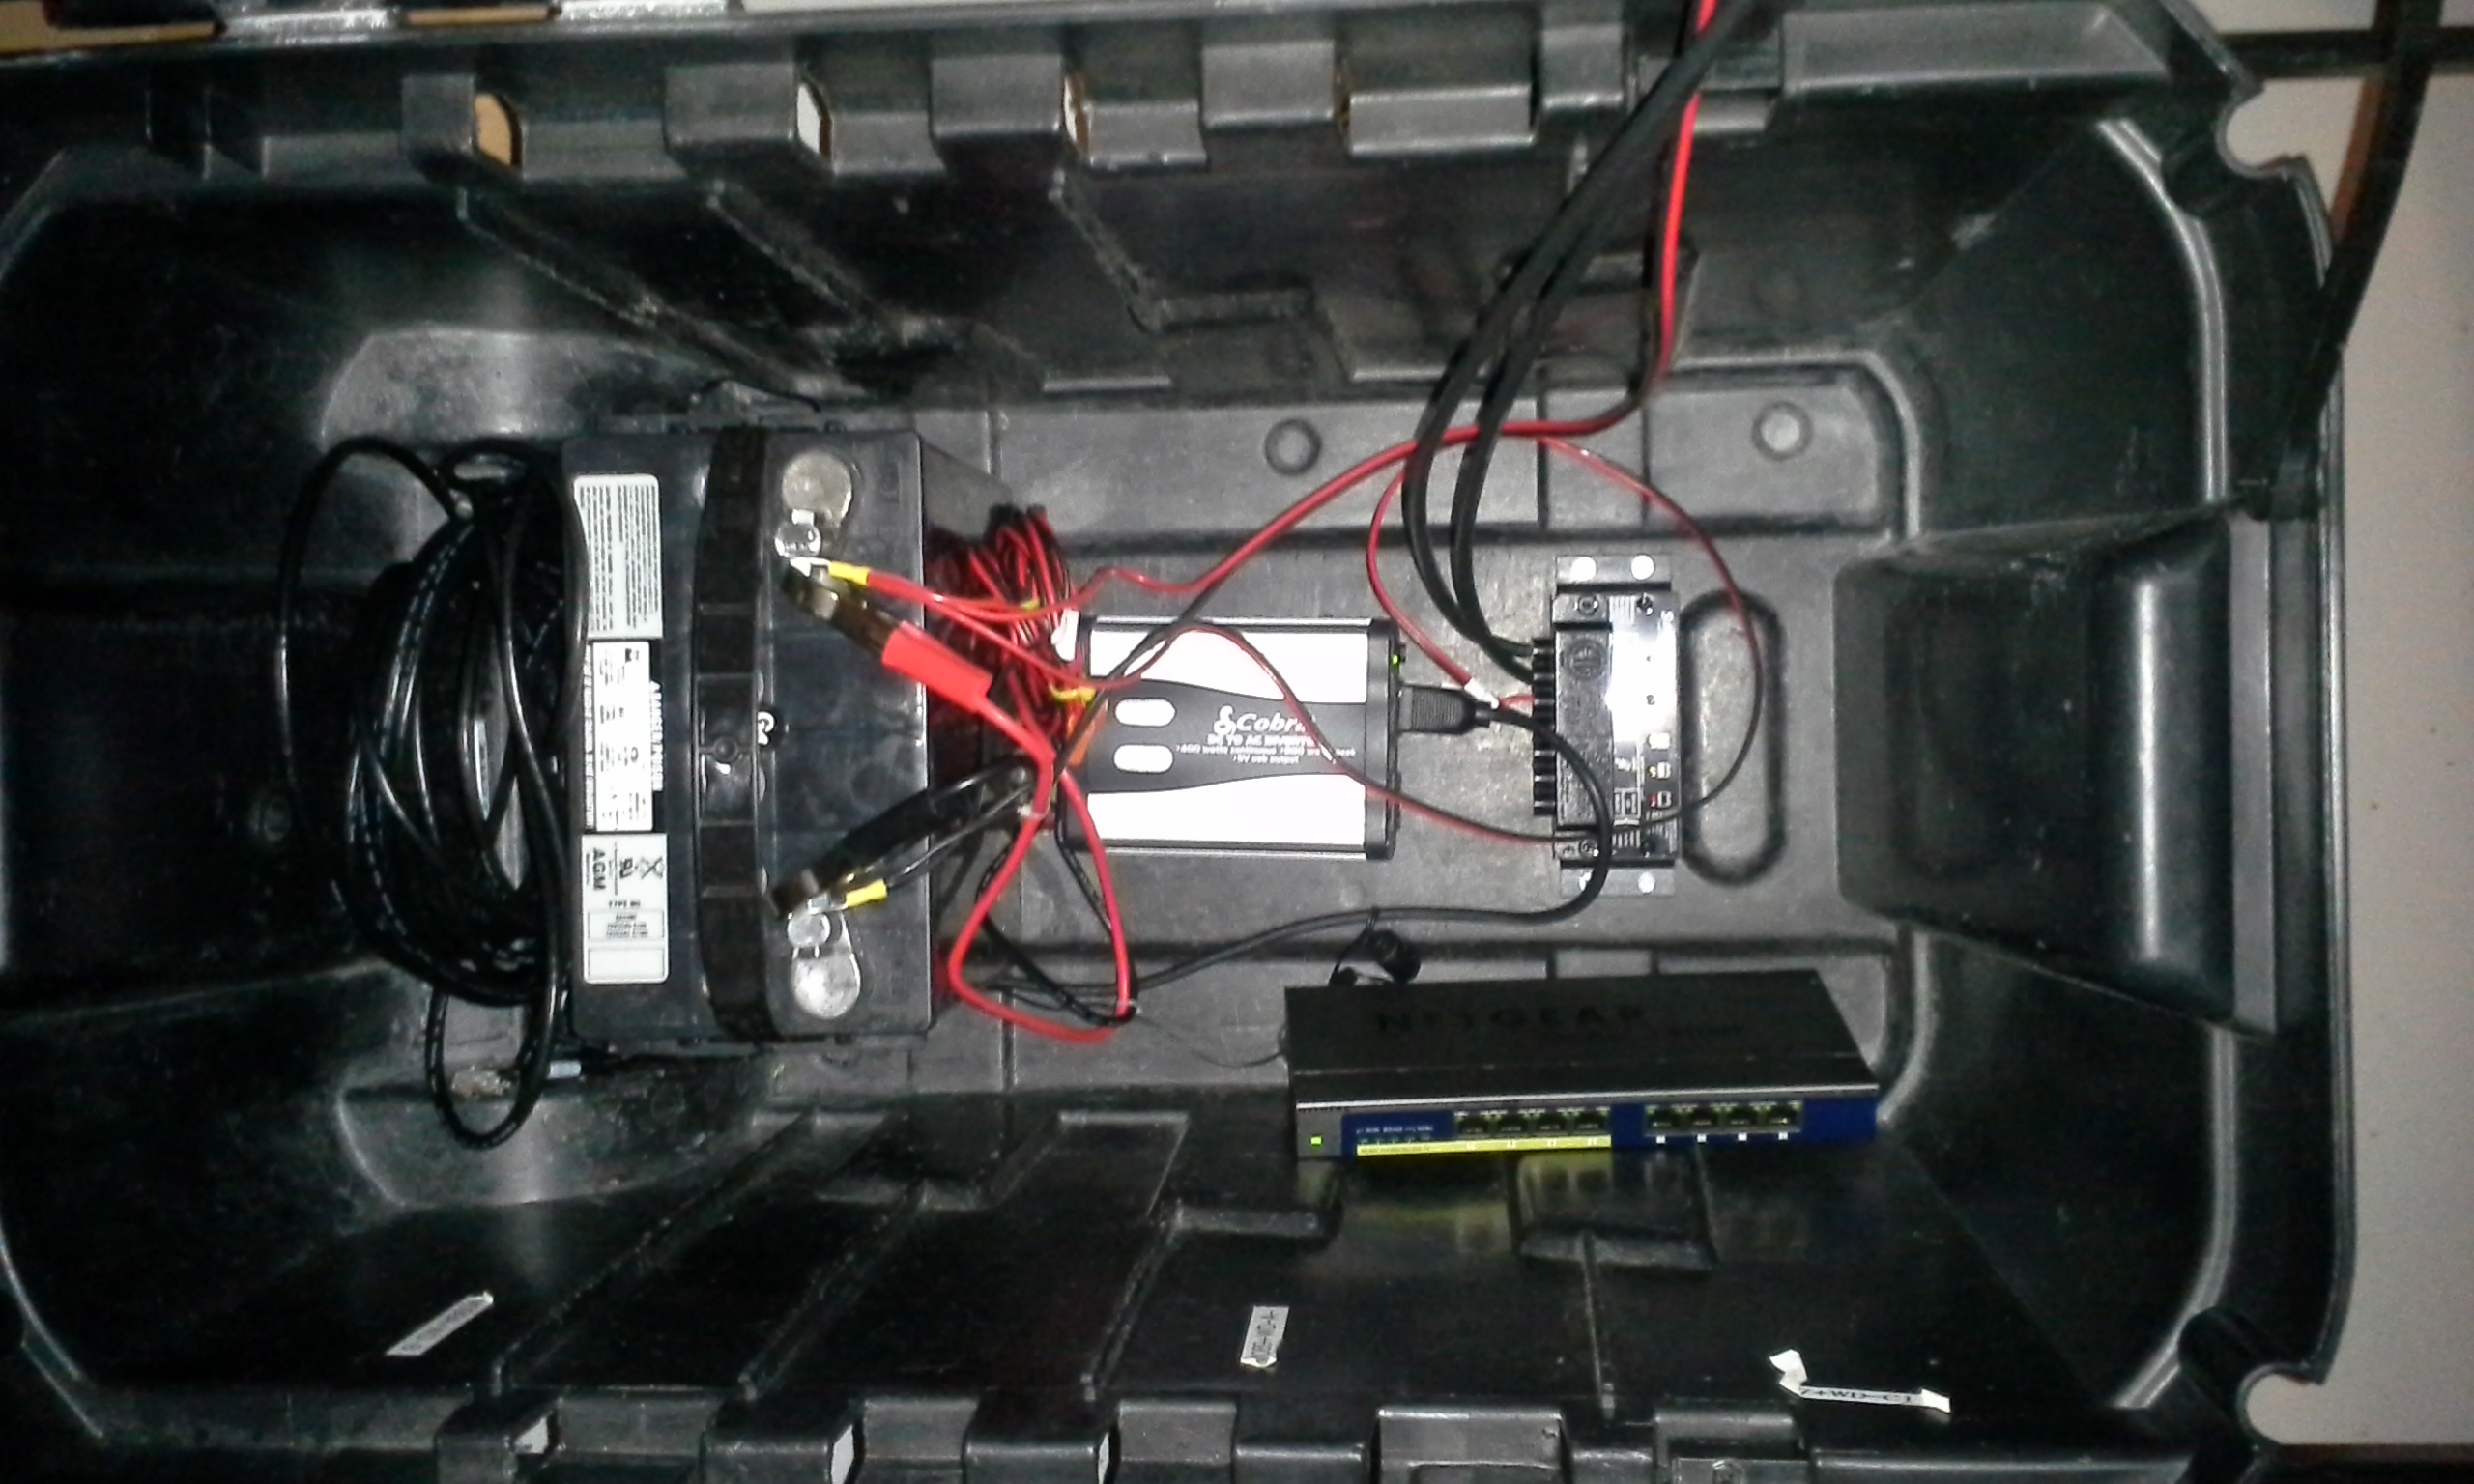
POE switch plugged directly into the inverter.
I'm not going to spend a lot of time explaining the rest of the steps as there are many different ways to set up SSID's and mesh groups and the focus here is the power. On to step 3.
Step 3. Building an outdoor SSID.
This event had thousands of students and with that many people I needed to limit who could connect to the AP to prevent over loading. The WLAN provided was primarily going to be used by the university staff for late registrations and wait-list updates. To ensure that only those groups could utitlize the WLAN I created the SSID and controlled who could join by adjusting the settings under the AAA profile of my SSID. I add or delete the AD groups in our RADIUS servers according to who might need the WLAN. There are many different ways of limiting users this is how I did it.
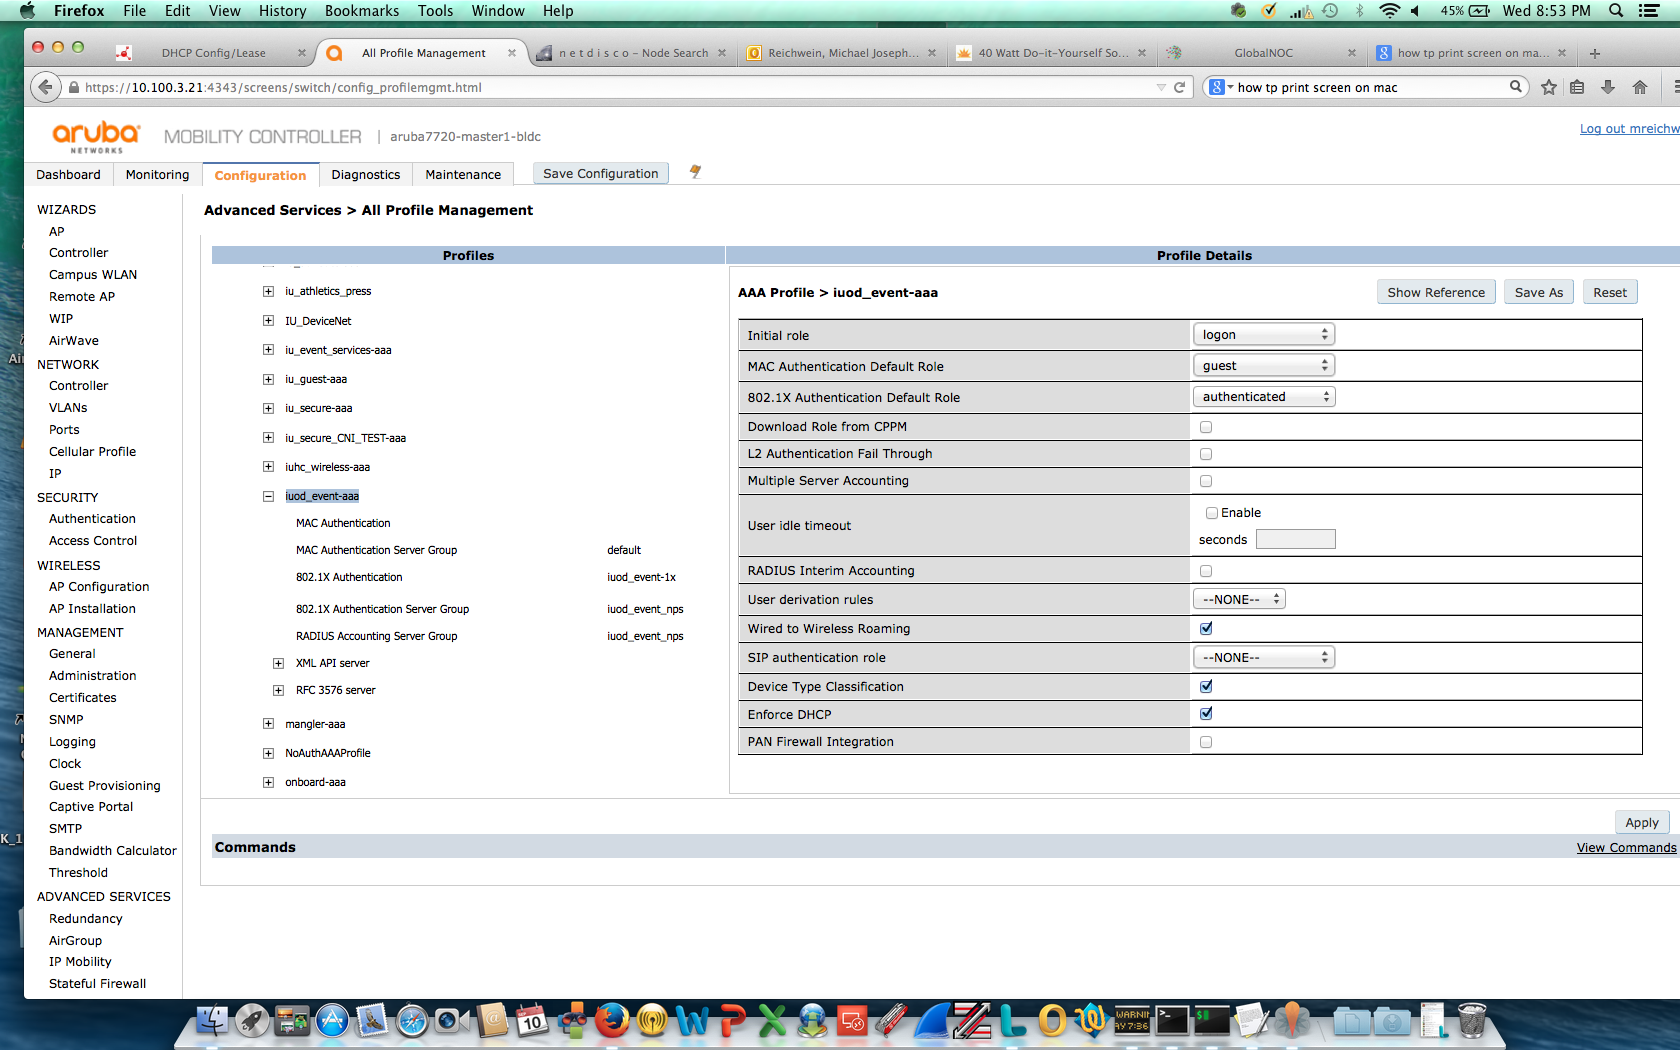
Step 4. Building a mesh group.
I will share a link that I found to be invaluable in setting up my mesh group.
http://www.arubanetworks.com/vrd/OPPDeployAppNote/wwhelp/wwhimpl/common/html/wwhelp.htm#href=Chap7.html&single=true
This document from Aruba is all that you will need to deploy a mesh group, from beginning to end. Just a quick note, since I was using an AP175 I needed to use the 2.4 radios as the back haul for the mesh.
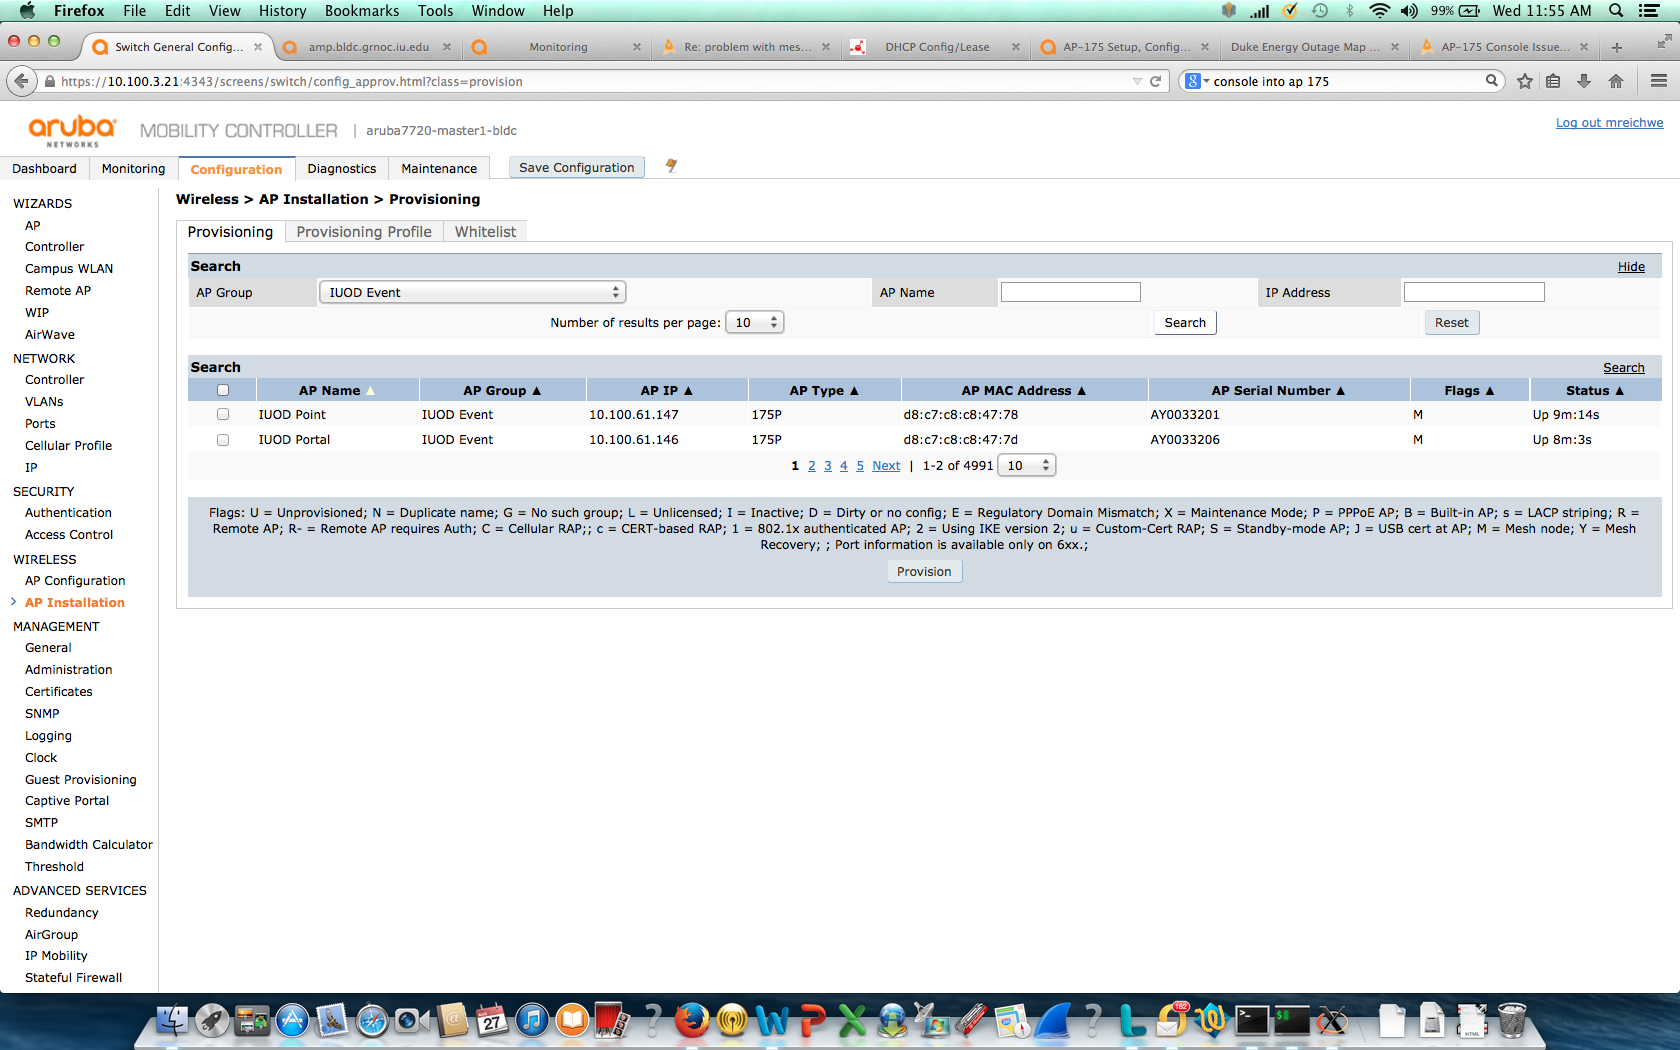
Step 5. Testing.
I consider this step to be one of the most important. I was lucky to have enough time to test my design before I had to use it in real time. I know I don't need to go into great detail about this as I'm sure that everyone reading this knows how important testing is to your design.
Step 6. Implementation of design.
After testing and tweaking here and there the day day of the event arrived. I first set the mesh portal up near the northwest corner of the IMU building.
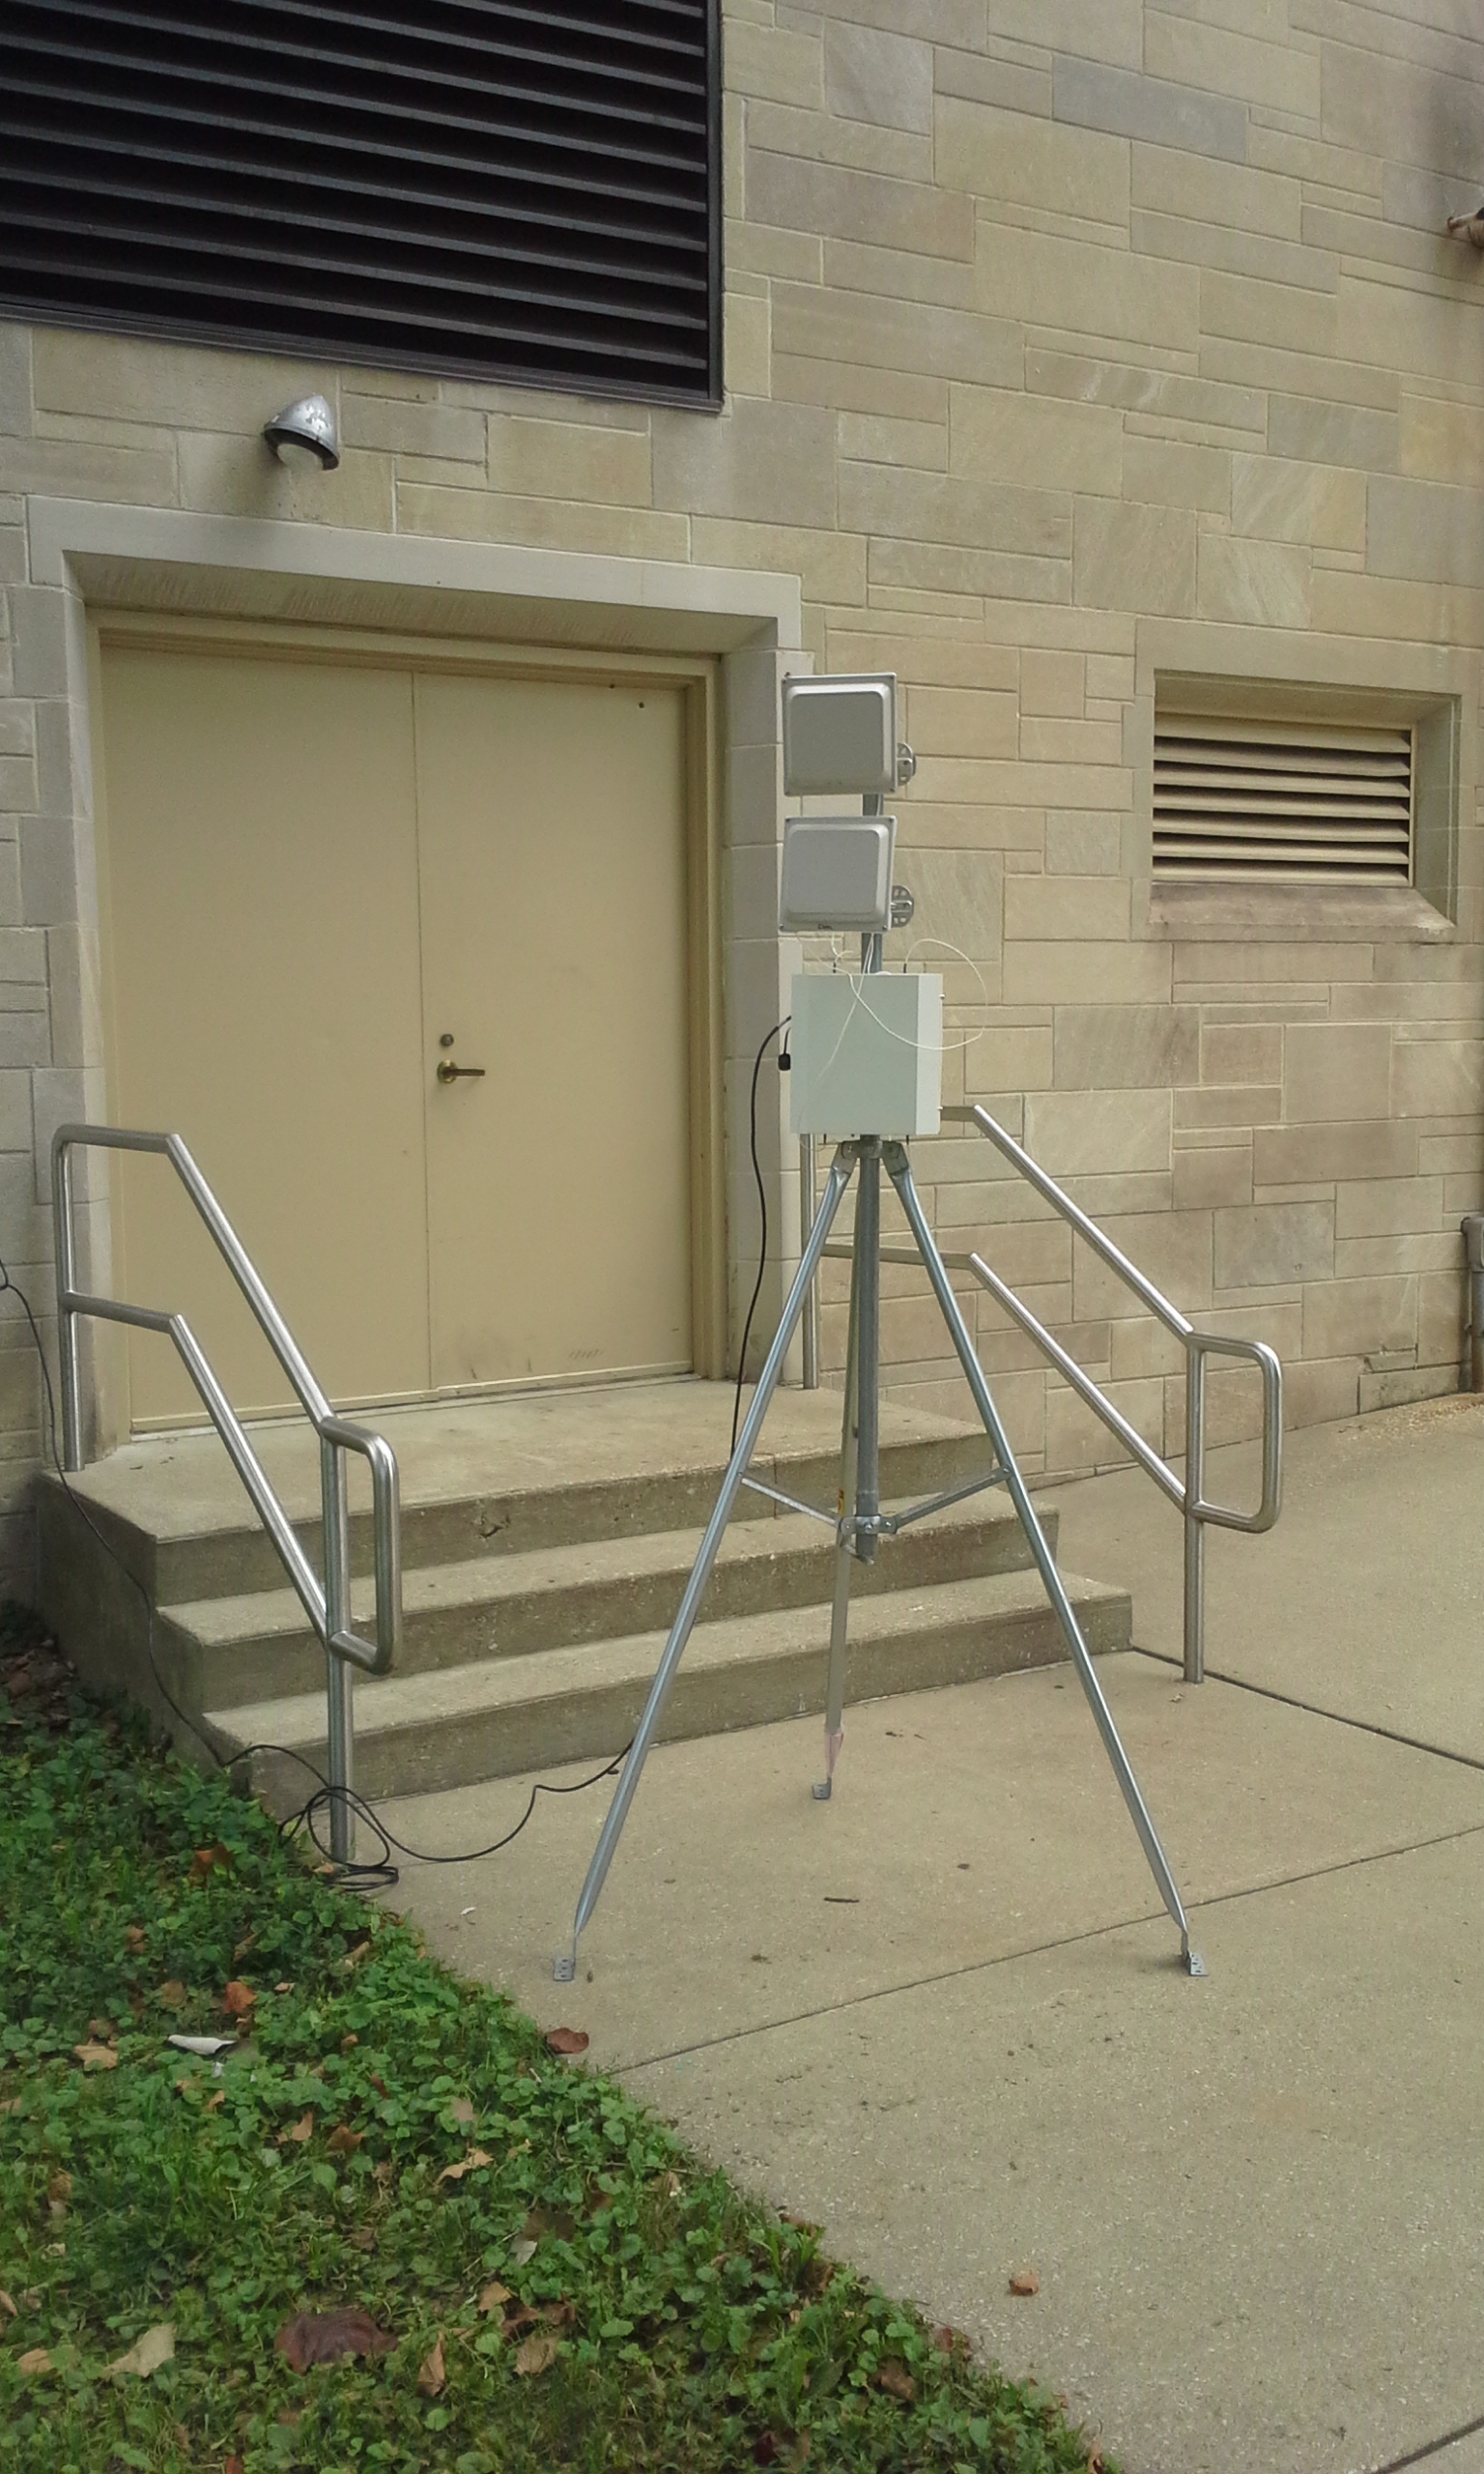
Mesh portal
I then placed the mesh point approximately 235 feet from the mesh portal with a clear line of sight. This provided WLAN coverage to the entirety of Dunn Meadow and if you care to look back at the picture of Dunn Meadow look to the left of the picture there is a building several hundred feet away from the mesh point and I was still able to see that I was providing -69 to -72 dBs of signal.
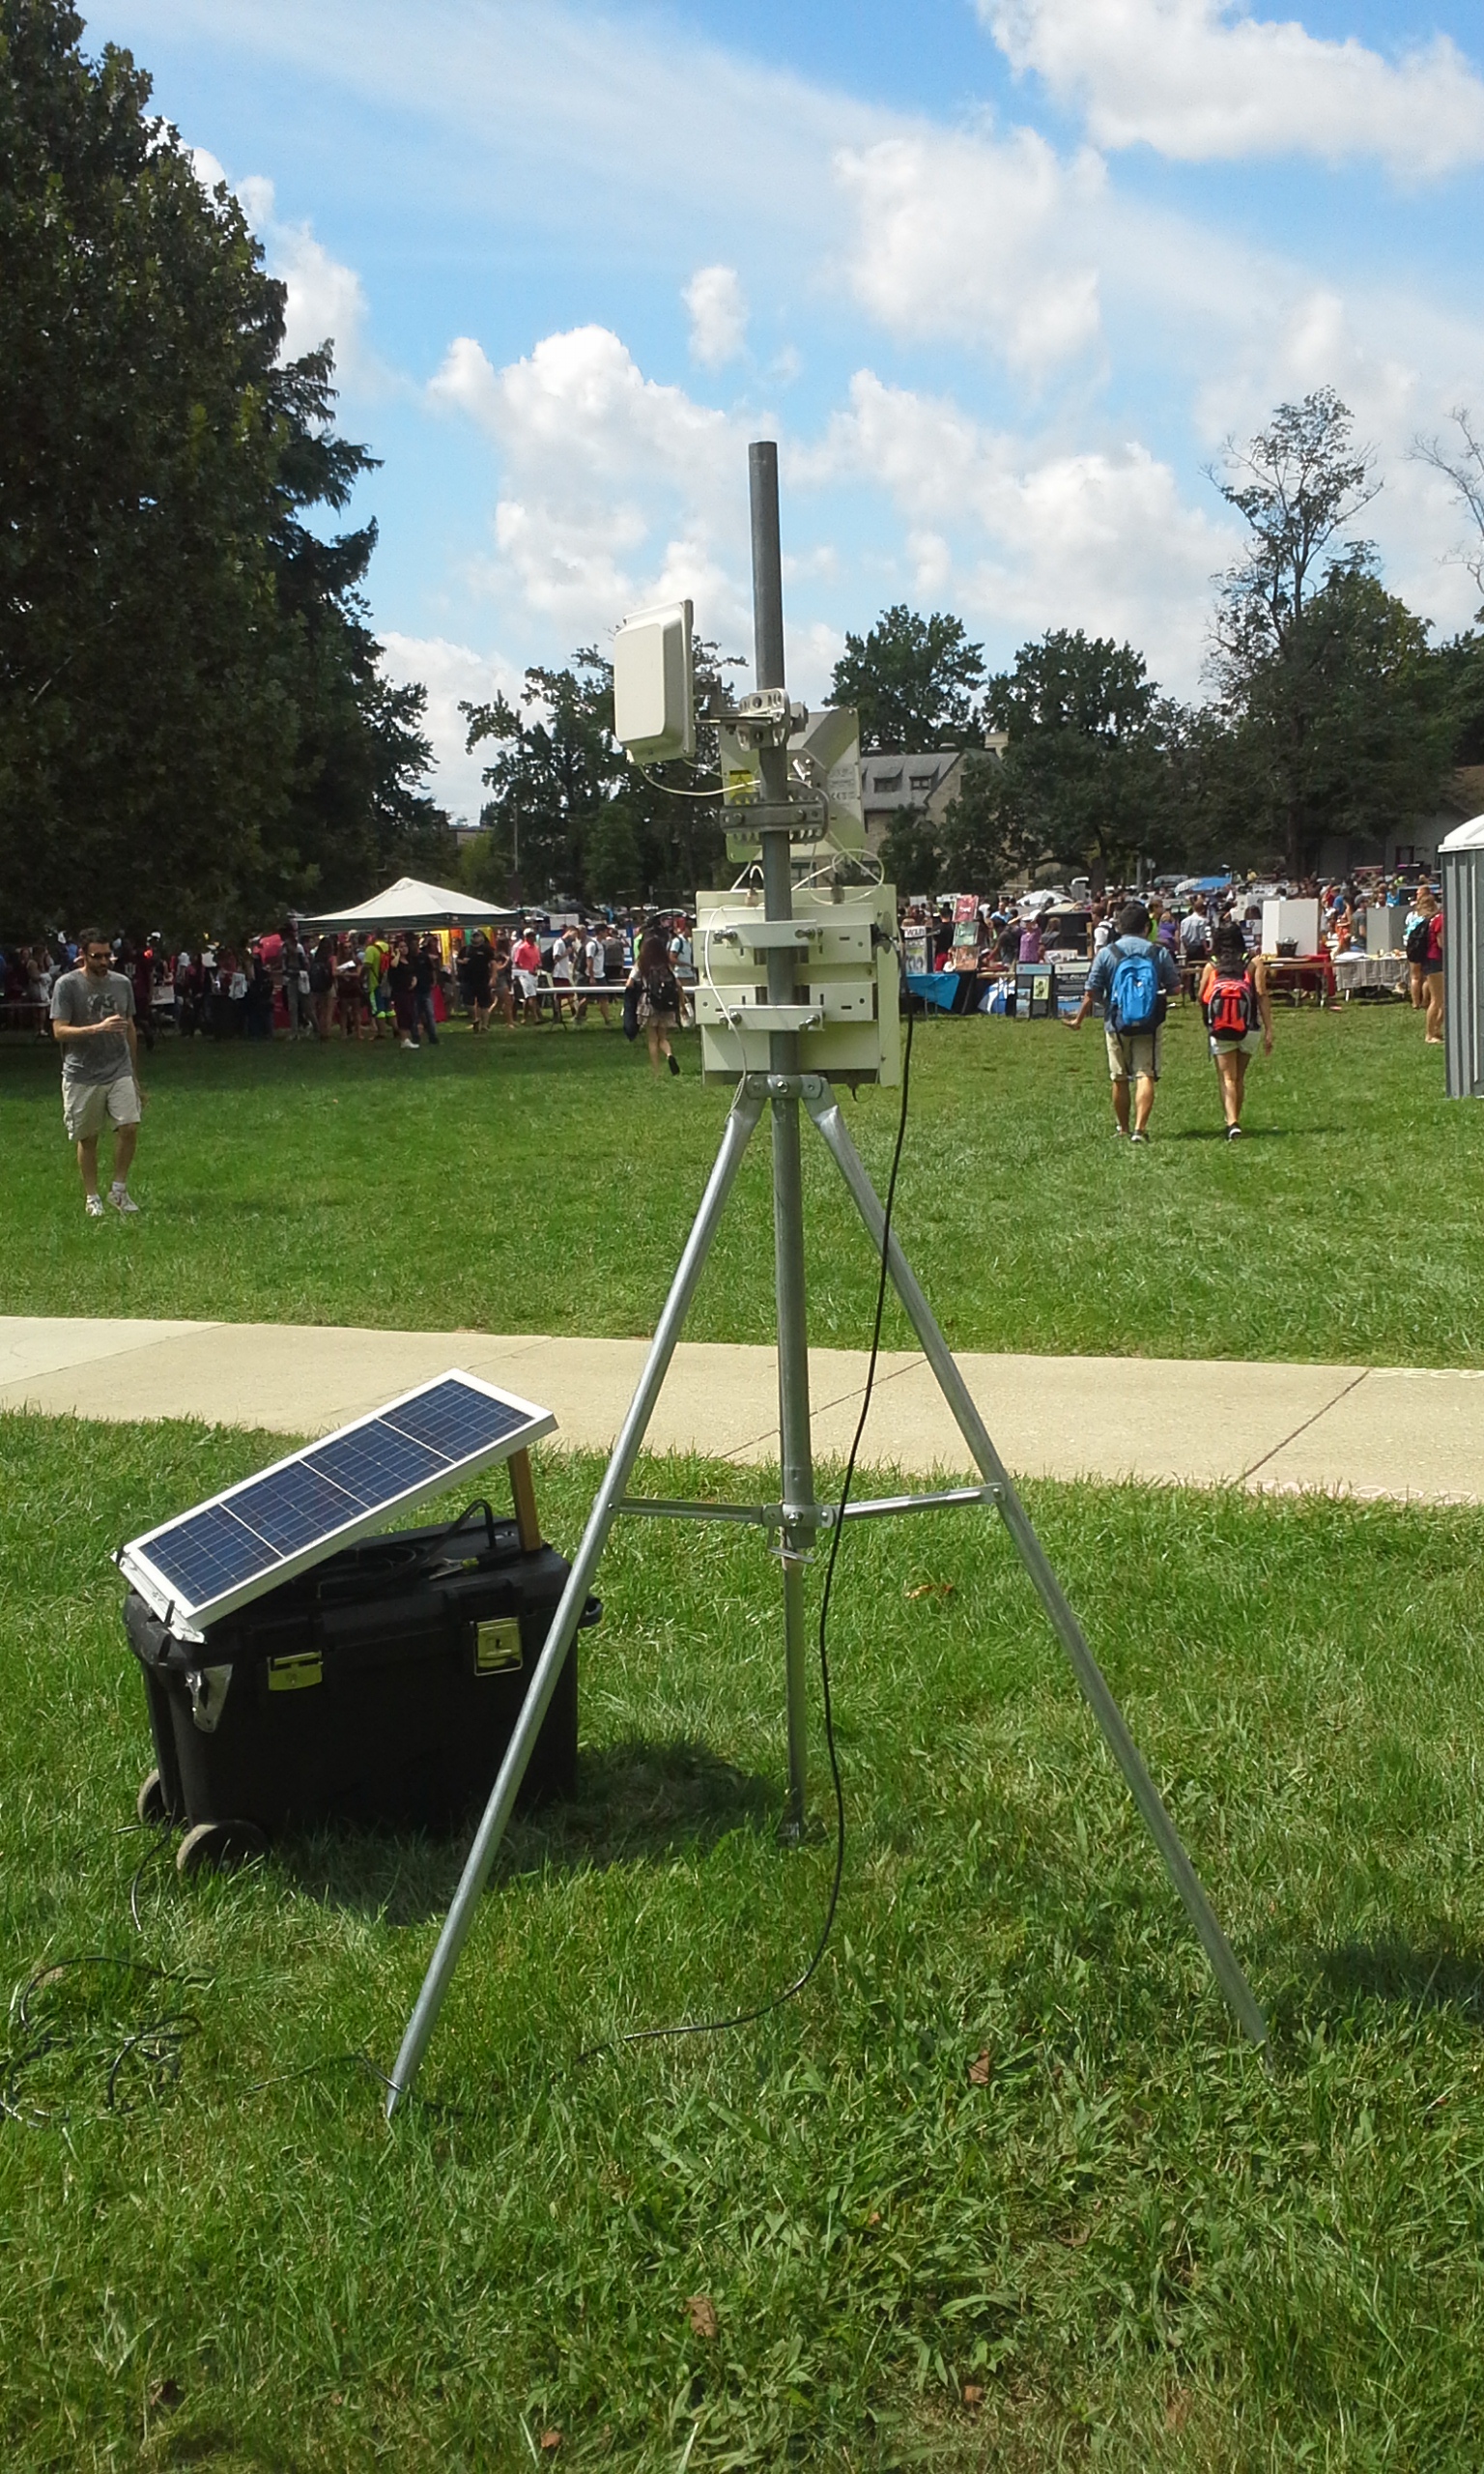
The finished design on the day of the event. Ta-da.
Summary:
The design was a success and performed well throughout the event. I understand that this design and setup might not be the optimal solution to providing power for mesh points and other WLAN designs. However, I just wanted to prove there are ways to marry alternative power sources with the cutting edge technologies to provide a WLAN when usual resources are not available.
Thank you for checking out my design, hopefully it might help you similar issues down the road.
Michael Reichwein
Indiana Unversity Network Operations
mreichwe@iu.edu