Tutorial by: NightShade1
Hello!
In this tutorial i ll show you how to configure 802.1x with server derived role(which is the interesting part of 802.1x with Aruba)
What do you need to achive this?
1-Windows Server 2012( a 2008 and 2003 works as well)
2-NPS Role on windows server 2012
3-Cetificate installed on Windows server 2012(the tutorial asume you have it already installed)
4-Instant AP cluster
Before beggining lets do some explanaitiong about this:
Server derived user role is a feature that is on Aruba product only!
It permits you to give different roles to different types of users, with roles i mean rules
For example you got 2 groups in Active Directory
Accounting
Engineering
You would like with the SAME SSID give it different access to the users on accouting than the users on engineering
Let say that you would like with the same SSID give access to everything in the company to the engineering group but to the accounting group you just want to give it access to 2 servers in the company!
You can do it with server derived user role!
In other brands like Cisco you need to set them in different vlans, and you need to start creating one vlan for each differnt access you want, which makes you work more and having inecesary vlans, plus you need to restrict this access on another devices....
With Aruba you can do all this on the same box!
Okay lets Beging
Windows Server 2012 Configuration
After you already installed the NPS ROLE you need to open the NPS role, and as soon as you open it you will see this wizard which is great because it makes it a way easier!
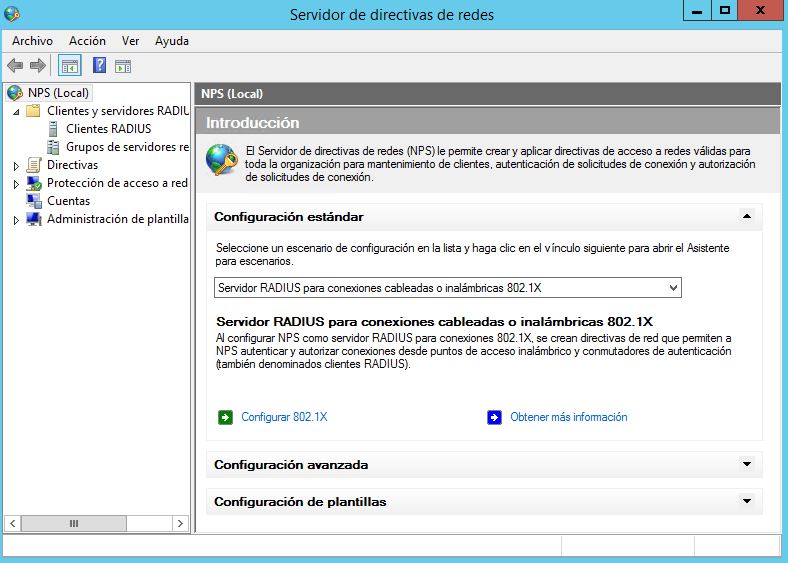
Click on Configure 802.1x
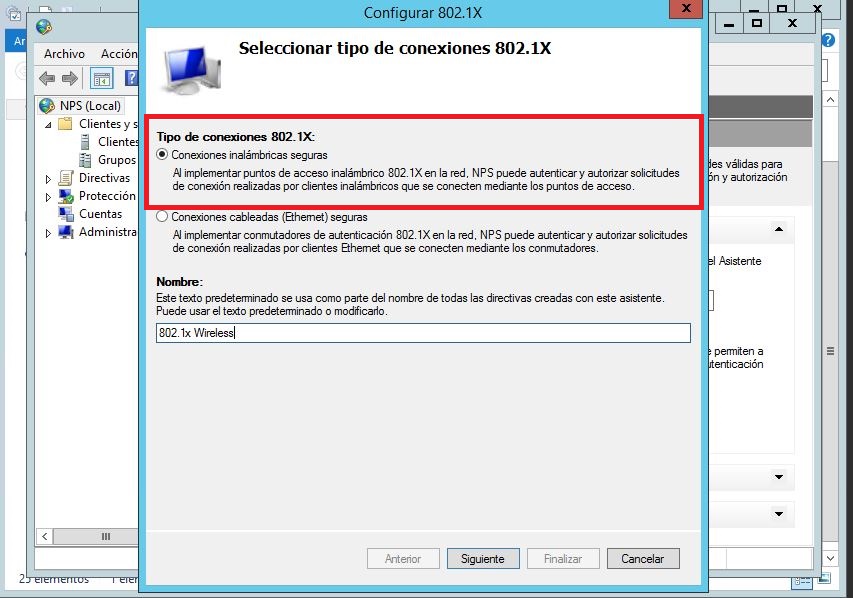
Click on configure secure wireless Network like in the image! and click next
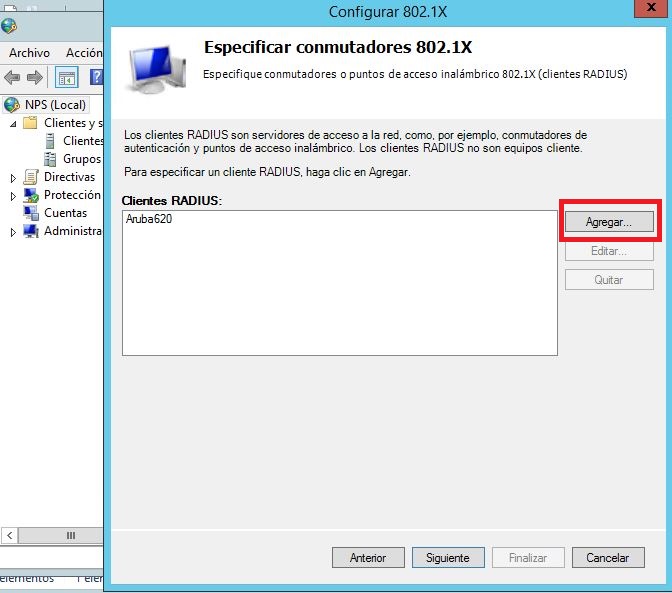
On radius clients click add
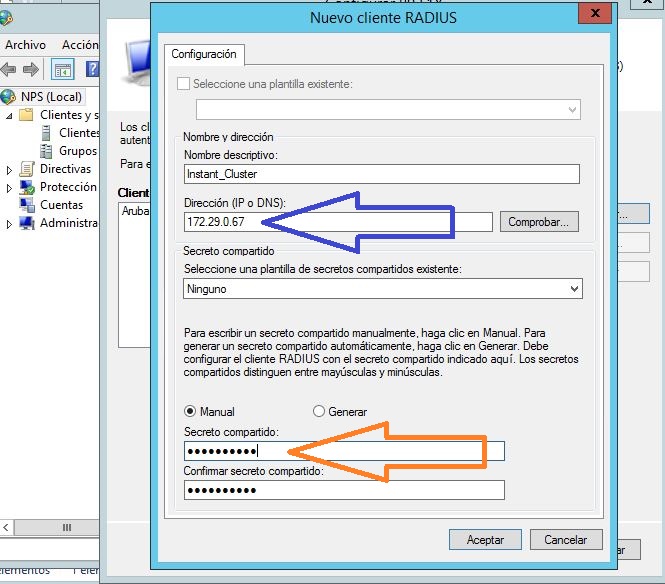
Next to the blue arrow you need to put the cluster IP Address
Next to the orange arrow you need to put a preshared key between the Cluster of instant and the radius server, and click accept
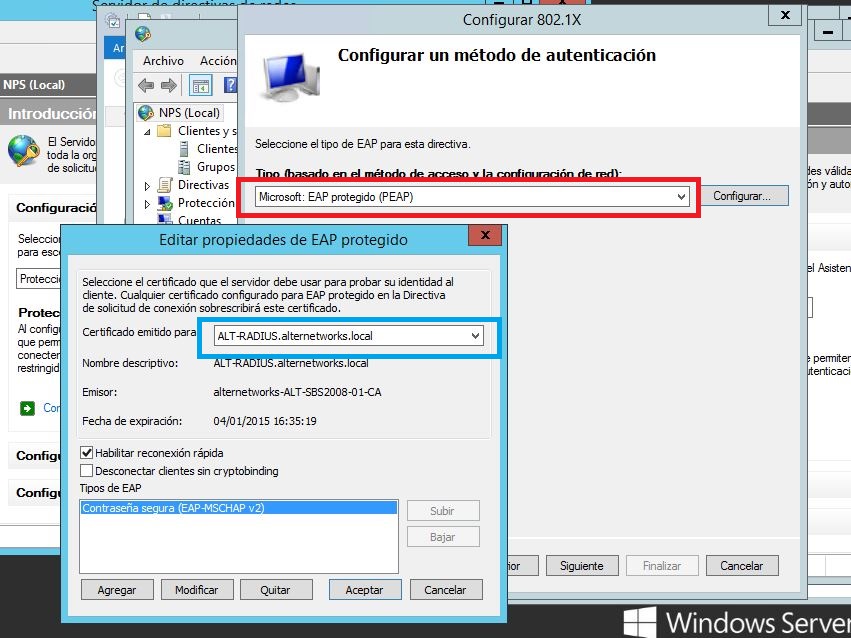
Select Microsoft EAP PEAP and click configure
Then on the dropdown as you see on the blue box, you need to select the certificate that you installed on your server, and then click accept and then click next
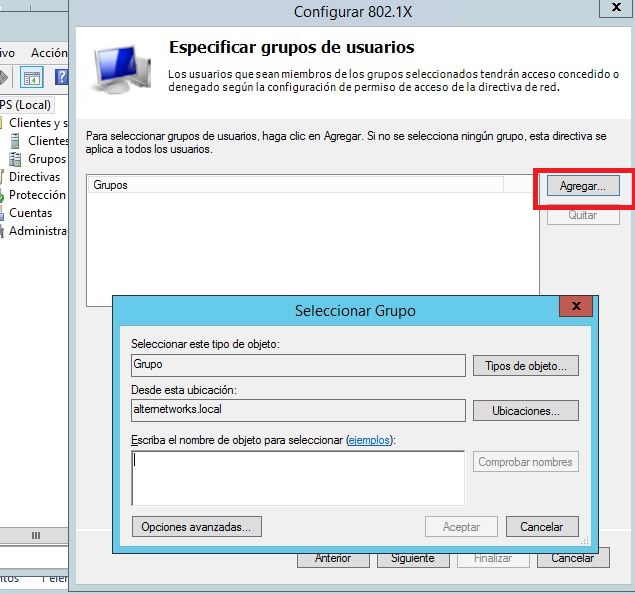
Click add, and then in the space in there you type the Active directory group which will have access to the network with the first role.
Remenber that we can have through the same SSID different roles with different access to the network. Those roles are linked to a user group which is this one we are selecting in here.
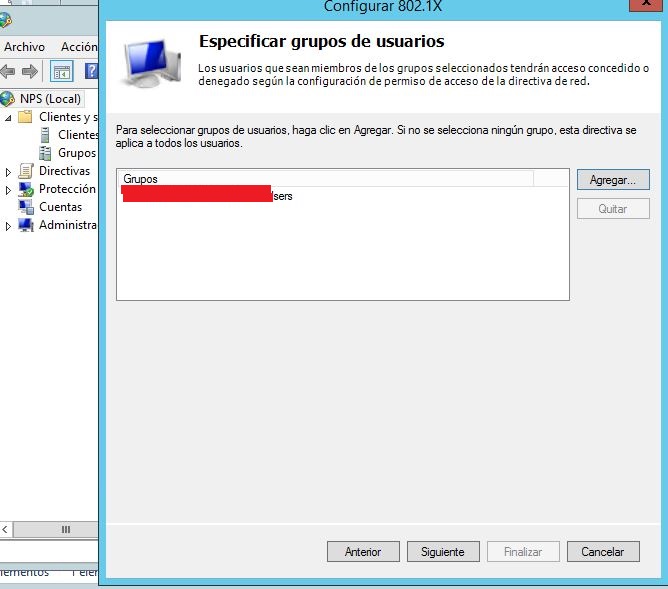
Click next
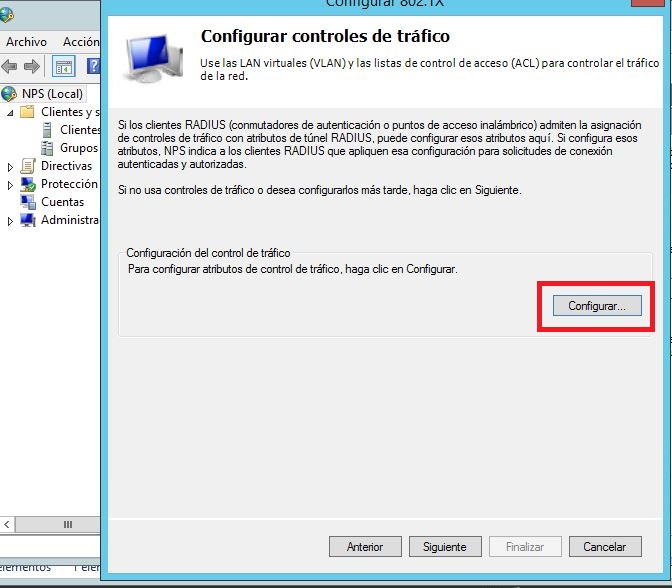
Click configure
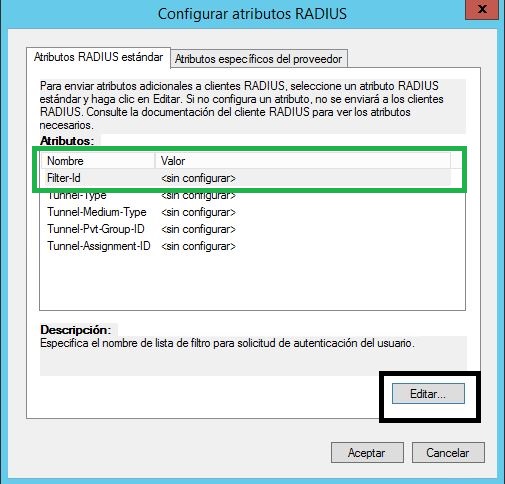
Click on filter ID and click edith
Remenber that with this filter ID is the the word that we send to the cluster of instant aps so they know the name of the role they are assigning... for example if i put Home in here then there should be a role name Home in the instants ap, if i put in here a word engineering then there should be a role named engineering in the instant aps
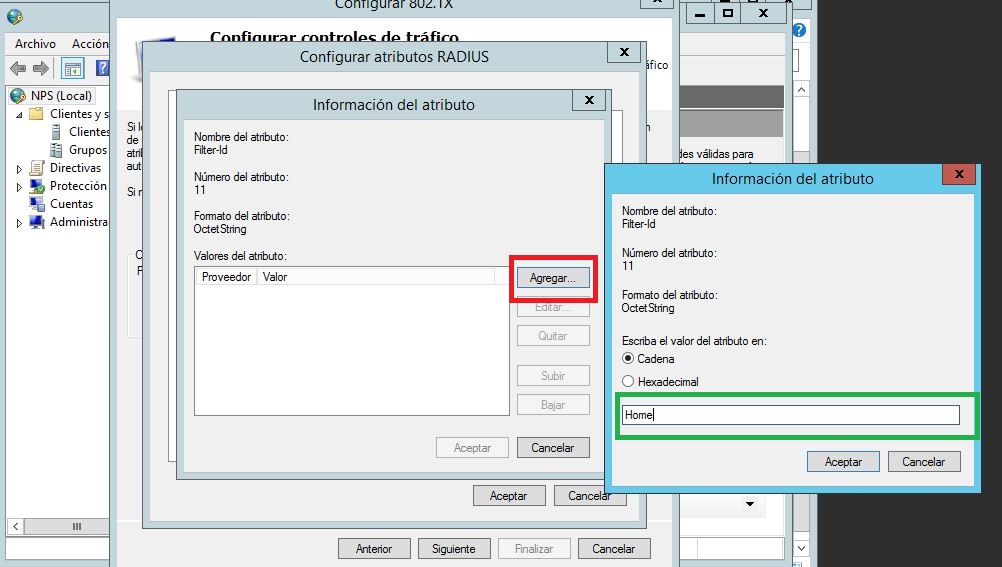
Click add and put the string which is the word that will be send to the IAP cluster as you see on the green box
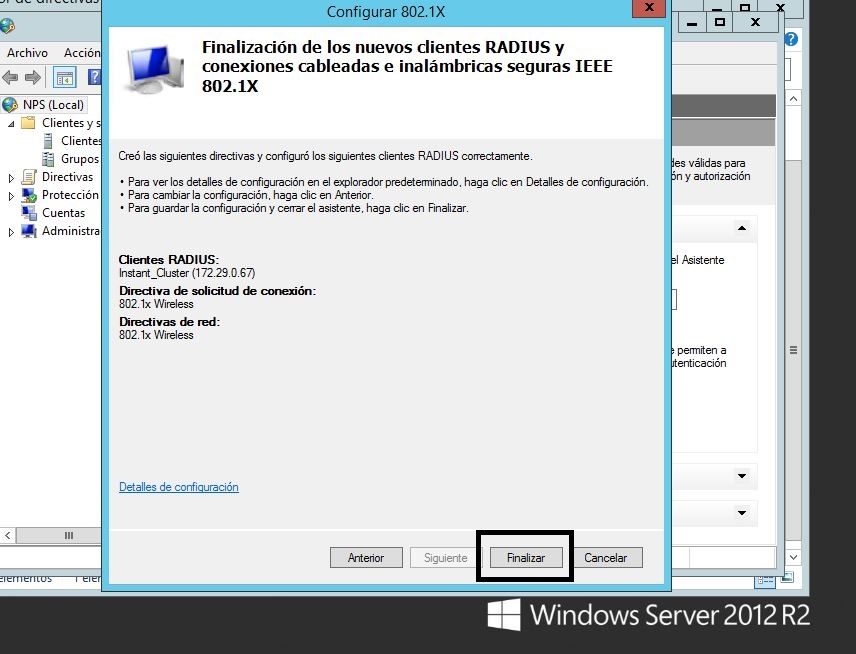
Click accept and then finish
If you got more roles with differnet access let say you got 2 more groups you would liek to do, then go and repeat the wizard! the only thing that will change will be the group of Active directory you choosing, and the word you using to send that value to the instant cluster!
Now you are done with the Windows 2012
Now lets beging to configure the Instant AP cluster
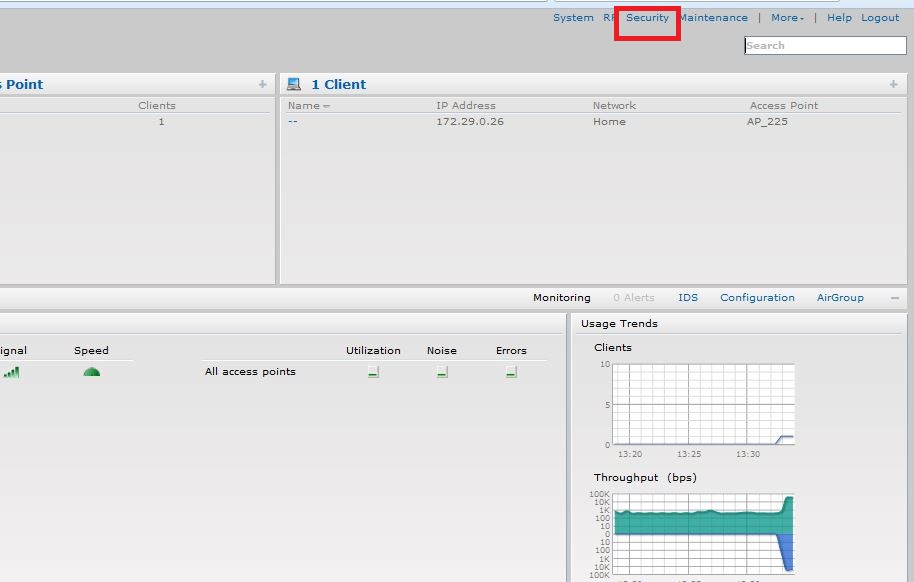
When you enter the Web Gui click on security
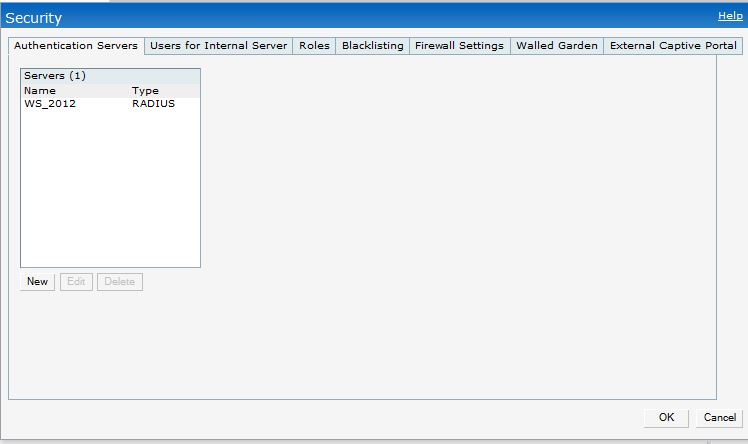
Click New
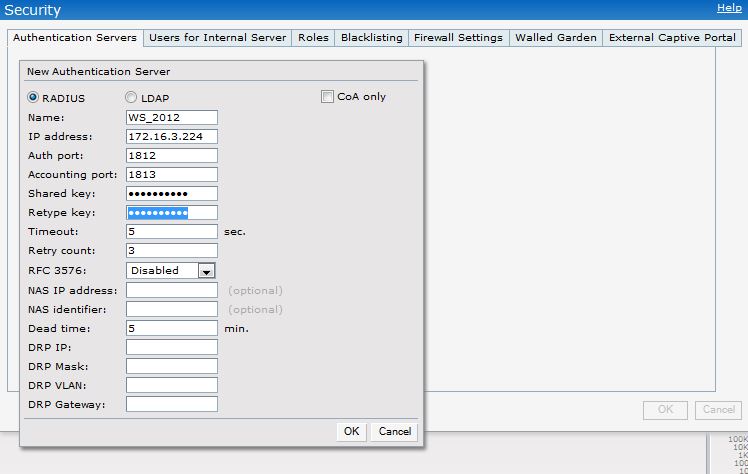
In the Ip address put the ip of the NPS server(windows server 2012 in this case)
Put also the preshared key(they one that we used before in the Windows server 2012)
click OK
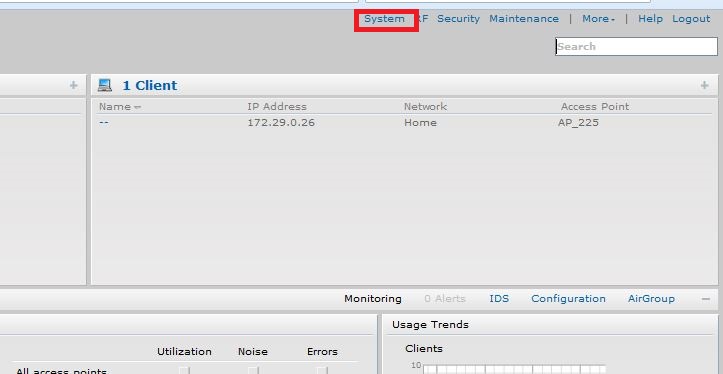
Click on System
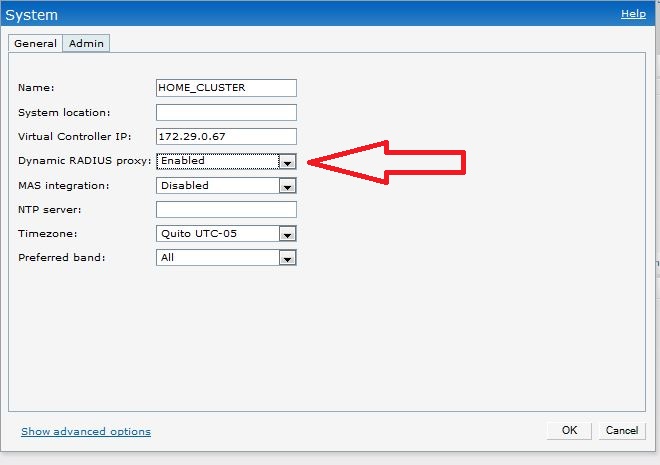
On dynamic radius proxy put enabled, this is really important... otherwise you would need to add all the Instant aps in the cluster to the clients on the windows 2012 NPS, but if you enabled it you wont have to do that.
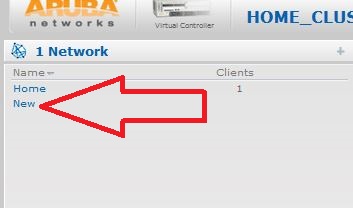
Click New
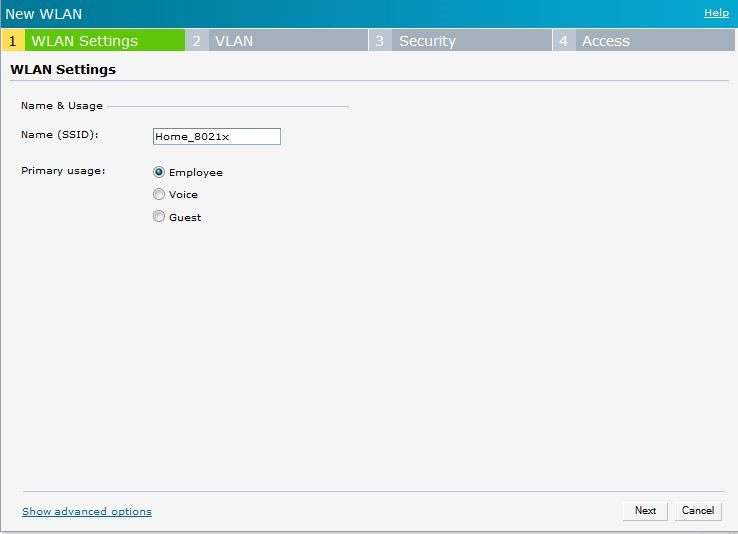
Put the name of the SSID in th box
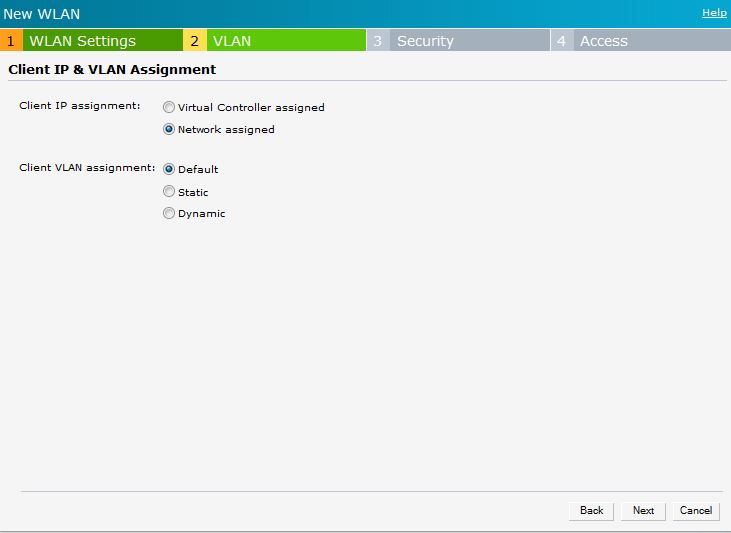
Here you need to put Network assign
And Client vlan assigment depends on what vlan you willl use for your wireless(in my case for demo purpuse i choosed default)
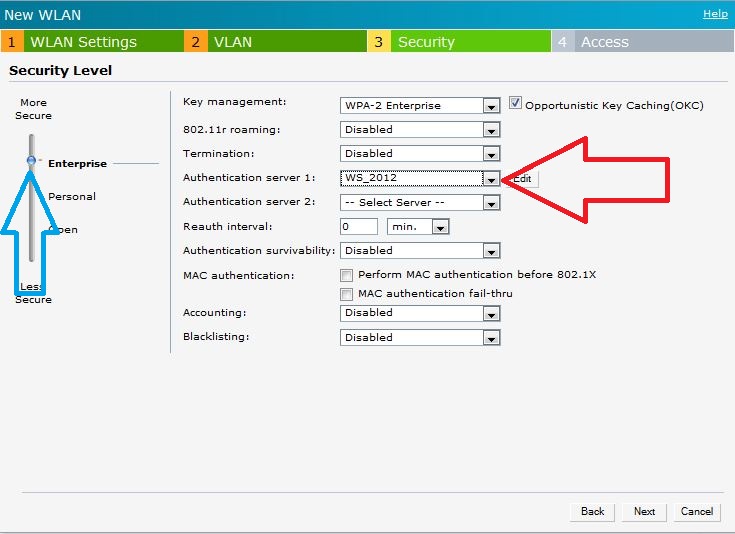
On security leve put Enterprise and authentication server select the server that we configured earlier on the instant AP and click next
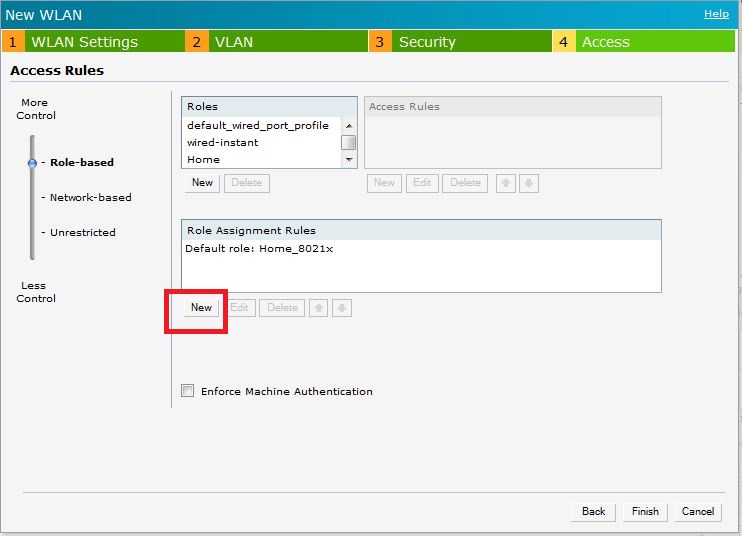
Click New like you see on the red box
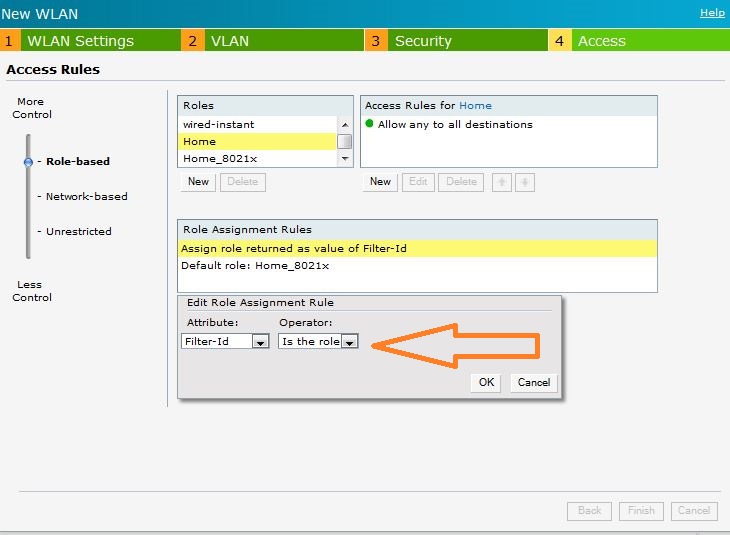
Choose on Atribute Filter-ID and on Operator Is the role
Click OK
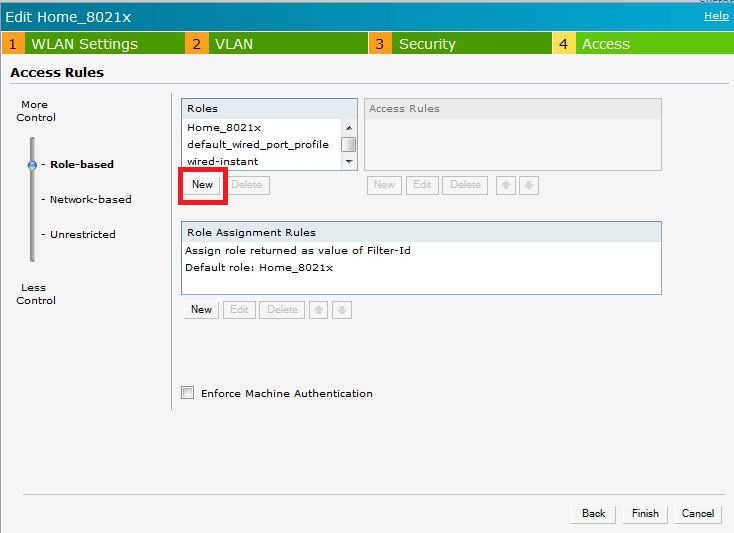
And in the name of the role put the word that you are using on the NPS on the filter ID to send to the Cluster Instant.
If you got 3 different access to your network for differnt group of users on your network then you need to create 3 differnt roles with 3 different names, which you will use on the NPS to send to the Instant Cluster
On each Role you need to put the rules you want for exmample in the next picture i show you
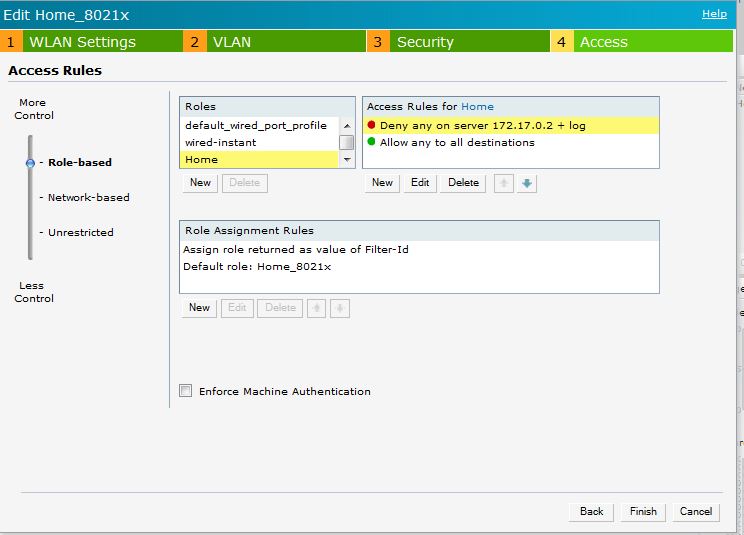
In the Home role the users does not have access to the 172.17.0.2 Server and has access to everything else
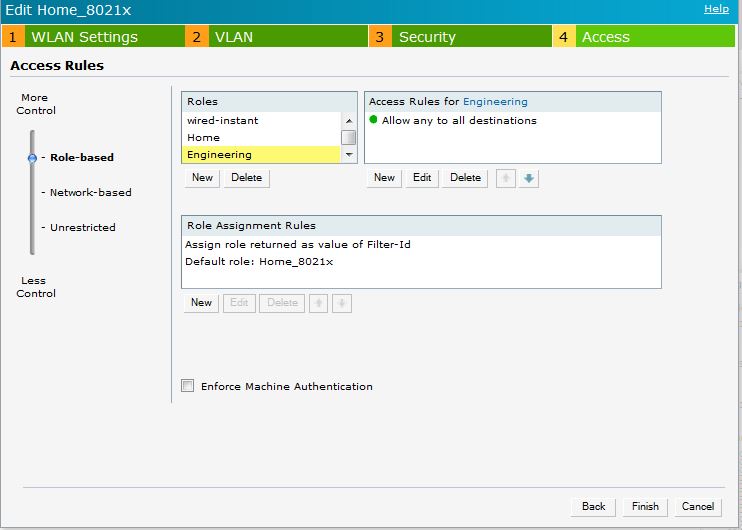
In engineering role they got access to everything!
Remenber that word of Home and Engineering comes from the value you assign to the group of users on the NPS.
And well you click finish and you are done!
After configuring this you should check out my other tutorial which tell you how to configure correctly the end point i mean the windows machine with EAP PEAP. Which is really important for security reasons. I see many configuring it incorrectly
http://community.arubanetworks.com/t5/AAA-NAC-Guest-Access-BYOD/Correctly-configure-EAP-PEAP-Windows-client/td-p/43398
Cheers
Carlos