This Article talks about installing Server certificate on CPPM.
We can install various types of Server certificates on CPPM.
i: Self signed Server Certificate.
ii: Certificate signed by a signing authority like AD.
iii: Certificate signed by Trusted Signing Authority.
Environment : This Article is written for CPPM 6.2.
Below are the detailed steps.
Step 1:
Creating a self signed Server certificate for CPPM.
Navigate to "Administration » Certificates » Server Certificate" and click on " Create Self- Signed Certificate".
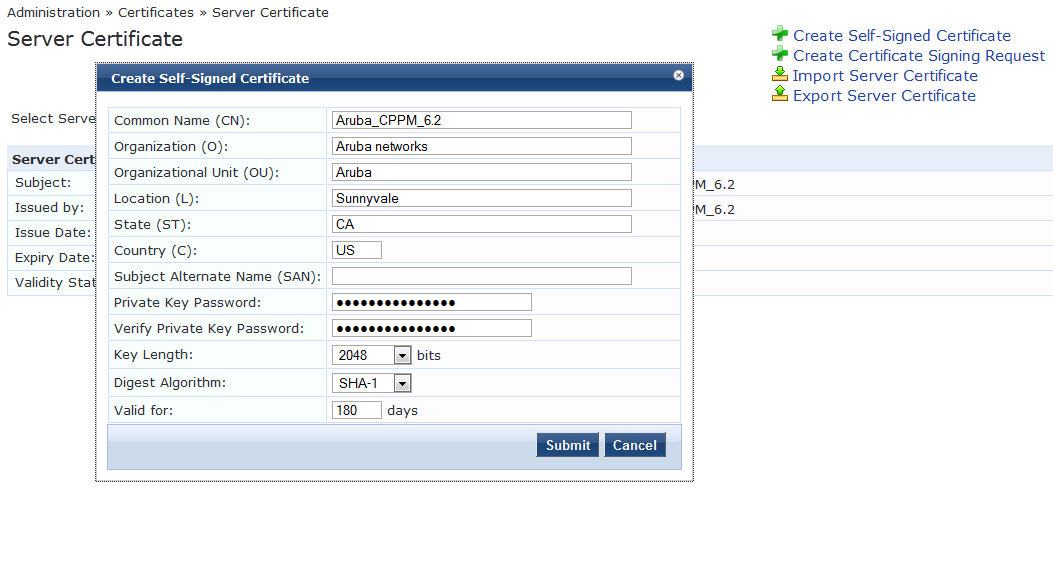
Fill in the form as per the details of the company and hit "submit".
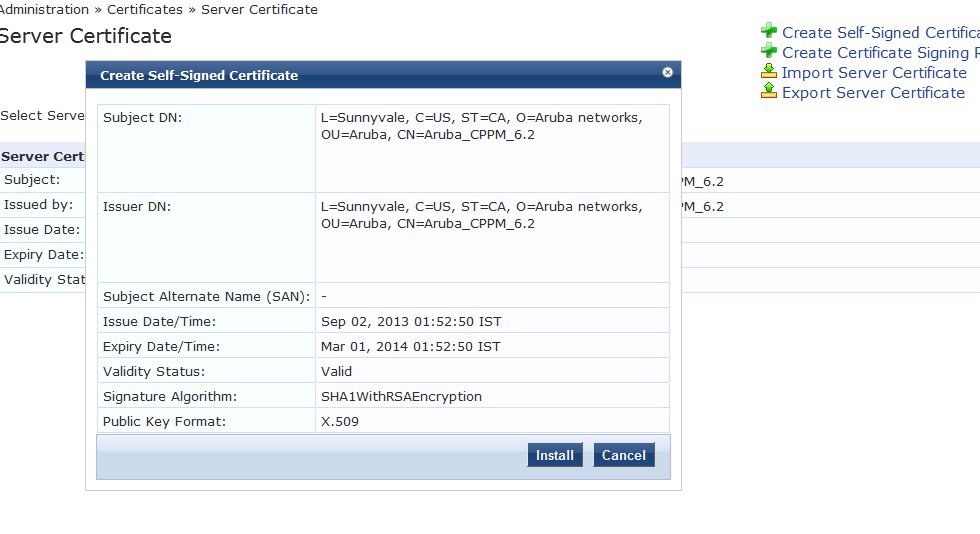
Click "Install" to install the certificate.
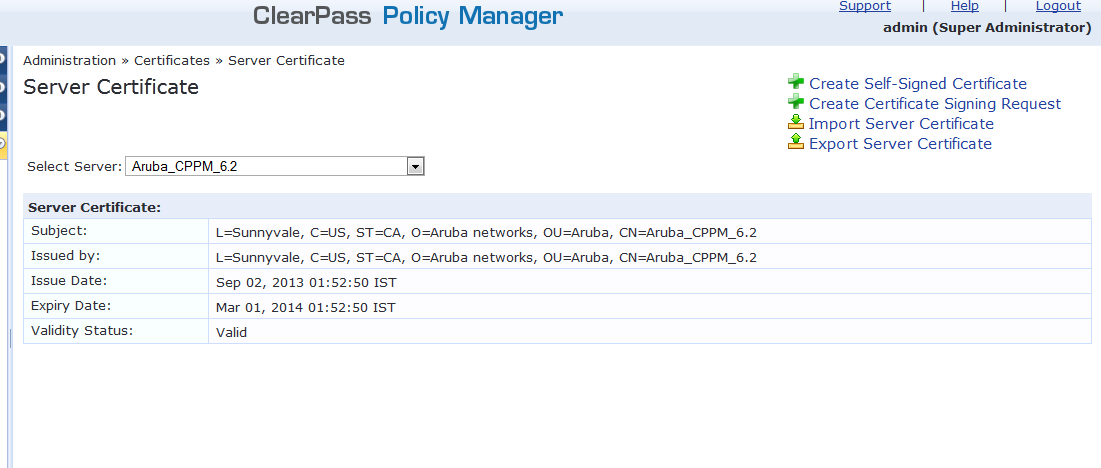
After completing the install step, please re-login using the Host name and navigate to the "Administration » Certificates » Server Certificate" and verify the details.
Step 2:
Installing a Certificate signed by AD or a trusted Root CA authority.
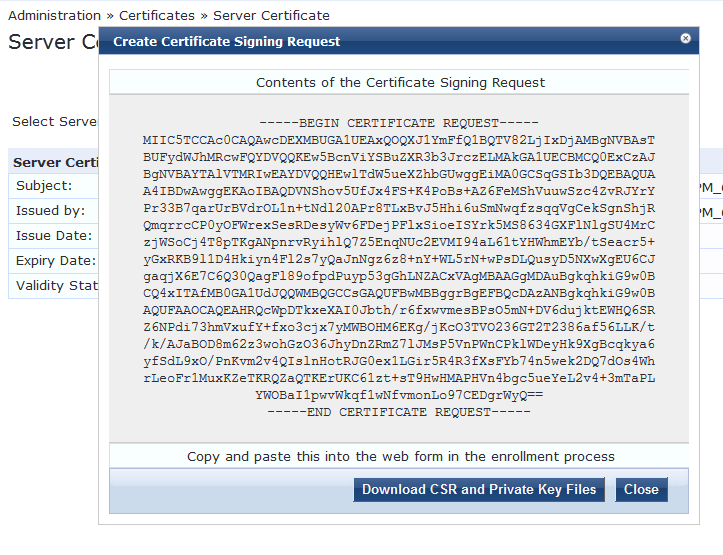
Navigate to "Administration » Certificates » Server Certificate" and click on " Create Certificate signing request" and fill in the details below. Make sure that we make a note of the Private key password.
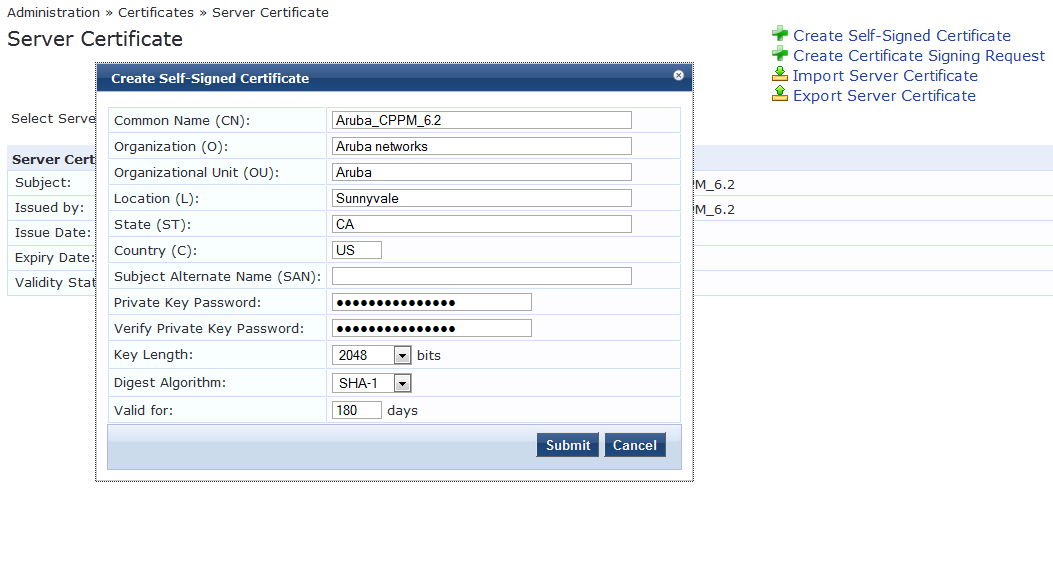
After hitting "Submit", please download the CSR and Private key file. We can also copy paste the CSR to a notepad and save it.
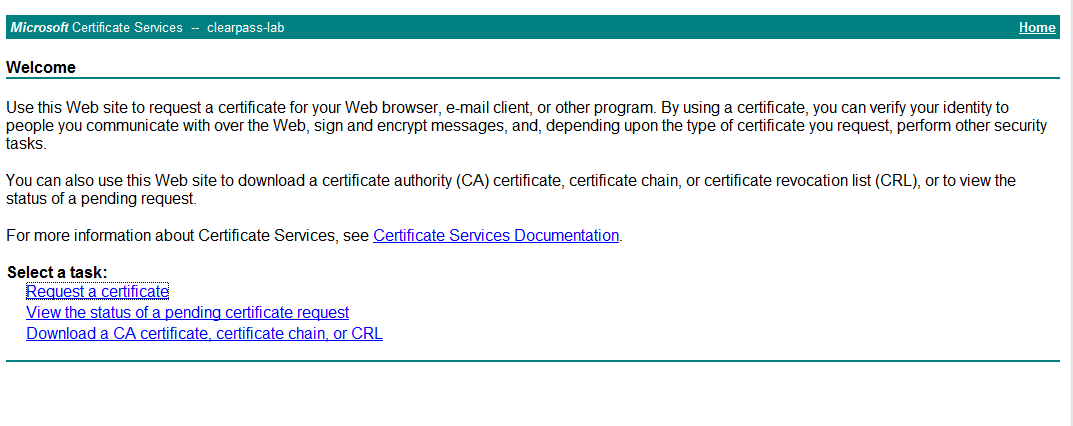
Go to the webpage for your Active Directory Certificate Services. By default, the webpage to access this is http://<IP
ADDRESS OR HOSTNAME>/certsrv/. Click on “Request a certificate”.
Request an “advanced certificate request”.

Select the second option from the list below to get the CSR signed.

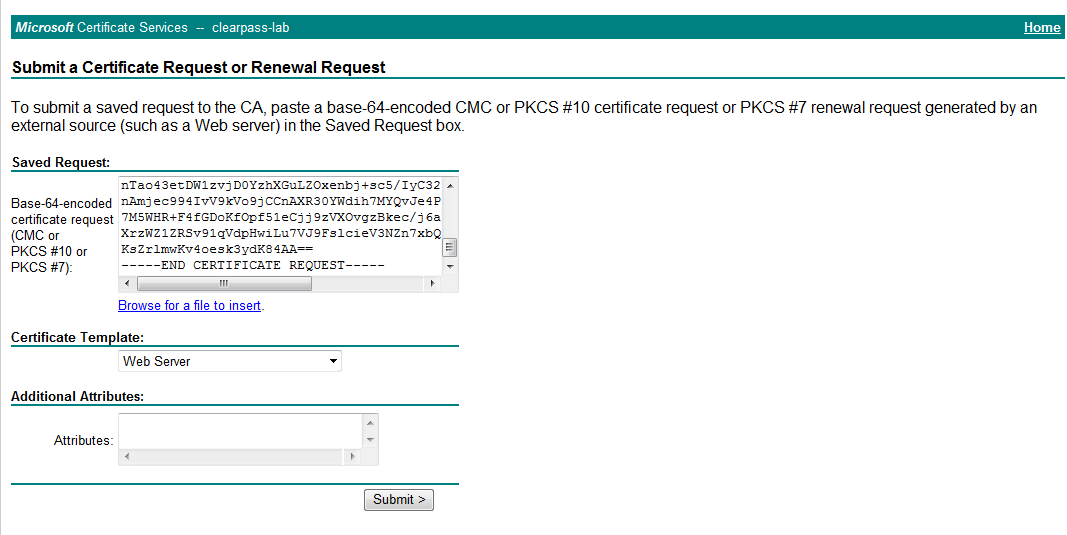
Copy/paste the CSR request generated on CPPM into the Saved Request box. Choose the Certificate Template as “Web server”.
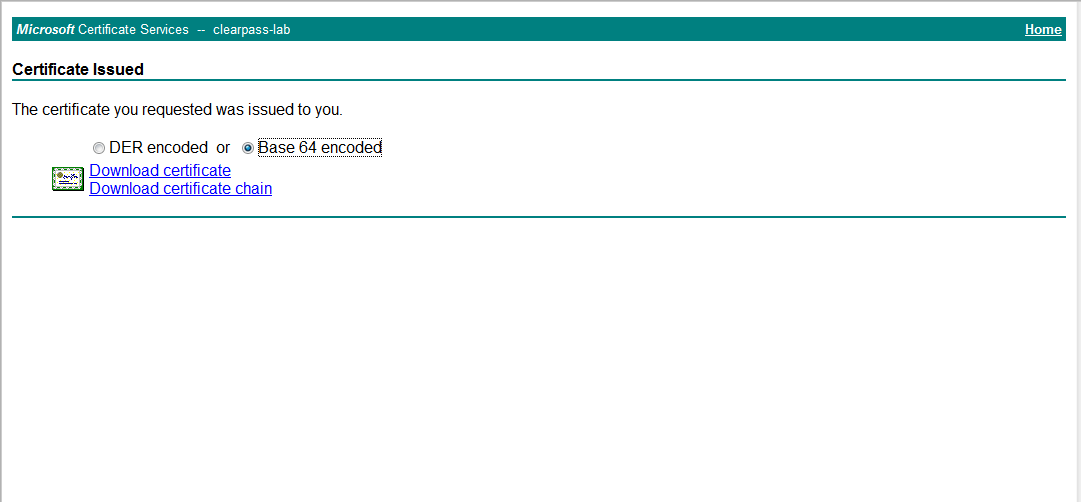
Download only the certificate chain in Base 64 encoded format. The chain will be in PKCS format and will have the server certificate and the root CA. We will need to extract each certificate from the chain in order to upload them to Amigopod.
Open the certificate in the native Windows certificate manager. Expand the folders to view the contents of the certificate chain. There should be at least two certificates. One is the certificate and the other is the Root CA.
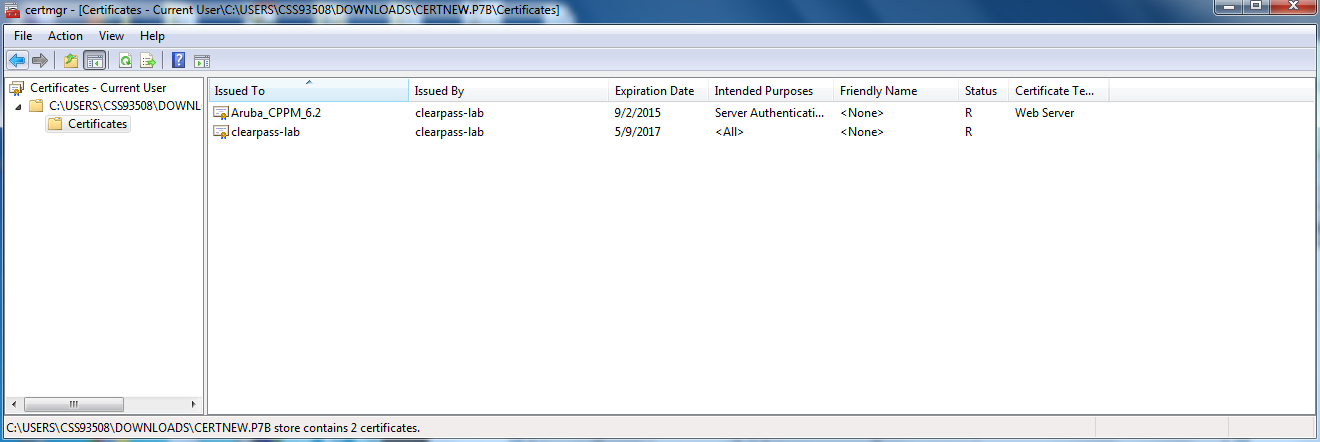
Export the server certificate using the certificate export Wizard.
In the Wizard, select Base-64 encoded X.509 (.CER) as the export format.
Browse for a folder destination and give the certificate a file name. The extension should be .cer.
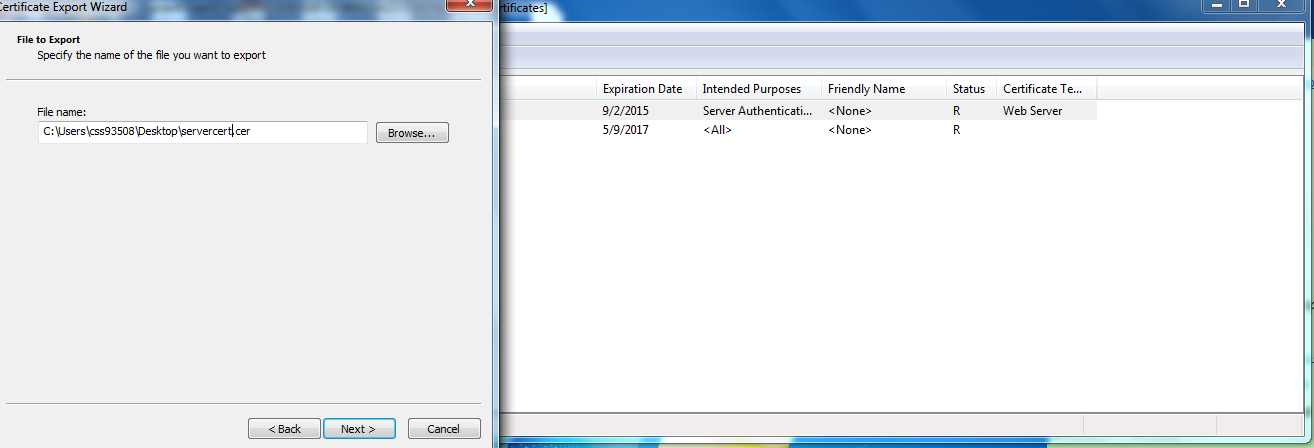
Repeat the steps with the Root CA certificate.
We need a single file to upload as a SSL certificate. So right click on the Server cert and open it in a editor utility like notepad++ and concatenate the contents in the below order.
1: Server Certificate
2: Intermediate Certificate ( if you have any)
3: Root certificate
Save the concatenated file as name.pem.
You are now ready to import these certificates into CPPM. navigate to the "Administration » Certificates » Server Certificate" .
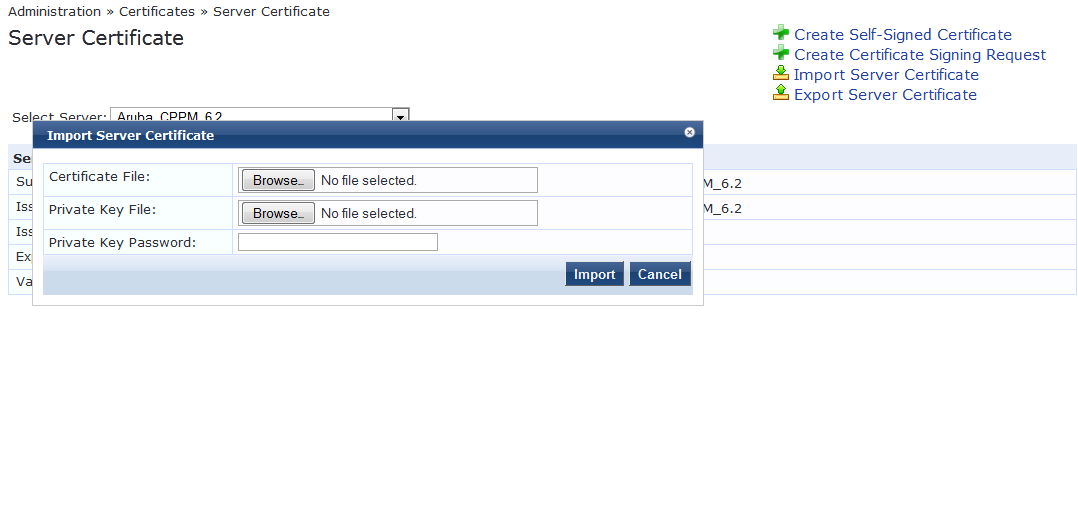
Certificate File : Concatenated file in .PEM format.
Private Key File : The certPrivkey.pkey file
Private key password: password enterned while creating a the CSR.
After Import please re-login using the Host name and navigate to the "Administration » Certificates » Server Certificate" and verify the details.