This will show you how to dump the Bradford device database to a CSV, massage the data and prepare it for import to CPPM.
Excel is the only commercial product required.
**Note: This will only work if all endpoints contain the same attributes (example: MAC, username, role).
- In CPPM, navigate to Administration > Dictionaries > Attributes and then click Add at the top right.
- Entity should be Endpoint. Create an attribute called “Bradford-Role” with Data Type “Text”. Change “Allow Multiples” to No.
- If you don’t already have a “Username” attribute, follow steps 1 and 2 to create one. (It may be called [Username])
- Export your data from Bradford to a CSV. You’ll want to navigate to the “Host View” and click the Export to CSV button at the bottom (location varies by version)
At the bare minimum, you’ll want to export “Adapter – Physical Address” and “User – User ID”. I also recommend exporting “Host – Role”.

- Open up the exported CSV in Excel. Add two columns to the end. Call the first one "mac-no-colons" and the second one "macAddress".
- In the “mac-no-colons” column for row 2, add the following formula
=SUBSTITUTE(<cell where exported mac address lives>, ":", "")
- In the “macAddress” column for row 2, add the following formula:
=LOWER(<replace with mac-no-colons column row 2 i.e. D2>)
- Highlight both of the new columns in row 2 and click the bottom right corner until the cursor turns to a plus sign. Now drag down to the bottom of the sheet. This will replicate the formula.
- Add another new column and call it “status”. In row 2, type “Known”. Copy that cell’s value and then select rows 3 to the end and paste.
- The next step is to hide (don’t delete, just hide) the original “Adapter – Physical Address” and “mac-no-colons” columns. (Click the column header, right click and choose Hide)
- Now delete Row 1 (the header row).
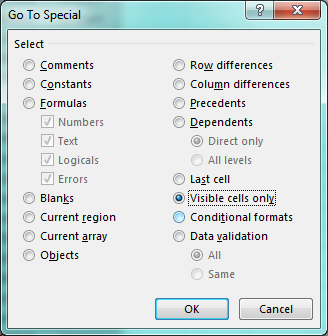
- Now Select All (Control + A, Command + A) and then Click the “Find & Select” button which is indicated by a binocular icon. Select Go To Special, click Visible cells only, then click OK.


- Copy the text to the clipboard (Control + V, Command + V)
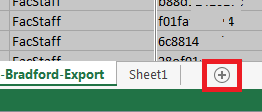
- Create a new worksheet by clicking the + at the bottom of the screen.

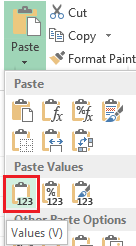
- Go to the new worksheet, and click the arrow under the Paste icon and select Paste Values.

- Save this file as an Excel sheet.
- Make sure you are on the second worksheet, and now save the file as a CSV (Comma delimited). Click OK at all of the prompts.
- Now head over to http://www.freeformatter.com/csv-to-xml-converter.html
- Open your CSV file in a plain-text editor. Select All, copy and then paste into “Option 1”. Skip Option 2
- In the “XML Template” box, enter copy and paste the formula below
<Endpoint macAddress="##3##" status="##4##">
<EndpointTags tagName="Username" tagValue="##1##"/>
<EndpointTags tagName="Bradford-Role" tagValue="##2##"/>
</Endpoint>
- Click Convert CSV to XML. Click Copy to Clipboard and then paste the output to a text editor. (Notepad++ recommended as it keeps the formatting)
- Remove everything before the first <Endpoint xxx > entry and remove the </document> at the end.


- Add the following to the beginning:
<?xml version="1.0" encoding="UTF-8" standalone="yes"?>
<TipsContents xmlns="http://www.avendasys.com/tipsapiDefs/1.0">
  <TipsHeader exportTime="Mon Jun 16 12:14:26 EDT 2014" version="6.3"/>
  <Endpoints>

- Add the following to the end:
</Endpoints>
</TipsContents>

- Save this file as an XML file and Import it into the endpoint database in CPPM (Configuration > Identity > Endpoints > Import)
The endpoints are now imported and you can use the "Bradford-Role" attribute in policy decisions.