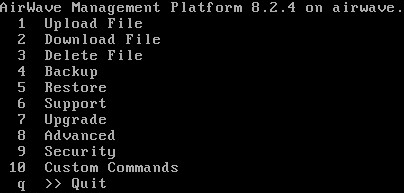
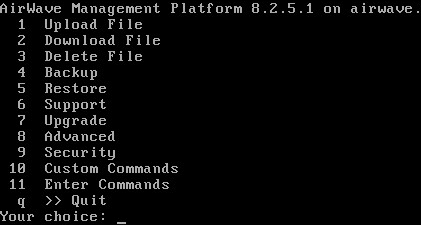
I recently went through the process of upgrading Airwave in my lab from 8.2.4 to 8.2.5.1. It was troublesome, to say the least. A fundamental change was introduced in versions from 8.2.4 onwards - full access to the Linux shell is no longer possible, with a text menu provided instead.

This is discussed at length in many posts; some of them are listed in "Other Related Material".
Backup!
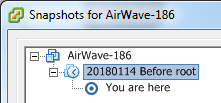
With a virtual version of Airwave, taking a snapshot of the system with ESX is quick and easy, and provides one or more restore points in case things don't work out as planned.

Keep them dated and labelled properly, and remove them once the task is completed.
Get the file on the Airwave server
This is where the lack of root access became a problem for me, along with the limited options for file access.
Upgrade
Once the upgrade file is copied on to the Airwave server, the upgrade process should find it and run the upgrade!
My first attempt failed:
Upgrade script AMP-8.2.5.1-amp_upgrade was not found in local cache.
Upgrade package found in local cache.
Validating the upgrade package...
Upgrade package is OK.
Using upgrade script extracted from local package.
Upgrade package found in local cache.

Checking iptables.


Checking the database schema.


Upgrade aborted!

Error occurred while checking the database schema. Please check the upgrade logs.
However, the second attempt was successful! It took about 1hour 45min.
Checking iptables.


Checking the database schema.

Validating the upgrade package...
Verifying authenticity of the upgrade package....
gpg: checking the trustdb
gpg: 3 marginal(s) needed, 1 complete(s) needed, PGP trust model
gpg: depth: 0  valid:   1  signed:   0  trust: 0-, 0q, 0n, 0m, 0f, 1u
Verifying signature....
Good Signature....
Verifying checksum....
Upgrade package verified....
Upgrading AMP to version 8.2.5.1 from version 8.2.4...
Detailed log will be written to /var/log/upgrade/AMP-8.2.5.1-upgrade.log

STEP 1: Moving old version aside.

STEP 2: Unpacking upgrade package.

STEP 3: Checking for compatibility.

STEP 4: Stopping AMP services.

STEP 5: Installing upgrade.
***************************************************************
Updated kernel packages that fix various security issues are now
available for your OS. To upgrade, select 'Upgrade' menu item on the AMPCLI Menu,
and then choose 'Upgrade OS Kernel' menu item.

For more information refer to the security advisory:
  https://rhn.redhat.com/errata/RHSA-2017-2863.html

***************************************************************
Duplicate devices or devices with incomplete information exist in the AMP database.
See /var/log/duplicate_or_incomplete_devices for details.

For additional information please contact Aruba Support at:
1-800-WiFi-LAN or http://hpe.com/support/hpesc

STEP 6: Restarting AMP services.
Setting up AMPCLI
Setting bootloader password...
Bootloader password already set
Done
Generating encryption keys...
Encryption keys already generated
Importing Official key...
Done
Fixing up post_nightly_maintenance script...
post_nightly_maintenace script already set up
Adding recovery user...
Done
Setting up secure accounts...
Setting admin username...
Note: admin user ampadmin exists
Done
Done
Removing alias for less...
Done
AMPCLI Setup completed
**********************************************
Post upgrade schema check is in progress..
This may take a few minutes..
**********************************************

Upgrade from 8.2.4 to 8.2.5.1 is successful.
Version 8.2.5.1 provides some additional menu options too, and some of the upgrade issues are said to be ironed out.

Root Access
This process (from http://community.arubanetworks.com/t5/Network-Management/AirWave-8-2-4-NO-CLI/td-p/298005 ) would probably be fine - except the GRUB bootloader is also password protected! It may be possible to bypass the bootloader password as well, but I did not pursue this.
- Reboot the server with CTRL-ALT-DELETE.
- When the blue boot screen pops up (depending on what OS you have, you may have an AirWave logo or CentOS or another OS logo on this page), press "e" to edit the boot configuration.
- Move the cursor down to the line that starts with 'kernel', and press "e" again to edit that line
- Make sure you're at the end of the line, give a space and add the word "single" (without quotes) to the string, then hit
- Type 'b' to continue the boot process; you'll boot quickly into a shell without having to enter a password
- Use the 'passwd' command to enter and confirm a new password for the root user
- Write down the new password and keep it someplace safe.
- Add root acces back vi /etc/passwd
- change the first line to: root:x:0:0:root:/root:/bin/bash
- Use the 'reboot' command to reboot the server into full operations mode.
- Log back in and create new user so you can log in without root
Other Related Material
https://community.arubanetworks.com/t5/Network-Management/upgrade-from-airwave-8-2-4-t-8-2-4-1/td-p/304422/page/2
https://community.arubanetworks.com/t5/Monitoring-Management-Location/How-to-upload-a-file-on-Airwave-8-2-4-from-Windows-machine/ta-p/303145
https://community.arubanetworks.com/t5/Network-Management/AirWave-8-2-5-update-issue/td-p/309831
http://community.arubanetworks.com/t5/Network-Management/AirWave-8-2-4-NO-CLI/td-p/298005
--> whole long discussion