Integration of Clearpass with Aerohive Introduction
Much as we’d like all our customers to choose, or already have Aruba wireless, that is not always the case. A key vendor in the marketplace is that of Aerohive, which consists of essentially fat Aps managed by a platform called HiveManager. This tutorial outlines how to integrate Clearpass into an Aerohive wireless deployment for the purposes of corporate dot1x and guest users.
Solution
The following was used for this testing and demonstration.
Aerohive – AP330 firmware 6.1r3
HiveManager – Hive Manager Online 6.1r3
Clearpass – 6.3.0.6172
Assumptions – Clearpass is joined to domain and Active Directory is being used for authentication.
Setup
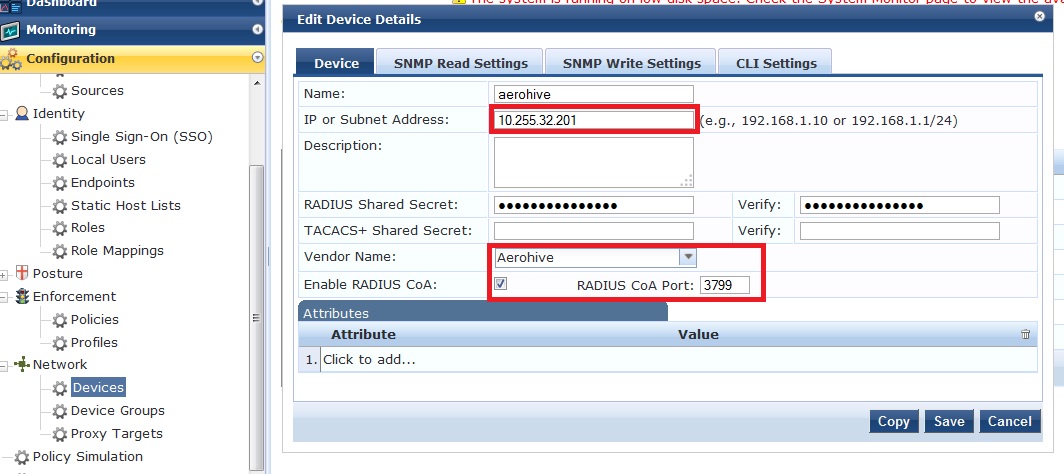
Add the Aerohive device to Clearpass as a radius client. You will need to add each individual AP as a client or add them by subnet.
1.1 Corporate dot1x ssid
Setup your ssid with the appropriate parameters on HiveManager.
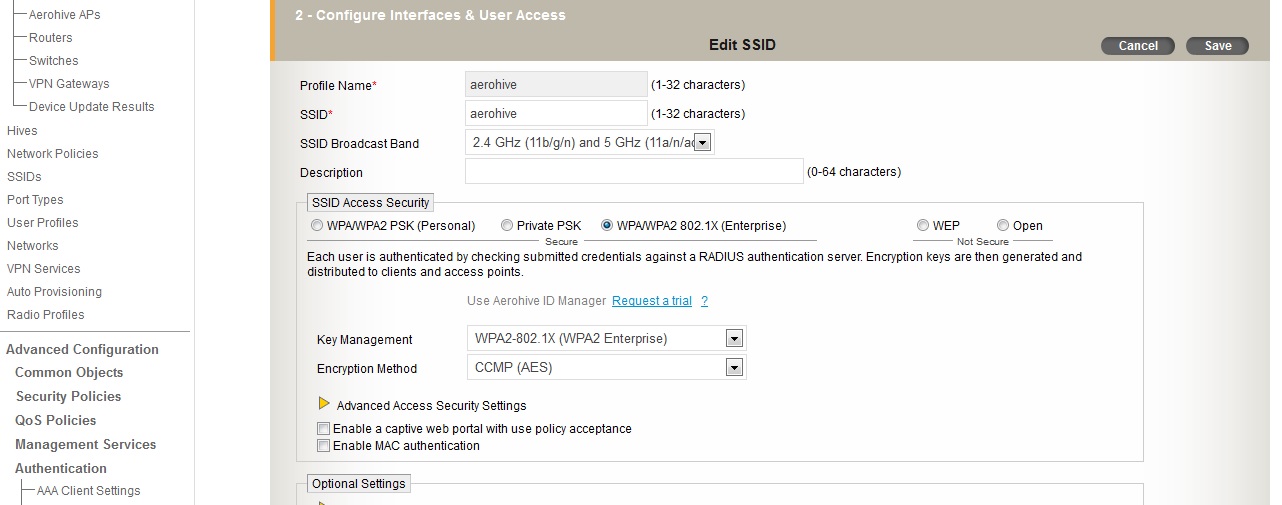
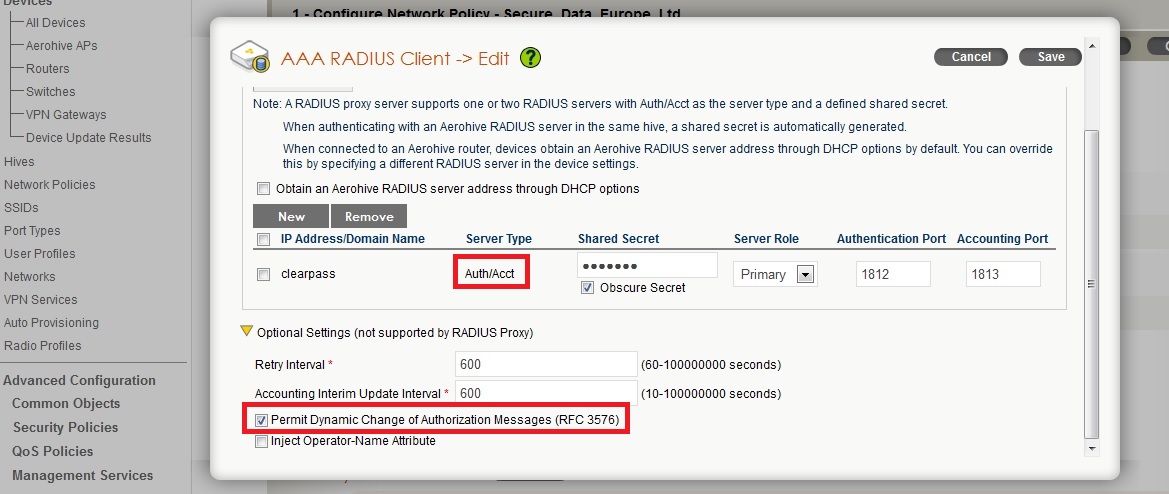
Add this ssid to your network profile, and create the Clearpass radius configuration. Create and assign an appropriate User Profile. In the case of this demo, we are using the same vlan as the AP for simplicity.

The radius settings for Clearpass should be setup as below.
Using the ‘802.1X Wireless’ template in Clearpass, create the service by entering the ssid and choosing the Aerohive device that was added during the setup.
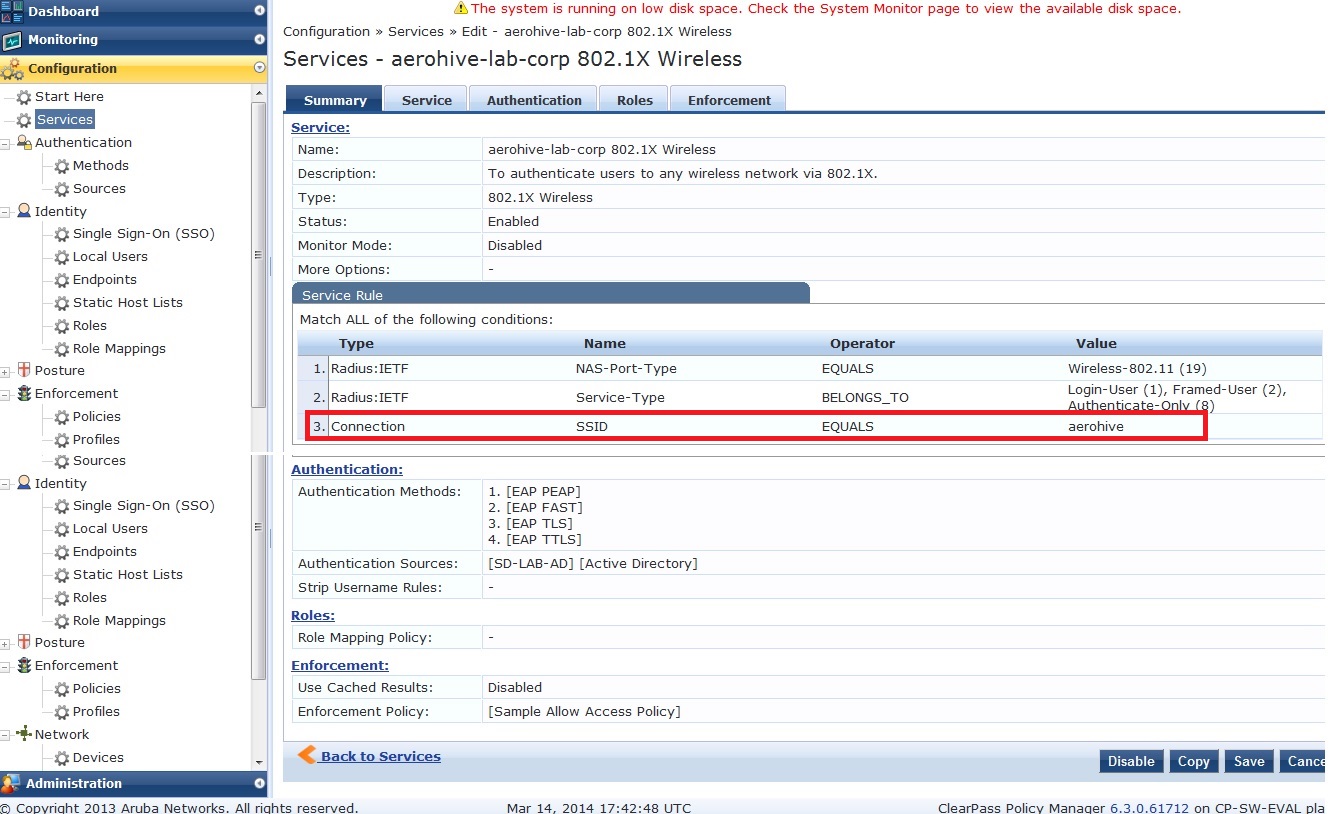
Add the attribute ‘Connection: SSID EQUALS <ssid>’ as above. Optionally, you can set a ‘NAS-Identifier’ on the Aerohive AP and filter on that.
1.1.1 Using Radius attributes to assign User Profiles.
Similar to the Aruba concept of user-roles, Aerohive uses user-profiles to define different types of user rights. Within the user-profile an attribute number is given and the radius response can be configured to return particular attributes so the user is placed into this user-profile.
These attributes can be returned by adding an Enforcement Policy to your Profile as below.
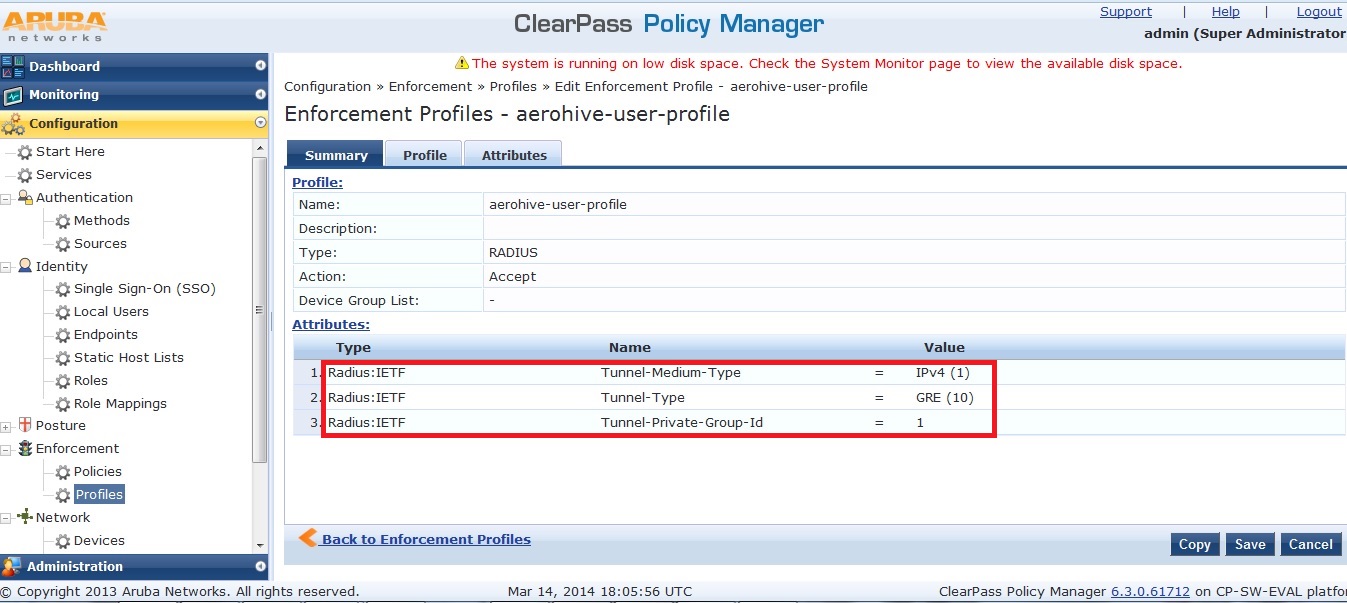
Note: The Tunnel-Private-Group-Id value must match the attribute-no of the user-profile on Aerohive.
1.2 Guest ssid
Aerohive can also be configured to use Clearpass for guest ssids. There are two ways of doing this and both will be considered here.
1.2.1 Using Aerohive portal and Clearpass as radius and Guest management.
The Aerohive guest ssid can be set so that the internal portal on the Aerohive is served and the radius request is sent to Clearpass. Clearpass has already been setup for guest account creation etc.
Create the Aerohive ssid with the following parameters.
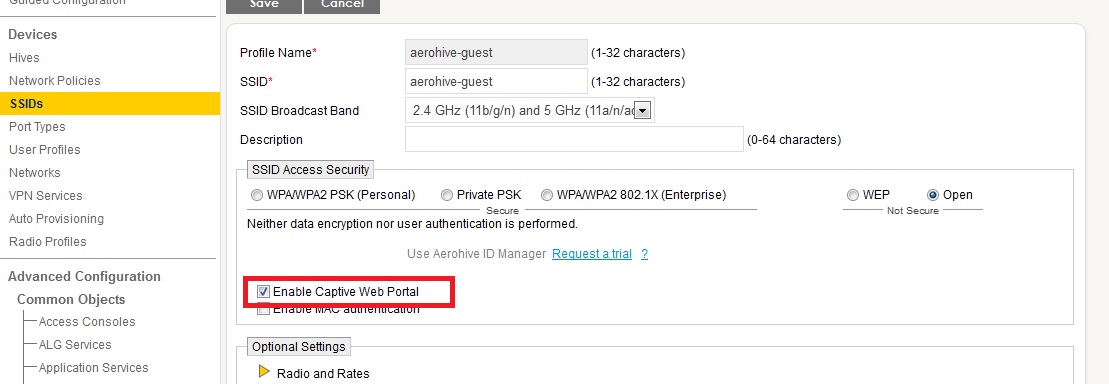
Within the Network profile, add this ssid and create the captive portal profile and assign the Clearpass as the radius server.
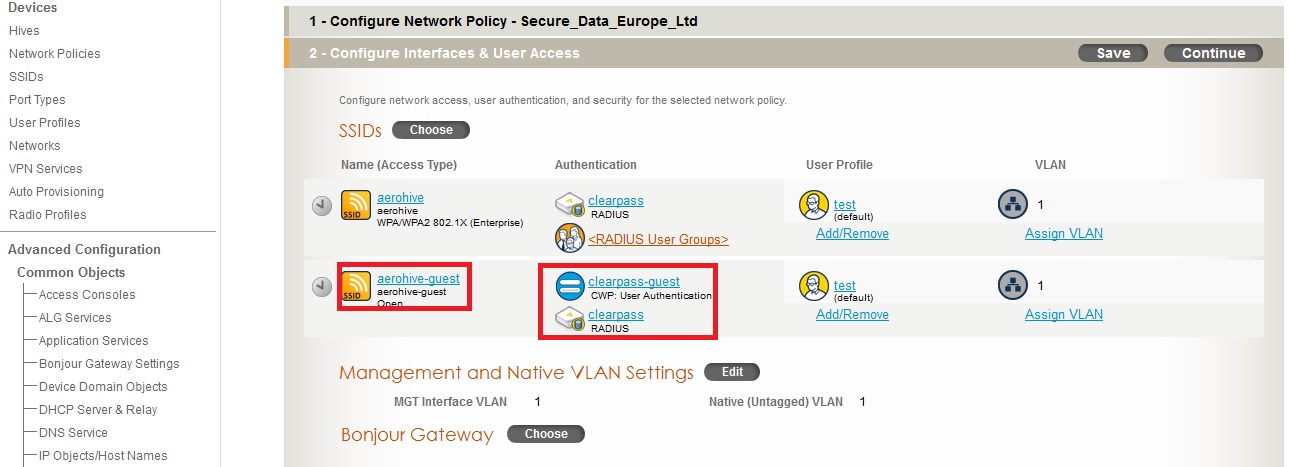
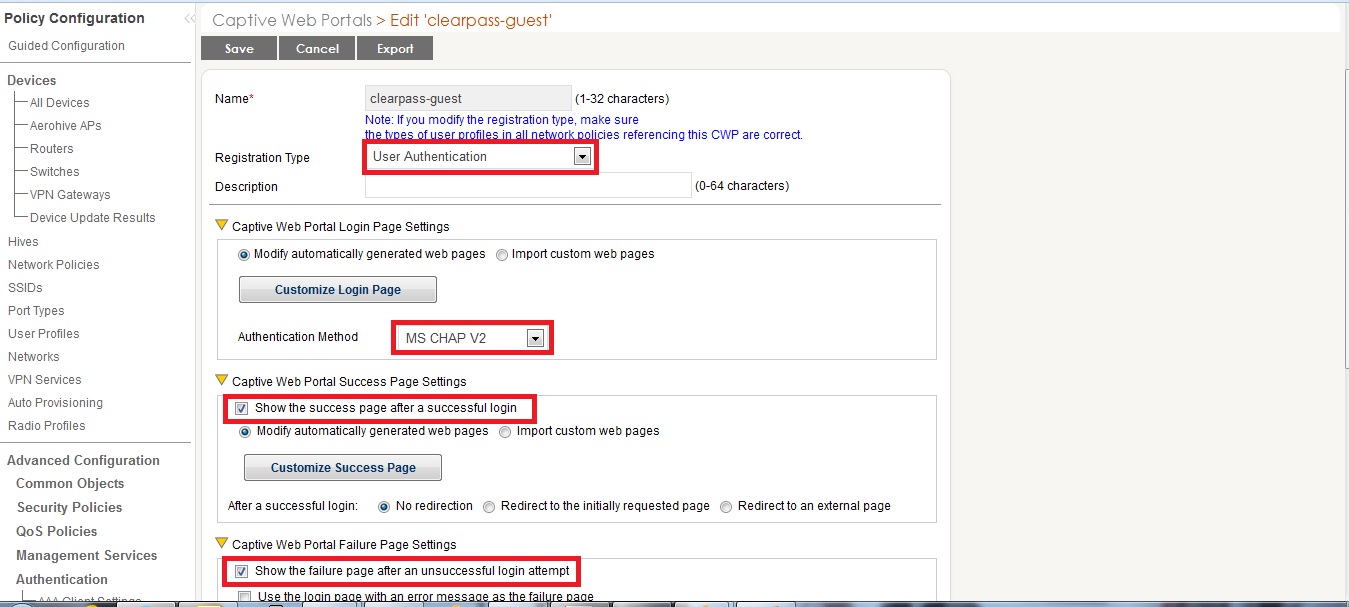
The captive portal profile on Aerohive will need to be configured as such with the following
- Registration Type – User
- Captive Web Portal Auth Method – MSCHAPv2
- Show success page after successful authentication.
- Show failure page after unsuccessful login.
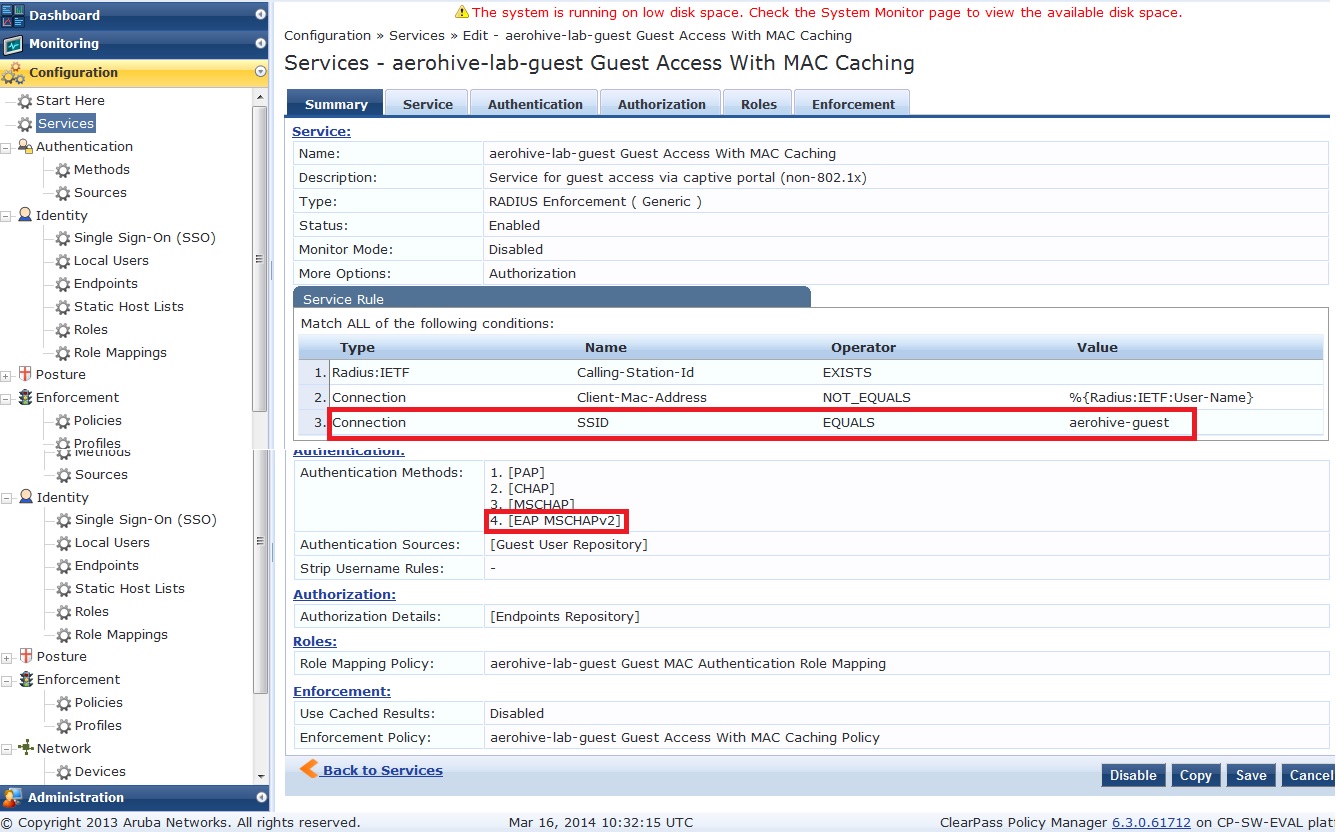
Using the Clearpass service template ‘Guest MAC Authentication’, create the guest service using the appropriate ssid and Aerohive as the NAS device.
Note: Guest MAC caching does not work with Aerohive, or at least I was unable to make it work. The user will always be presented with the portal page, even if they have passed mac authentication. If anyone knows how to make this work, please advise. We will still use the MAC caching template though so that the mac is registered on Clearpass.
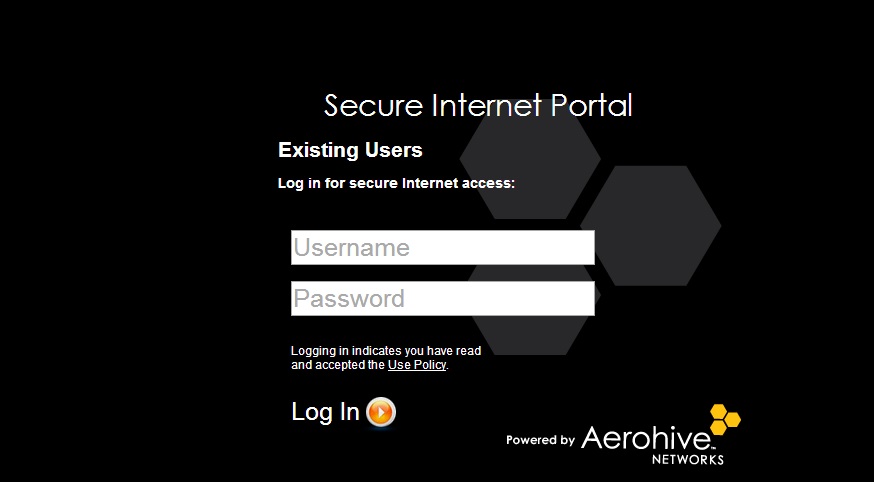
When the user connects, they are presented with the captive portal from the Aerohive AP.
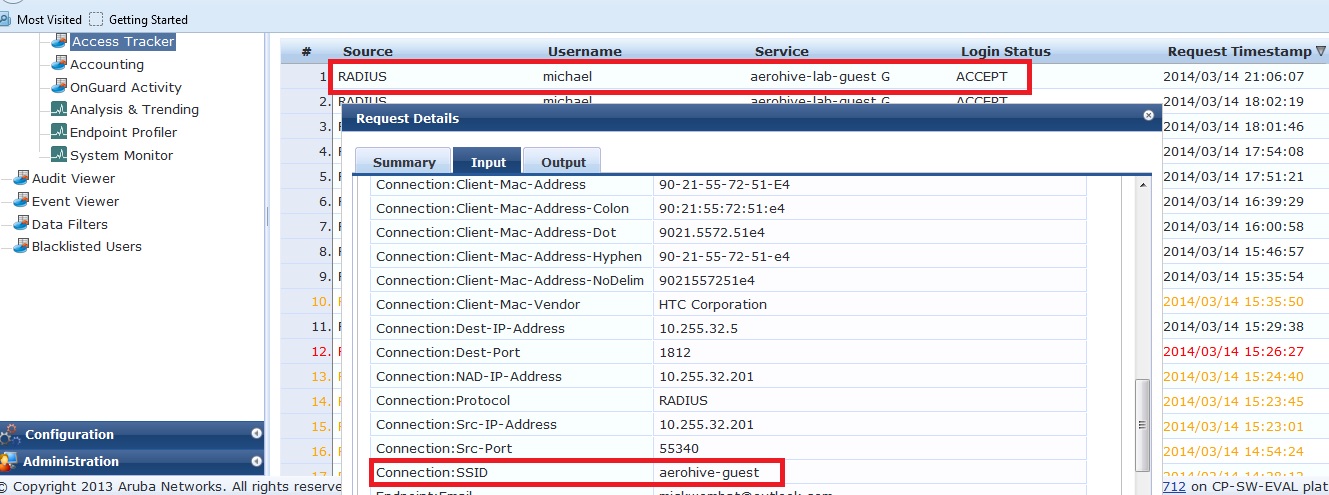
The radius request is sent to Clearpass for authentication as shown in access tracker below.
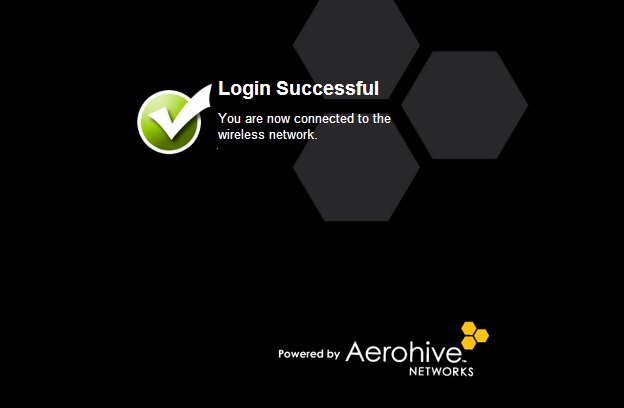
And the user is presented the success page.
1.2.2 Using Clearpass portal and Clearpass as radius and guest management
The following outlines how to use Clearpass for the guest registration page and subsequent authentication.
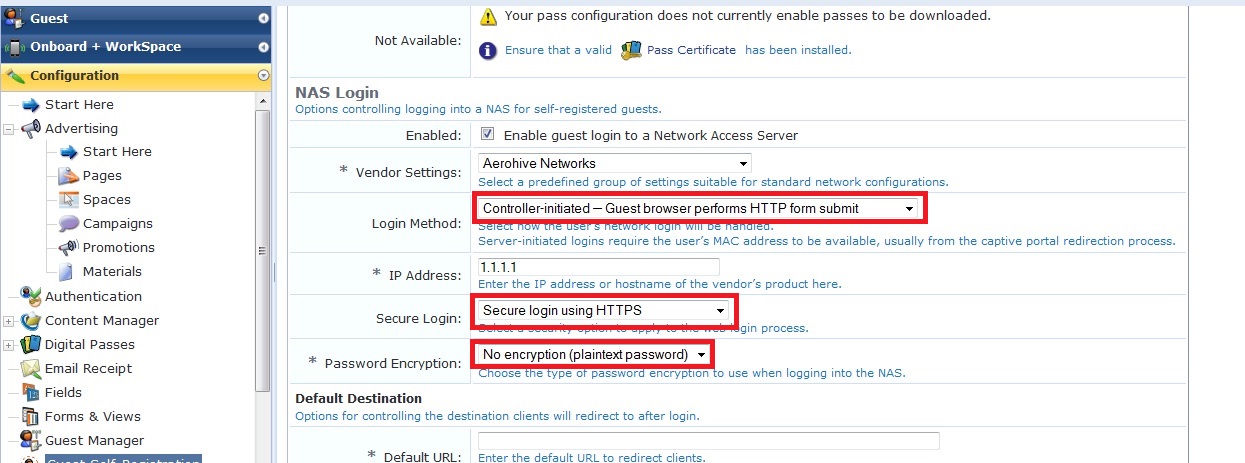
Configure the guest registration page in Clearpass Guest as below, with the following NAS-login settings.
- Secure login – use https
- IP address – 1.1.1.1
- Password Encryption – No encryption (Note, we are still using https for the registration, so this is not a security concern)
Configure the Aerohive captive portal settings as shown below.
- Registration type – External authentication
- Authentication method – CHAP
- Login URL – address of your defined guest registration page.
- Password Encryption – No Encryption.
- Enable https

After registering using the Clearpass portal, the user is presented with the success page served from the Aerohive AP.
