Certificate Requirements for Controller-Initiated Web Logins with ClearPass
The default captive portal workflow for Aruba controllers uses a controller-initiated login where the client browser submits the required credential to the controller, and the controller sends a RADIUS request to the AAA server to validate the credentials.
A public CA-signed captive portal certificate is required for controller-initiated workflows. There are three deployment options outlined below, each using a different certificate model.
If ClearPass Guest is being used, some web login configuration elements will need to be updated there as well.
Note: This article applies for both single and multi controller deployments.
Deployment Options
- All controllers use a single, generic public CA-signed captive portal server certificate (RECOMMENDED)
- All controllers use a single public CA-signed wildcard captive portal server certificate
- Each controller uses a unique public CA-signed captive portal server certificate
All Controllers Using One Common, Single Name Captive Portal Certificate
Overview:
In this recommended deployment model, one single name server certificate is used across all controllers. The certificate should contain a user friendly, generic common name. This name should not be present in DNS. For example, network-login.yourdomain.xyz. The common name should also be present as the SubjectAltName (most CAs will do this automatically).
NOTE: The CSR and key generation must be done an external device (ex: using openssl). The controller does not allow exporting of private keys (by design).
ClearPass Guest Configuration
- For Guest Web Login page: Guest » Configuration » Pages » Web Logins: Edit respective web login pages with login method set as “Controller initiated” and configure the “*Address” field to reflect the common name in the certificate.

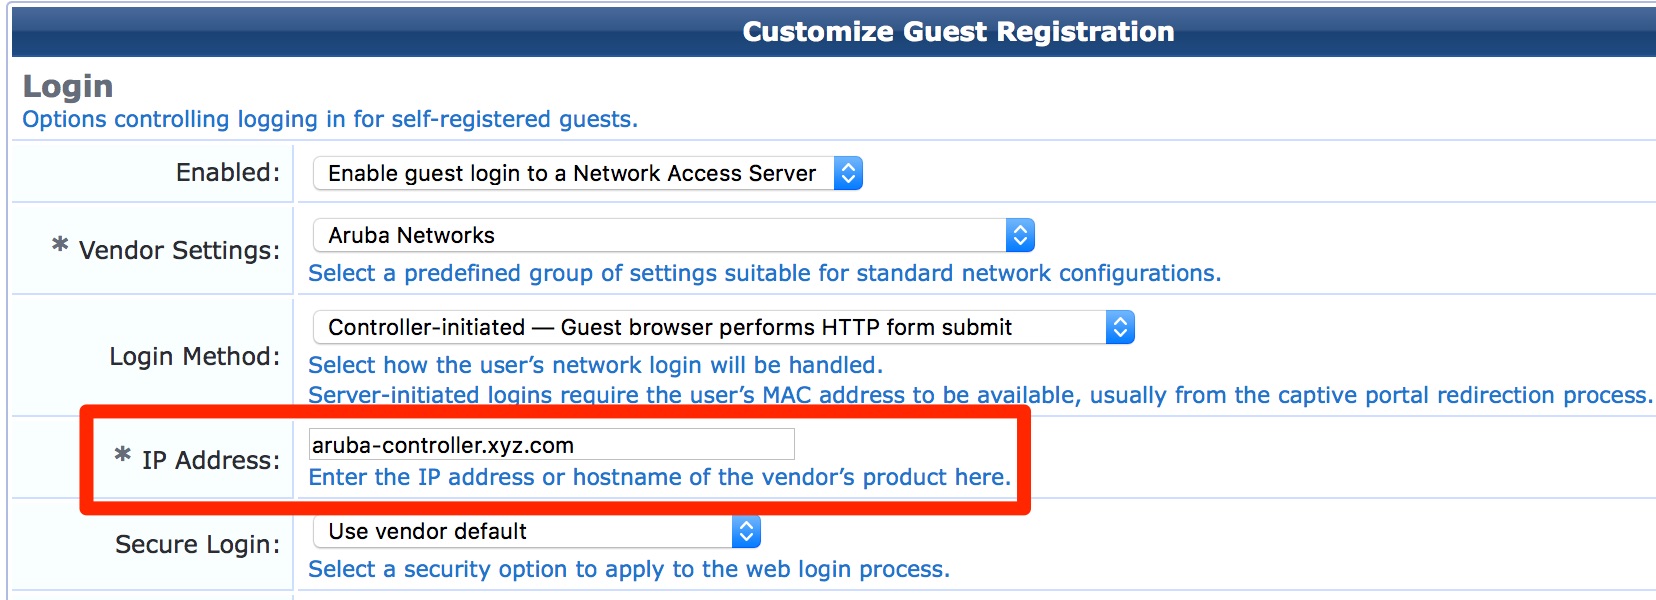
- For Guest Self-Registration page: Guest » Configuration » Pages » Guest Self-Registrations: Edit the self-registration and go to NAS Vendor Settings. If we are using Controller-Initiated logins then we need to update the “*IP Address” field with the Common Name of the controller's captive portal certificate (ex: network-login.yourdomain.xyz).
Note: For instructions on installing certificates on Aruba controllers, refer to the ArubaOS User Guide > https://www.arubanetworks.com/techdocs/ArubaOS_6_5_4_X_Web_Help/Web_Help_Index.htm#ArubaFrameStyles/Management_Utilities/Managing_Certificates.htm
All Controllers Using One Wildcard Captive Portal Certificate
Overview:
In this alternative deployment model, one public CA-signed wildcard server certificate is used across all controllers.
The controller automatically appends "captiveportal-login" to the domain in the certificate. For example, if the common name of the certificate was "*.arubasupport.com", the dynamic captive portal redirect FQDN would be "captiveportal-login.arubasupport.com".
NOTE: The CSR and key generation must be done an external device (ex: using openssl). The controller does not allow exporting of private keys (by design).
ClearPass Guest Configuration
- For Guest Web Login page: Guest » Configuration » Pages » Web Logins: Edit respective web login pages with login method set as “Controller initiated” and configure the “*Address” field to reflect the above derived hostname.
Example: if the wildcard cert is *.arubasupport.com, then the derived hostname would be captiveportal-login.arubasupport.com.

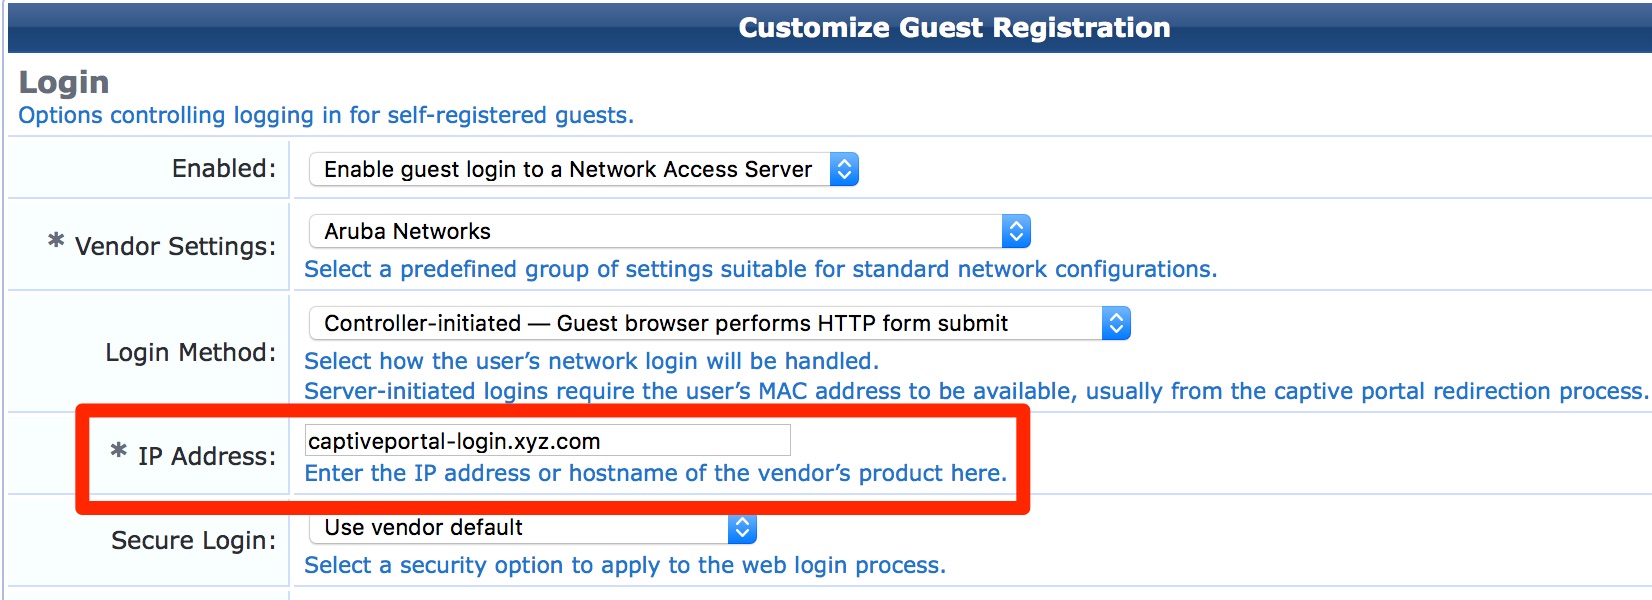
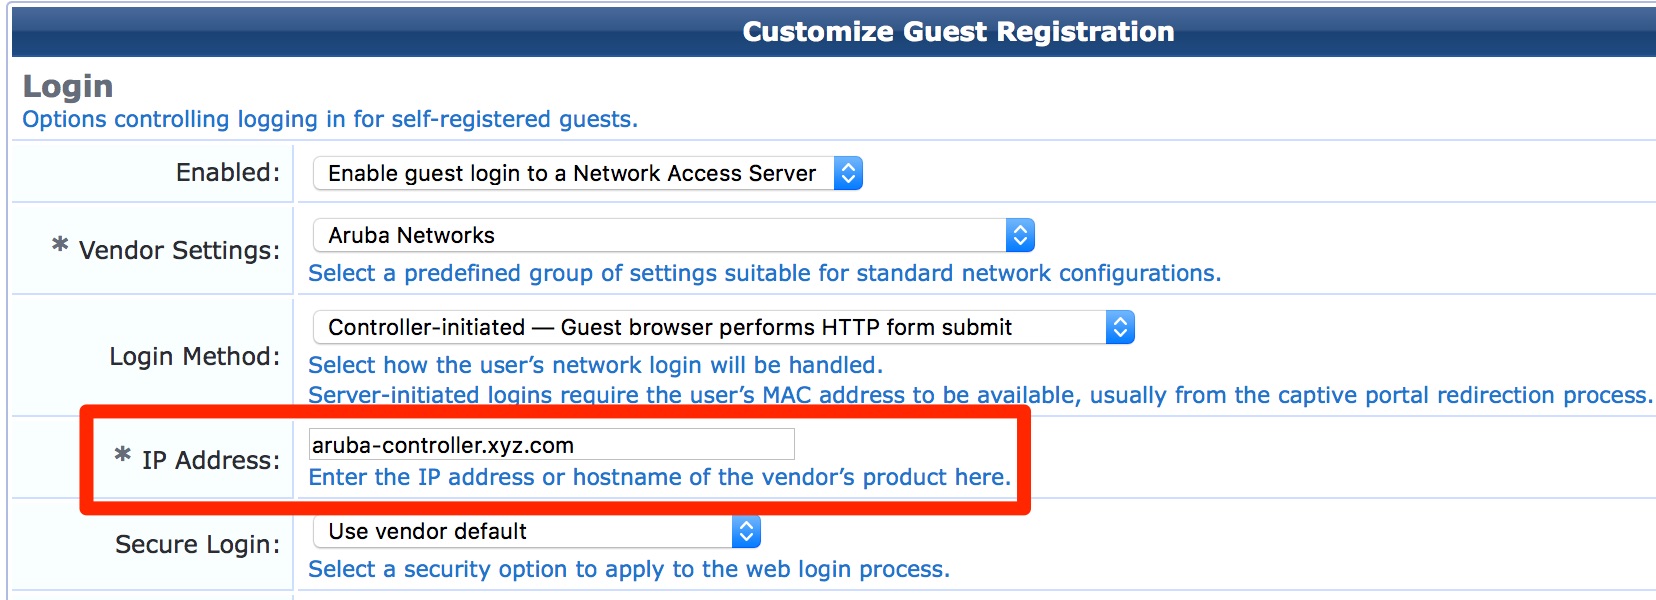
- For Guest Self-Registration page: Guest » Configuration » Pages » Guest Self-Registrations: Edit the self-registration and go to NAS Vendor Settings. If we are using Controller-Initiated logins then we need to update the “*IP Address” field respectively.

https://www.arubanetworks.com/techdocs/ArubaOS_6_5_4_X_Web_Help/Web_Help_Index.htm#ArubaFrameStyles/Management_Utilities/Managing_Certificates.htm
Using Unique Captive Portal Certificates Per Controller
Overview:
In this alternative deployment model, a unique public CA-signed server certificate is used on each controller.
ClearPass Guest Configuration
1. We need to enabled Dynamic Address under the ClearPass Guest Weblogin/Self-registration page for this to work by following the below instructions:
- For Guest Web Login page: Please login to the ClearPass Guest and navigate to Guest » Configuration » Pages » Web Logins: Edit respective web login pages with login method set as “Controller initiated” and enabled the check box for “The controller will send the IP to submit credentials” under Dynamic address.

- For Guest Self-Registration page: Please login to the ClearPass Guest and navigate to Guest » Configuration » Pages » Guest Self-Registrations: Edit the self-registration and go to NAS Vendor Settings. If we are using Controller-Initiated logins then we need to update the “*IP Address” field with the common name in the certificate.

2. We need to make sure that the controller includes the switchip in the redirect URL for this to work.
Login to the Aruba controller WebUI and navigate to Configuration >> Security >> Authentication >> L3 Authentication >> Captive Portal Authentication >> Check "Add switchip in the redirect URL"

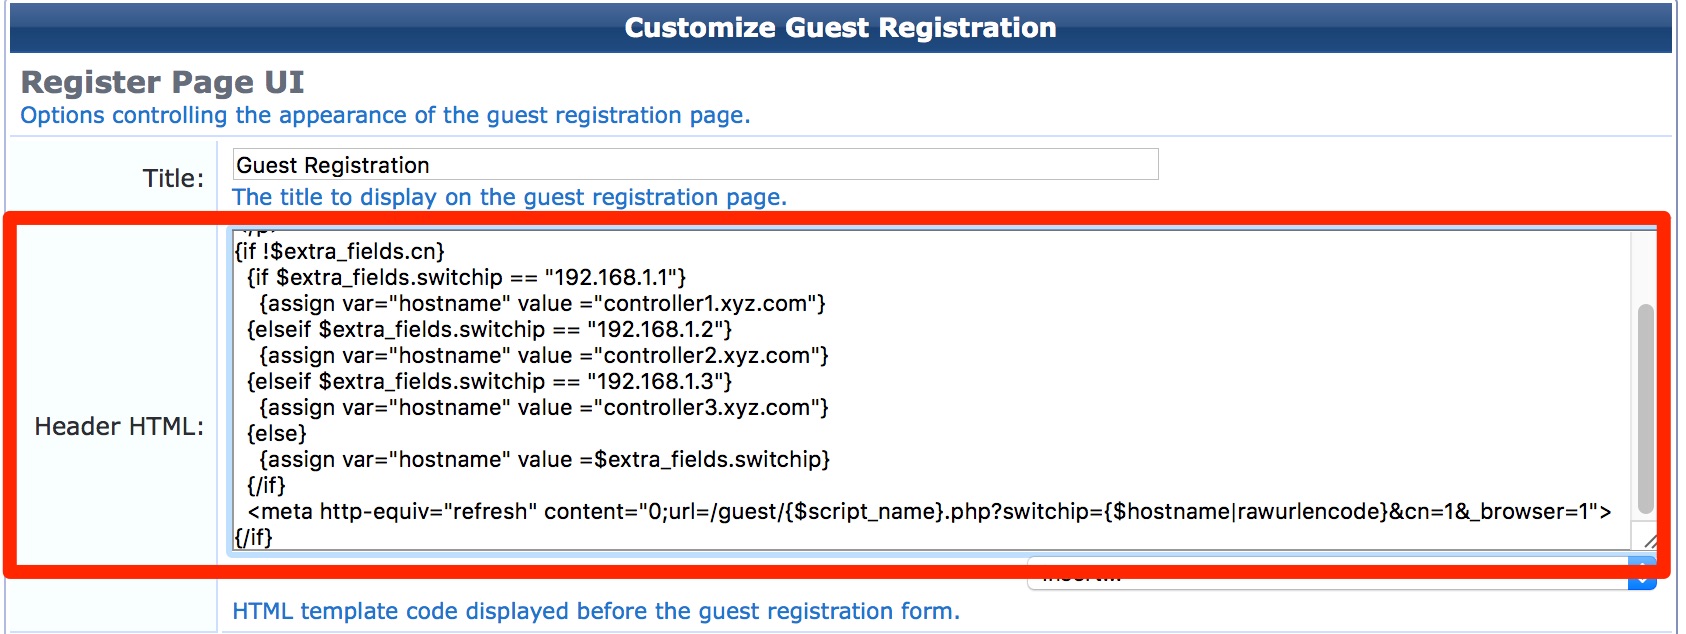
3. Need to use the below simplified script in the Header HTML of a web login or self-registration page replacing respective IP and hostname mapping of the controllers.
- For Guest Web Login page: Please login to the ClearPass Guest and navigate to Guest » Configuration » Pages » Web Logins: Edit respective web login pages with login method set as “Controller initiated” and add the below script in the Header HTML of the web login page after replacing the highlighted IP and hostname with your controllers IP and captive portal certificate CN mapping.
Sample script:
{if !$extra_fields.cn}
  {if $extra_fields.switchip == "192.168.1.1"}
    {assign var="hostname" value ="controller1.yourdomain.xyz"}
  {elseif $extra_fields.switchip == "192.168.1.2"}
    {assign var="hostname" value ="controller2.yourdomain.xyz"}
  {elseif $extra_fields.switchip == "192.168.1.3"}
    {assign var="hostname" value ="controller3.yourdomain.xyz"}
  {else}
    {assign var="hostname" value =$extra_fields.switchip}
  {/if}
  <meta http-equiv="refresh" content="0;url=/guest/{$script_name}.php?switchip={$hostname|rawurlencode}&cn=1&_browser=1">
{/if}
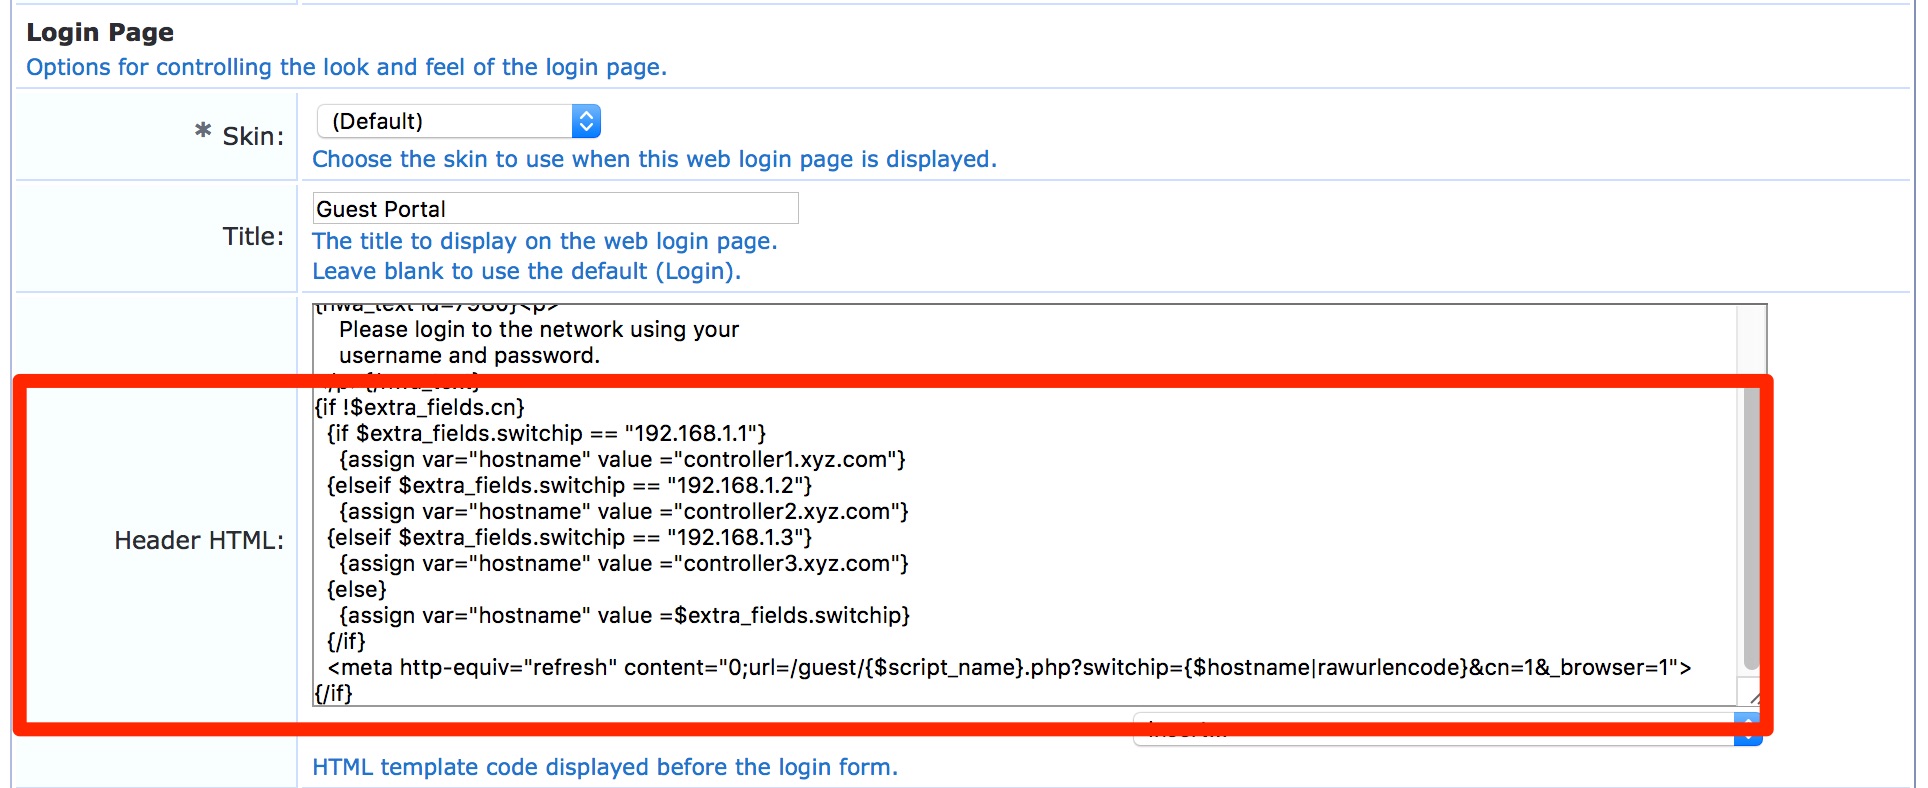
- For Guest Self-Registration page: Guest » Configuration » Pages » Guest Self-Registrations: Edit the self-registration and go to NAS Vendor Settings. If we are using Controller-Initiated logins then we need to add the above script in the Header HTML of the web login page after replacing the highlighted IP and hostname with your controllers IP and hostname mapping.
Verification
We can verify this is working on the client by looking at the redirection URL re-writing the switchip to the respective hostname.