This Article explains about-
i) adding the Aruba IAP as NAD device.
ii) Integrating Aruba Controller with CPPM to perform Dot1x authentication.
iii) Configuring service on CPPM to handle this request.
Environment : This Article is written for CPPM 6.2.0 and greater.
Below are the detailed steps.
1: Adding Aruba Controller as NAD device on CPPM.
Navigate to Configuration > Network > Devices
Click Add Device
Add the device as shown below.
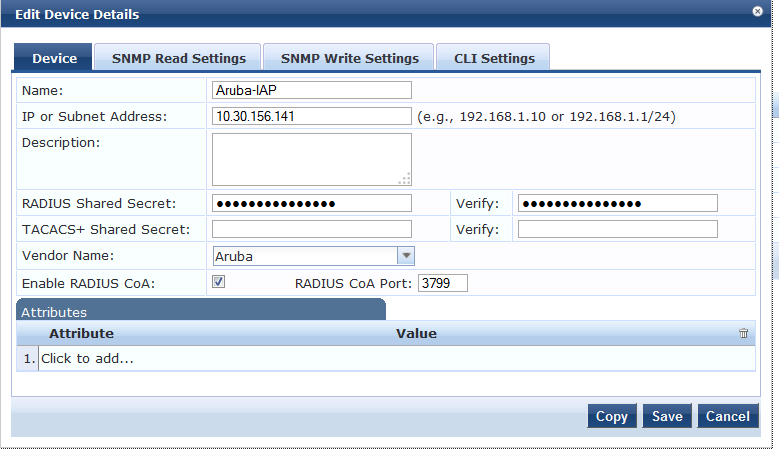
The Vendor name should be selected as Aruba and COA enabled.
also Make sure that we configure the same Radius Shared secret on the VC as well.
2: Integrate Aruba IAP with CPPM to perform Dot1x.
Click on "System" and fill the below details.
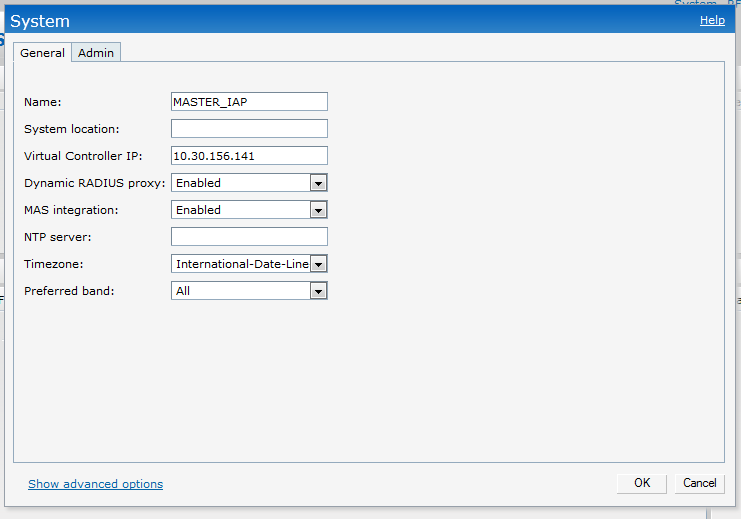
Give an IP to the Virtual Controller and enable Dynamic radius Proxy. This will forward all the radius packets ( from any IAP in the cluster) to CPPM with the VC's IP.
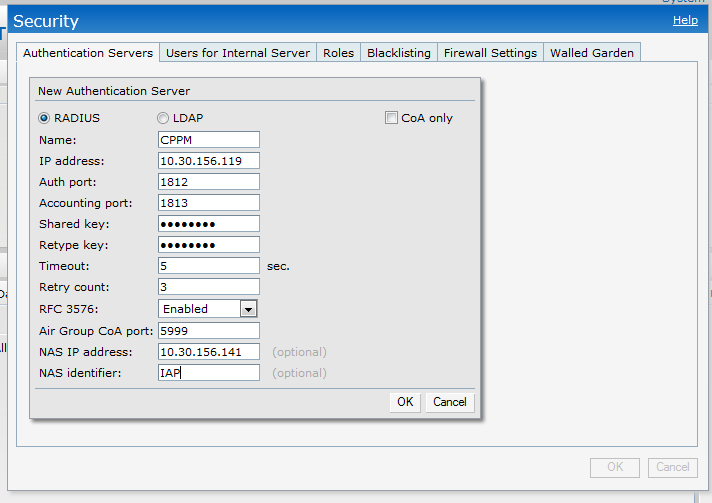
Click on "Authentication" and add a new radius Server.
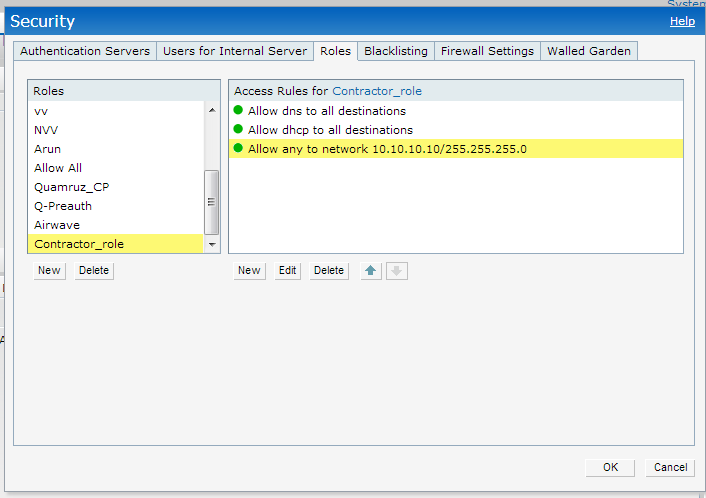
Navigate to Security - Role page and add two new roles.
Employee : allowed to all destination.
Contractor : limited access
These roles can be customized based on user's requirements.
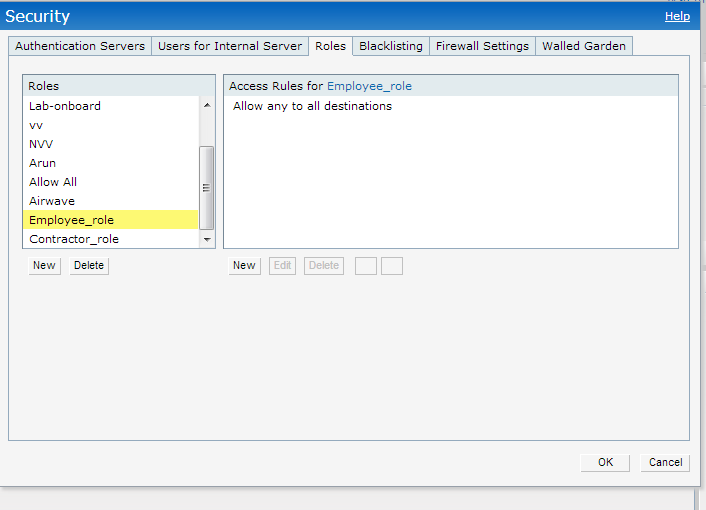
Sample Contractor Role.
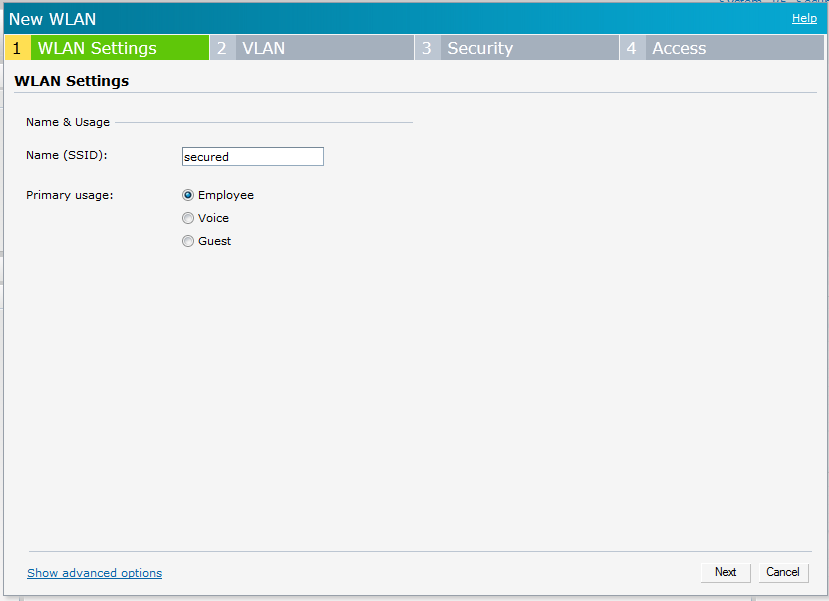
Create a new SSID.
Click on "New" and give a name to the SSID.
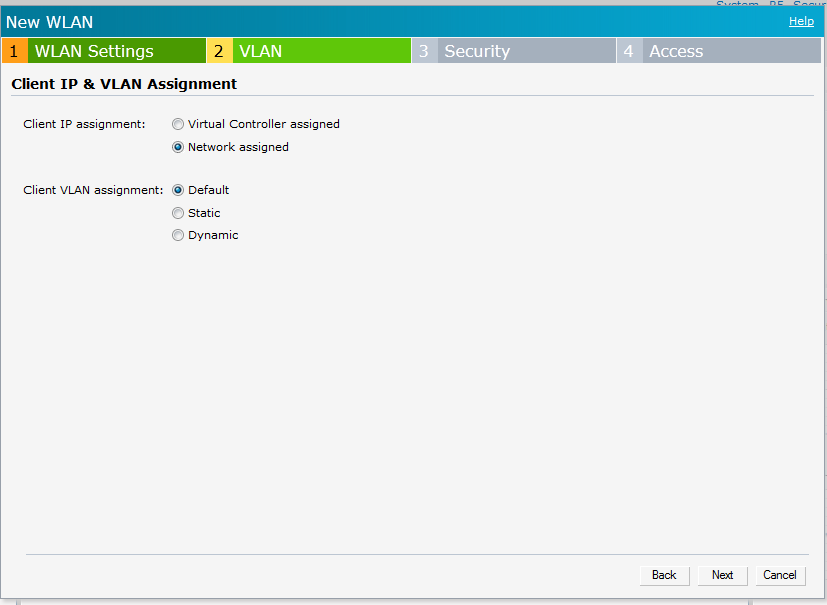
On next page, select the Client IP assignment.
We can have it either VC assigned or Network Assigned based on our requirements.
On the Next page,
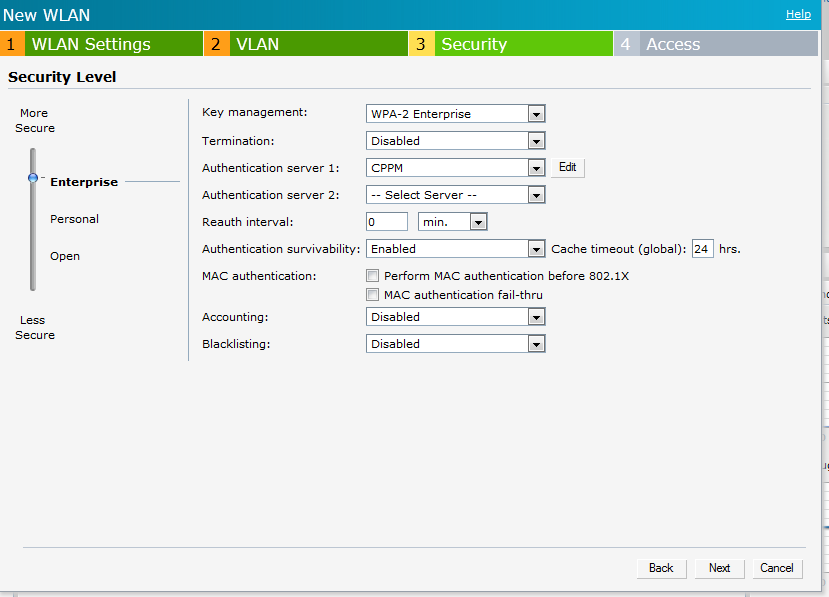
Select the security as "Enterprise"
Key Management as "WPA-2-Enterprise"
Authentication server as " CPPM"
Authentication Survivability - enable this. This if enabled will cache the MAC of the client and will authenticate it for 24 hours if the CPPM server is offline.
On the next page,
We can leave the Access control as "unrestricted" as we will push the role from CPPM.
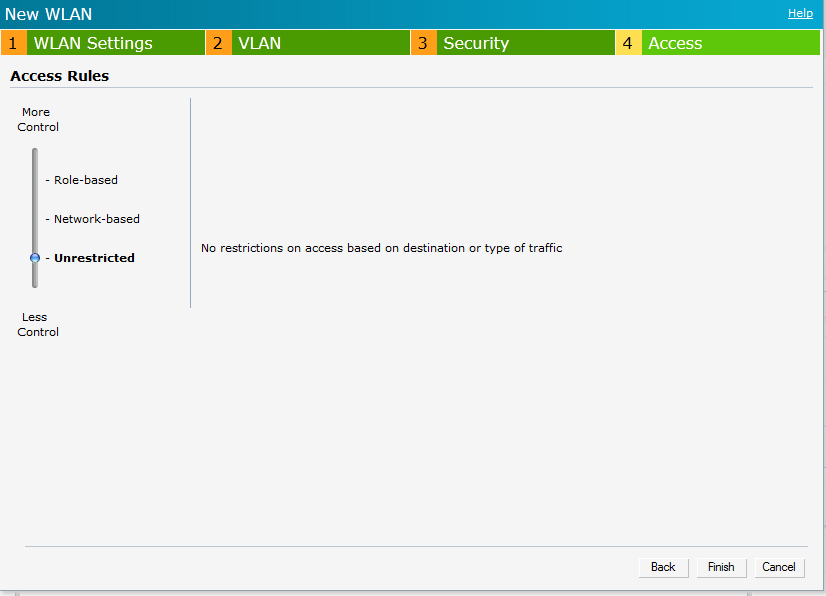
This completes the configuration on the IAP.
3: Configuration of CPPM
Navigate to "Configuration » Identity » Local Users" and create two users.
 For Employee user assign Employe role and for Contractor assign Contractor Role.
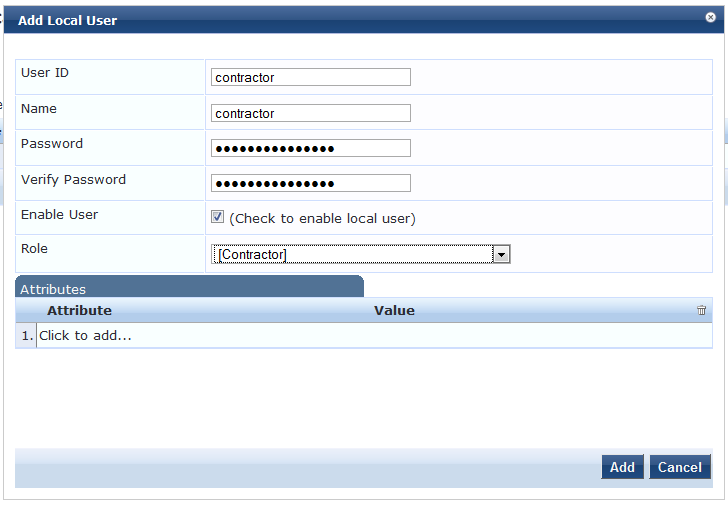
These users would be used for authentication.
Now, we will add Enforcement profiles for Employee and Contractor.
Navigate to "Configuration » Enforcement » Profiles » Add Enforcement Profile".
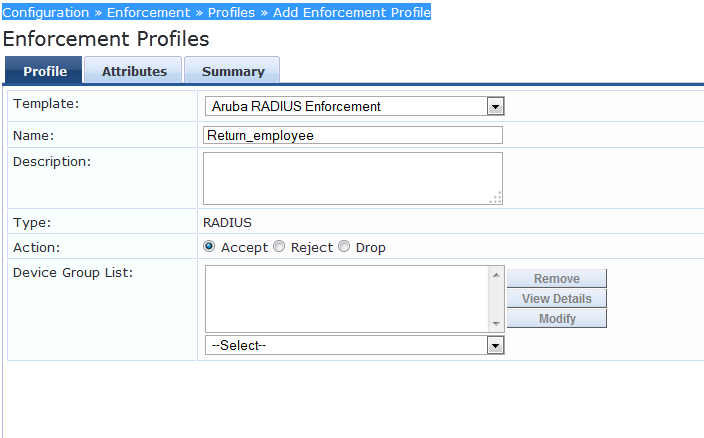
The Aruba-user-role must be exactly same as the role which we added on the IAP.
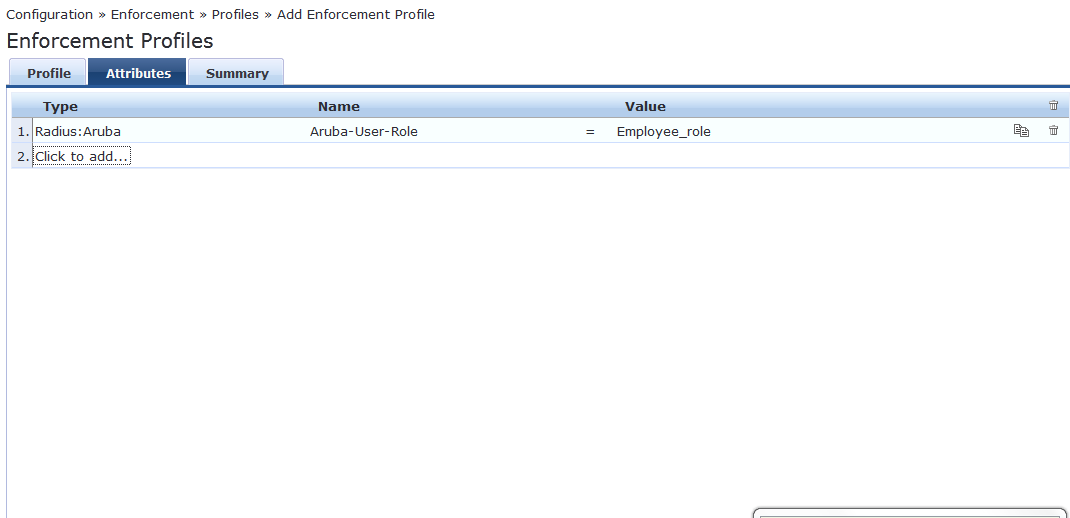
Similarly add a Contractor enforcement policy .
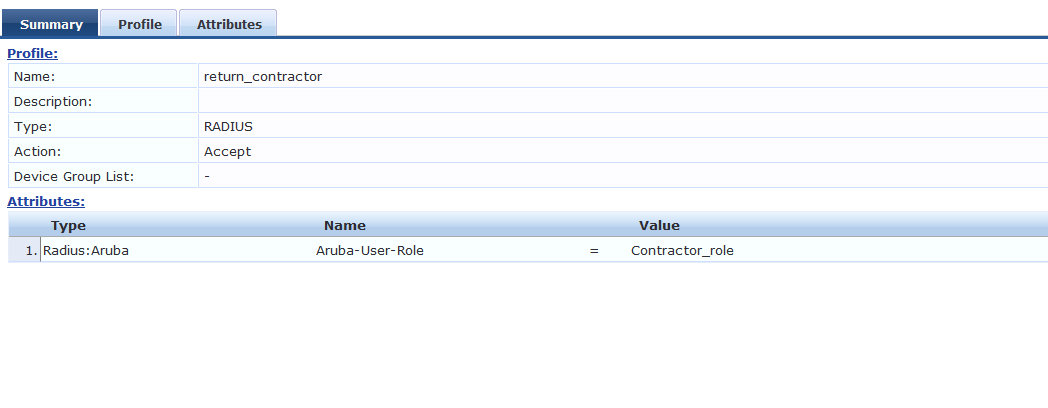
Now we will add an Enforcement Policy to apply the logic.
Navigate to "Configuration » Enforcement » Policies"
and Add a new policy.
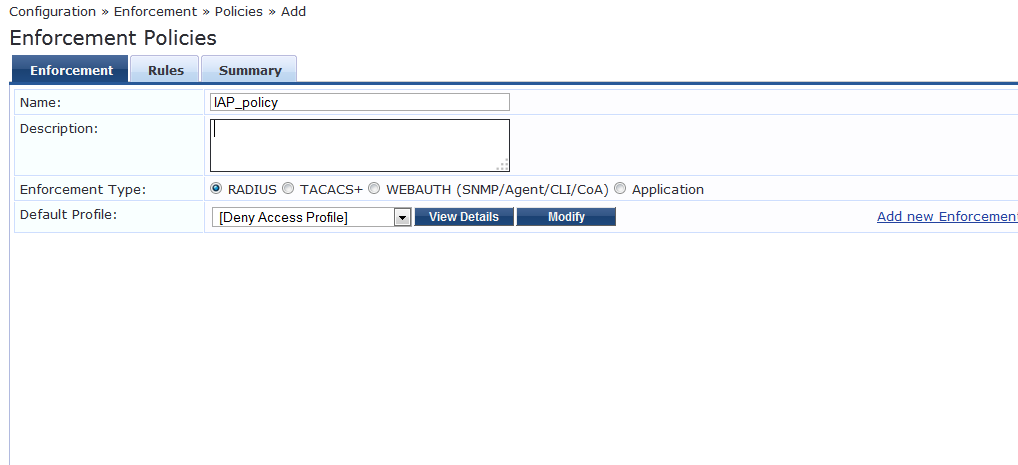
Make sure that the Default Role is set to "Deny Access Profile" and Enforcement type is "Radius".
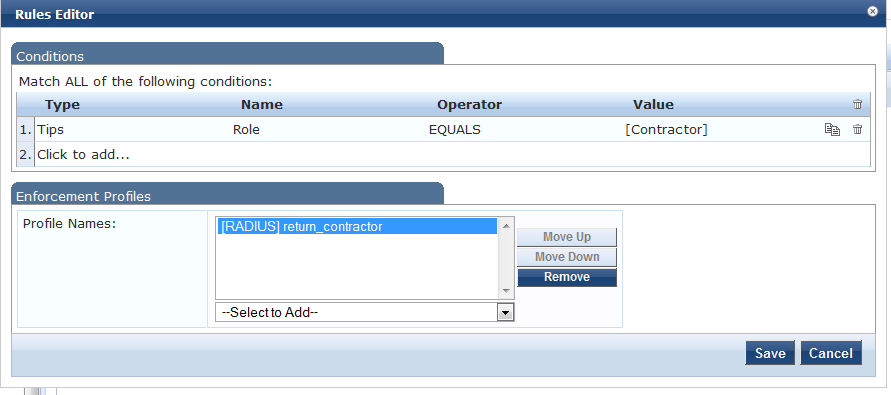
This Rule is set as " If Tips Role = Contractor the CPPM will return the Contractor Role to IAP"
Similarly set the rule for Employee.
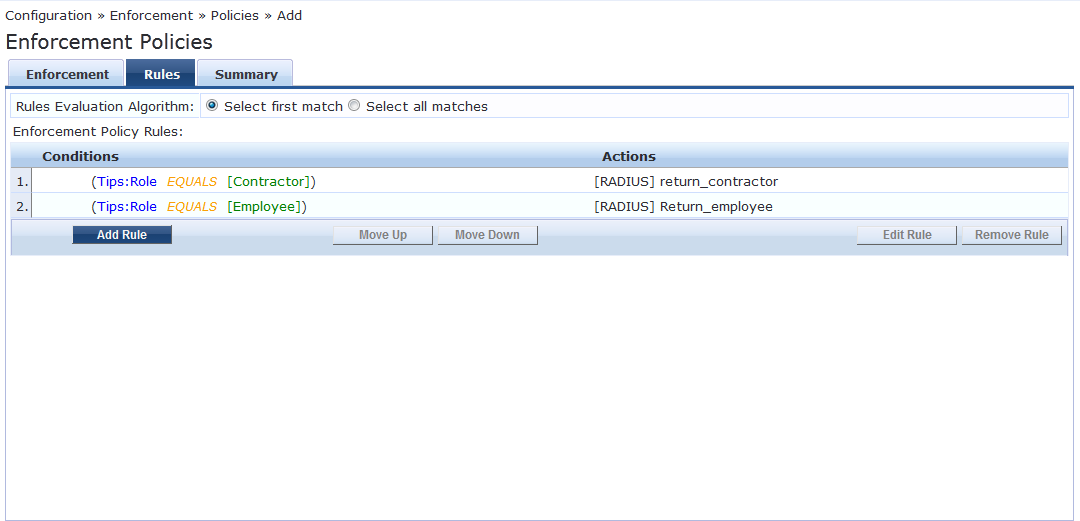
Save this policy and exit.
Now, we will add a Service to handle this request.
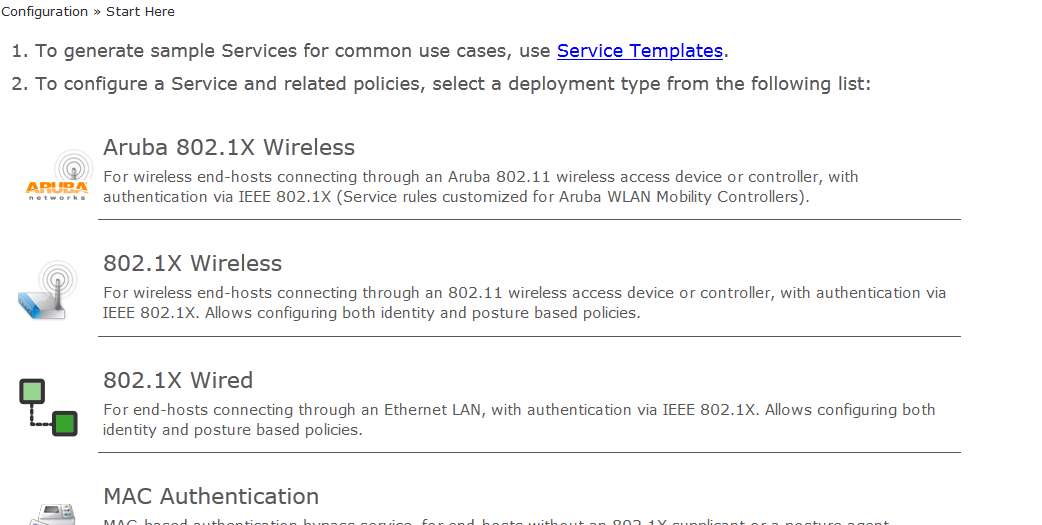
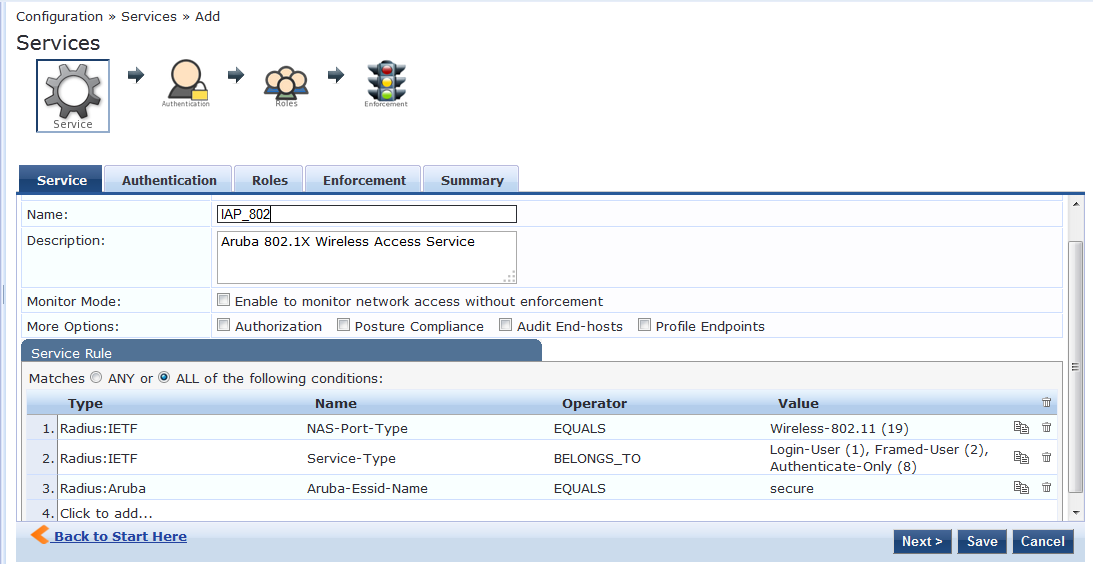
Navigate to "Configuration » Start Here" and use the default "Aruba 802dot1x wireless template."
Edit the last rule and enter the exact name of the SSID.
Leave the authentication Methods as default and add Local User repository as Authentication Source.
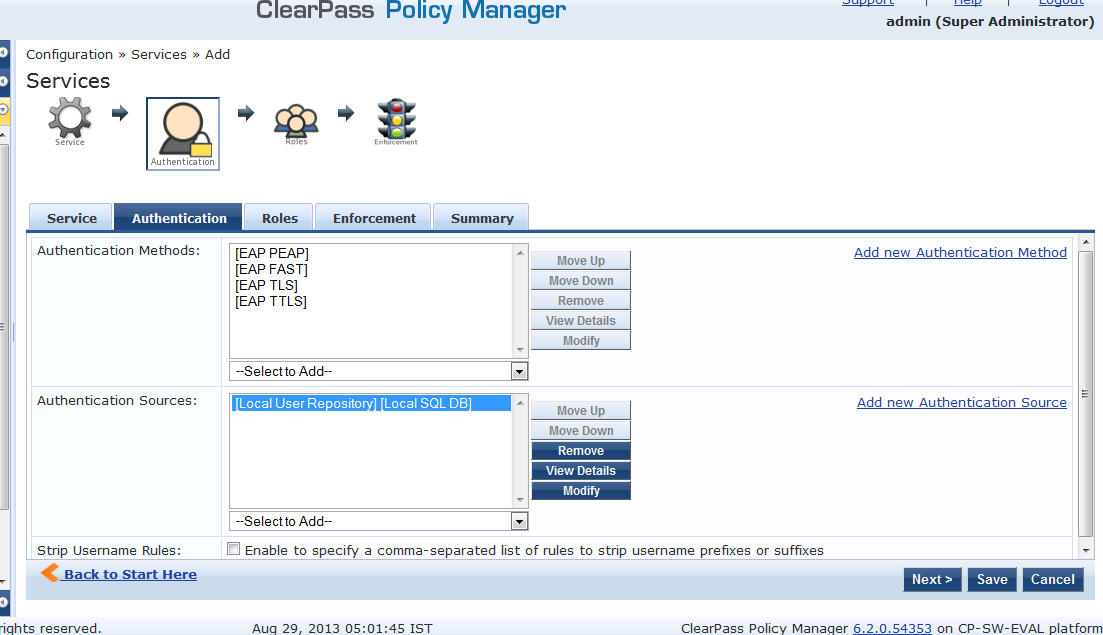
Note: We can also use AD to authenticate the users, but CPPM must be joined to the Domain.
Leave the Roles tab as blank becasue we are not using AD for authentication.
On the Enforcement Tab, mapp the correct enforcement profile.
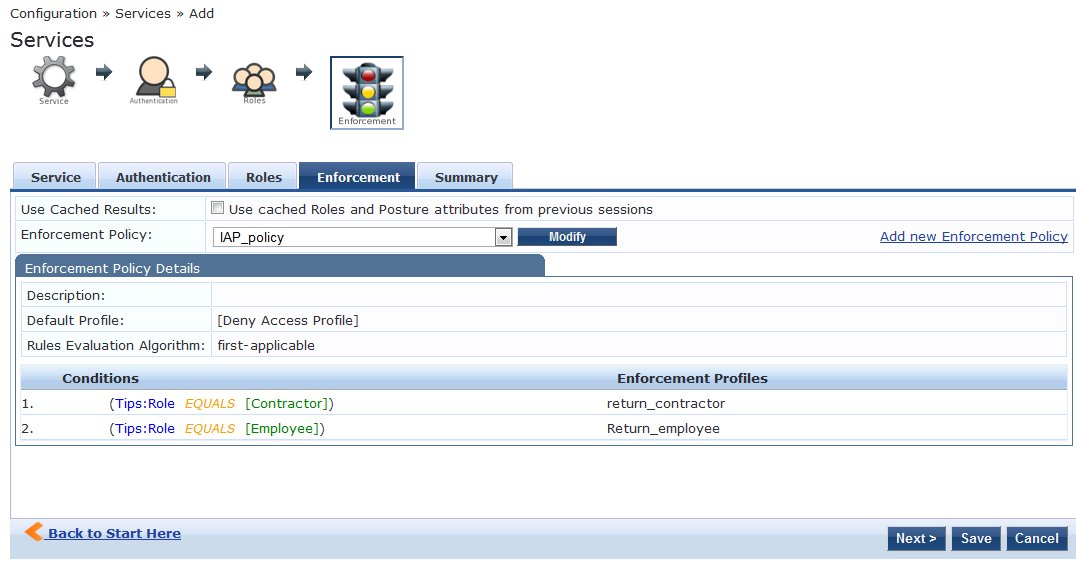
Click on Save and this completes the CPPM configuration as well.