This tutorial will explain how to physically add a new drive your VMWare server and increase the diskspace on Airwave to utilize this new drive.
Attached is a document on how to accomplish this task.
EDIT: As requested (finally had time), here is the article posted.
1 Purpose of document
To be able to extend the hard drive space of an Airwave server deployed on a Virtual Machine using VMWare.
2 How to add a new SATA drive to an VMWare ESXi Server
- Insert new drive into spare slot on the server, connect all cables required
- Boot Airwave server
- Log into your vSphere application.
- Navigate to the Configuration section as per below
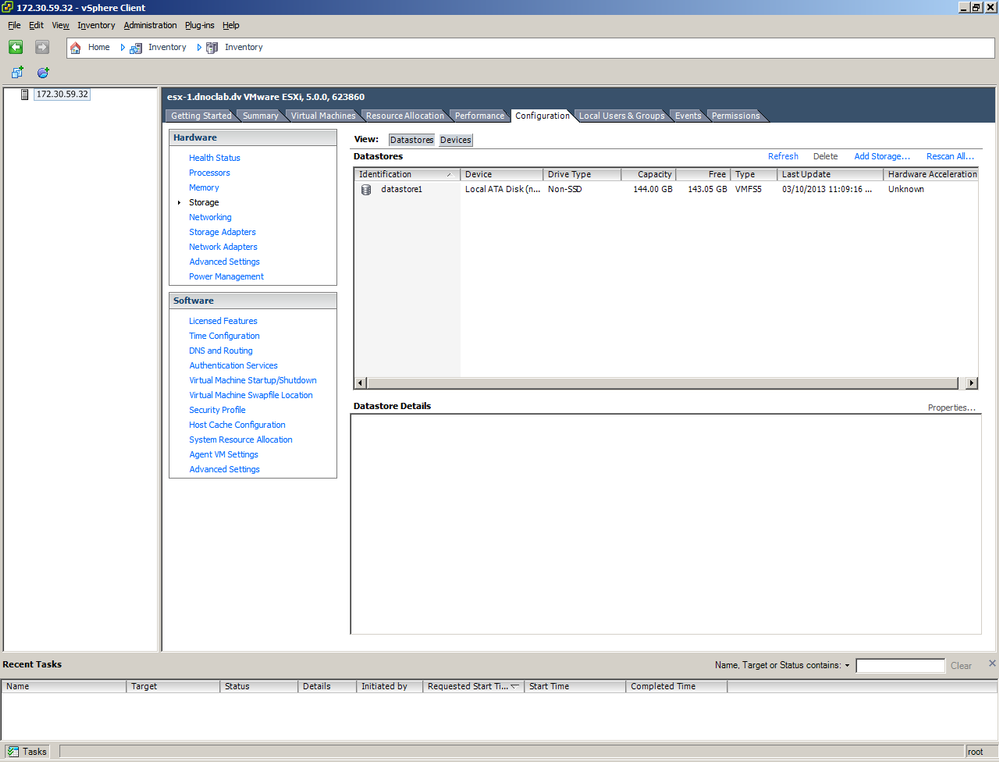
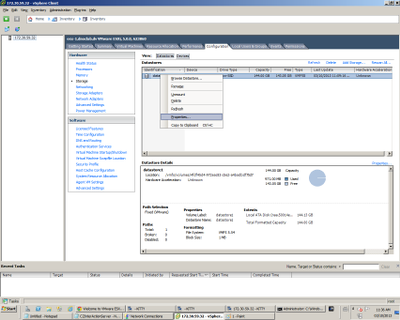
Highlight the desired datastore where AMP is installed on.
Right-click and select ‘properties’
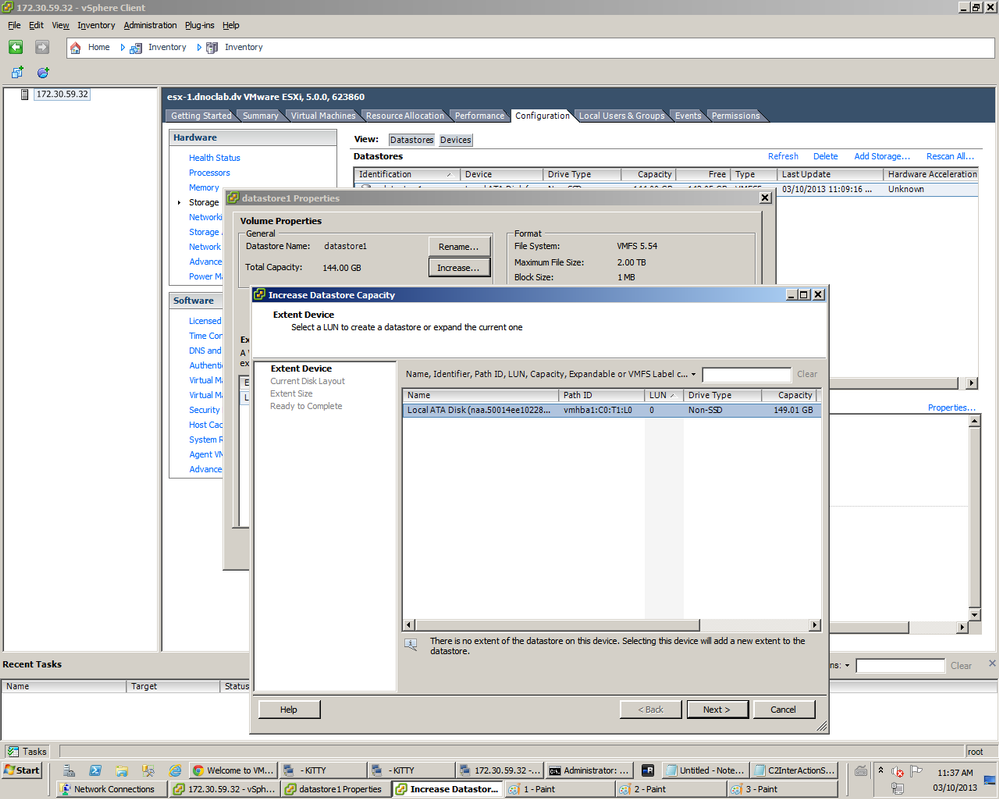
Click on the ‘Increase’ button and it will discover your new drive, highlight it and click on ‘next’
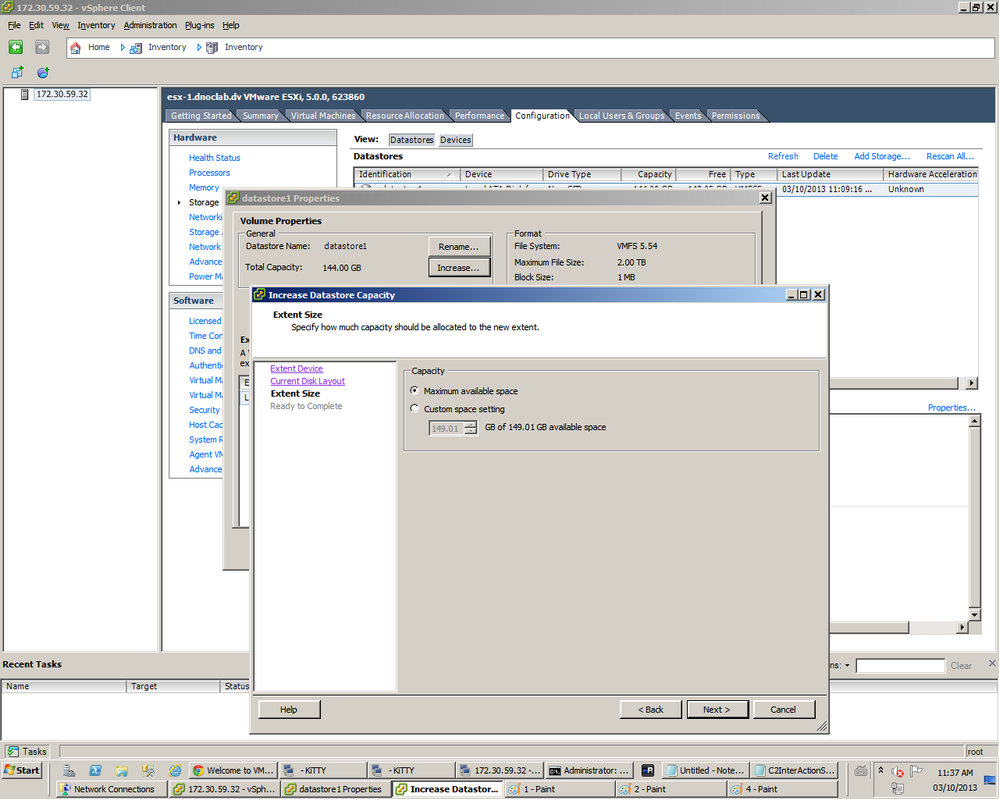
Select Maximum available space or if desired custom space setting. Click on ‘next’
Then click on Finish
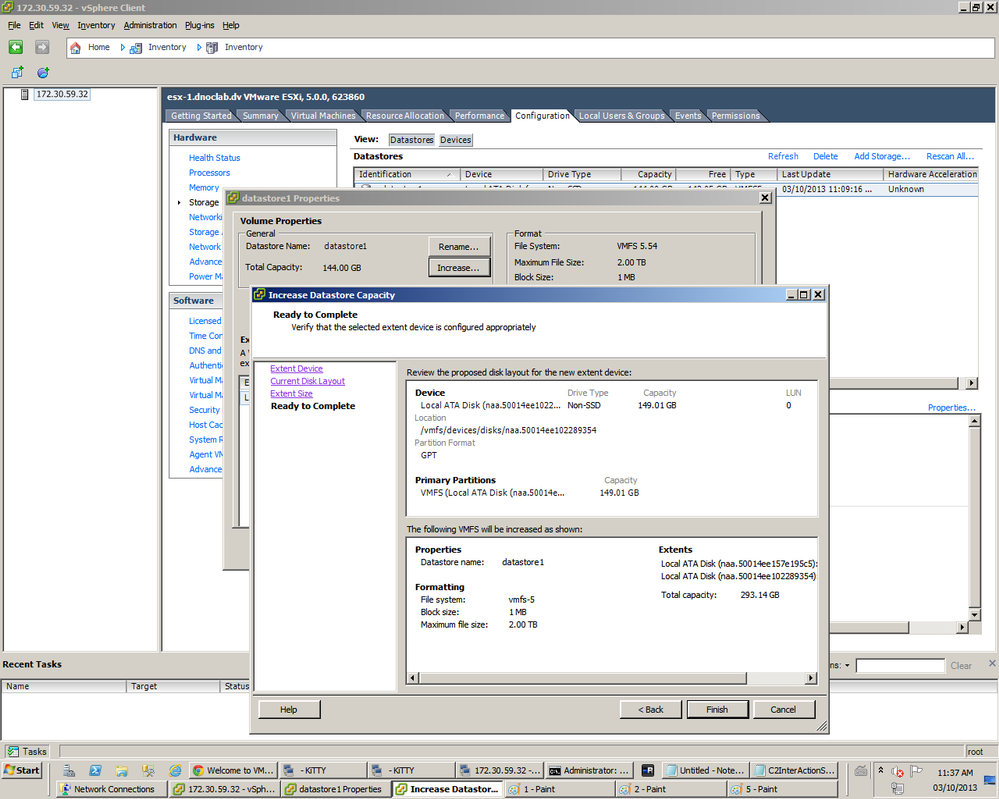
Once you’ve clicked on finish, you will now see both disks and your total capacity changed.
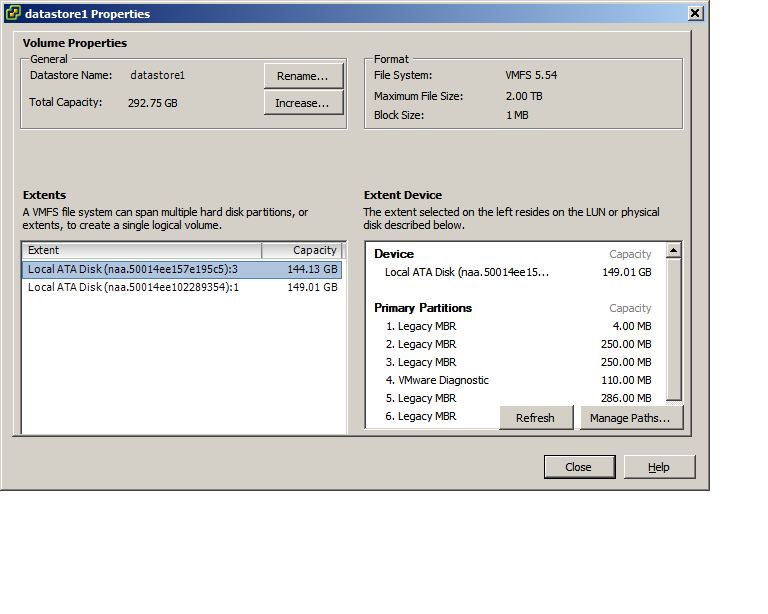
You can click on close.
You have now added the new sata drive to your existing datastore.
3 Modification to the Airwave VM
Next step is to have Airwave recognize this new hard drive.
First step is to increase the amount of Hard Drive space the VM will be using
Go into Edit settings of your VM and click on the hard disk
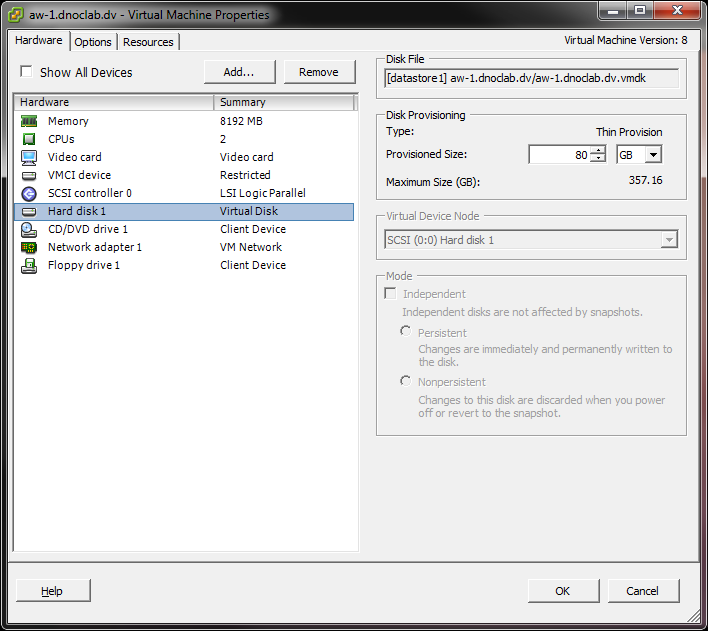
Make it whatever size you want (depends on the datastore) and click ok,
Now let’s make AMP recognize the new HD Space.
There are multiple ways to accomplish this but I found this to be the easiest.
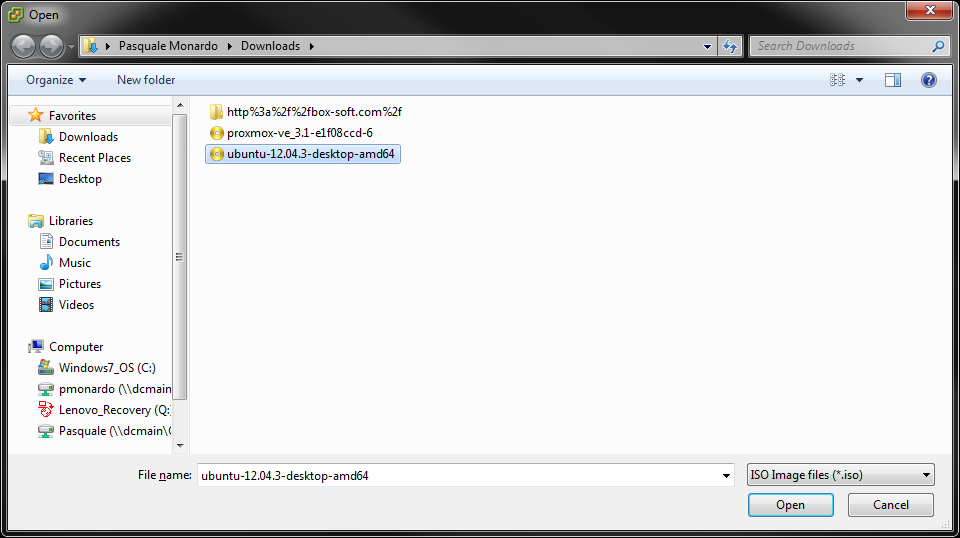
Download a LIVE CD version of Ubuntu Desktop and save the ISO
Select Ubuntu as the ISO for the CDROM Drive
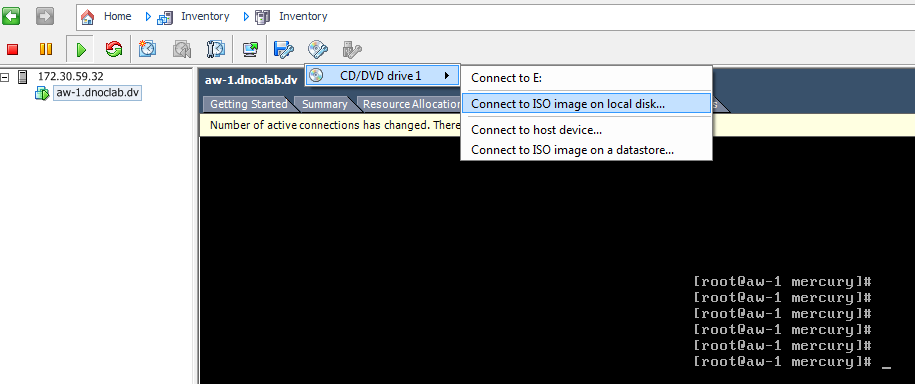
Reboot AMP and press F2 when prompted to go into the boot screen, choose CDROM as the 1st boot device.
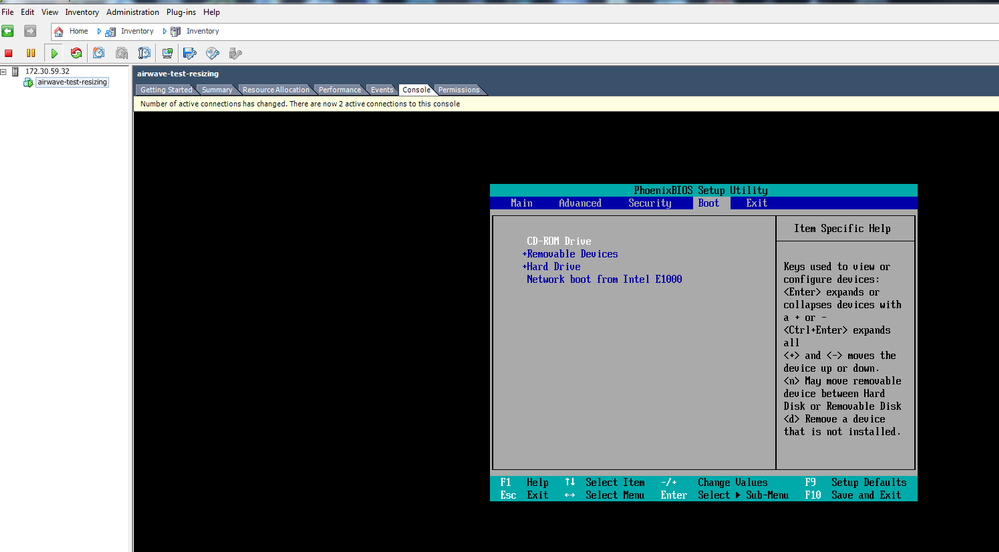
Save and reboot
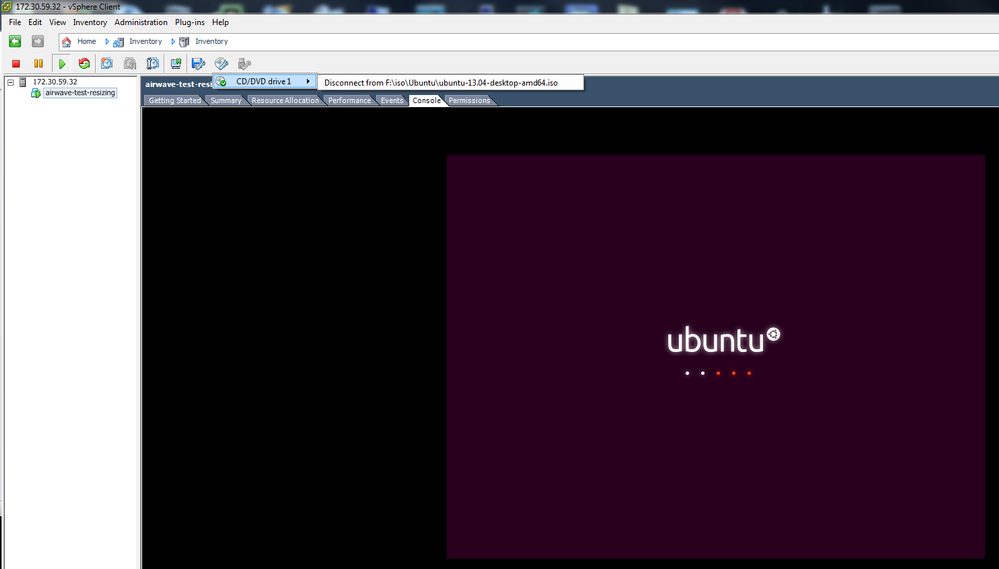
Then Ubuntu begins to load
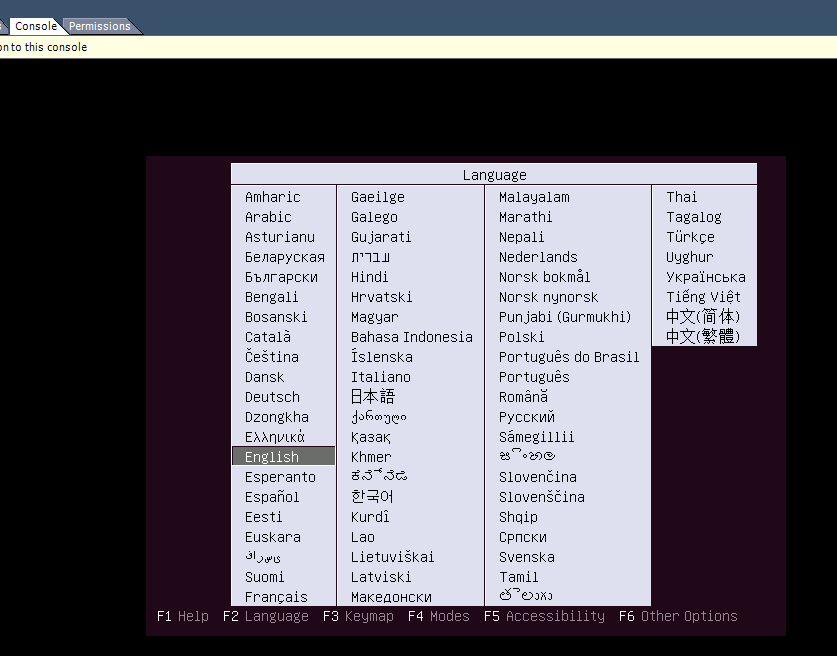
Choose language of your choice
Select ‘Try Ubuntu without installing’
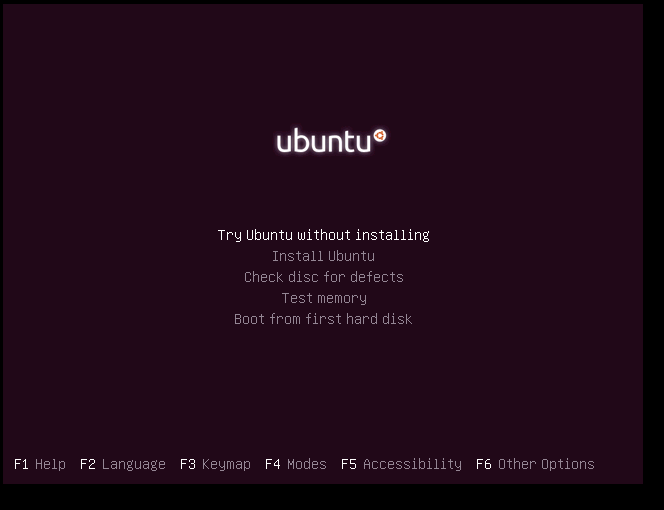
It begins to load:
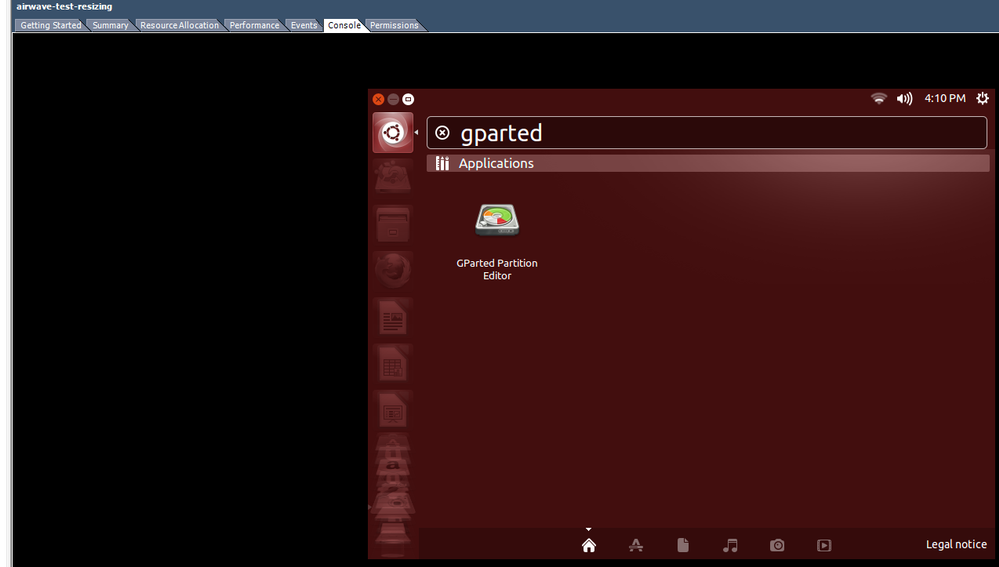
Once it loads, go into the GPARTED program.
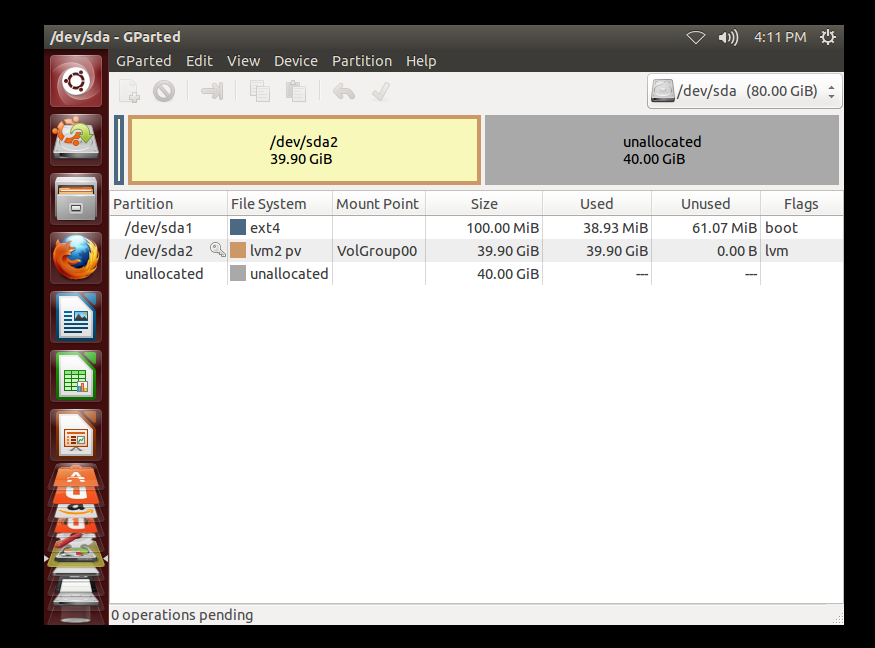
You will now see an unallocated section of HD Space
Right-Click on it and create new partition and leave the file system to be unformatted.
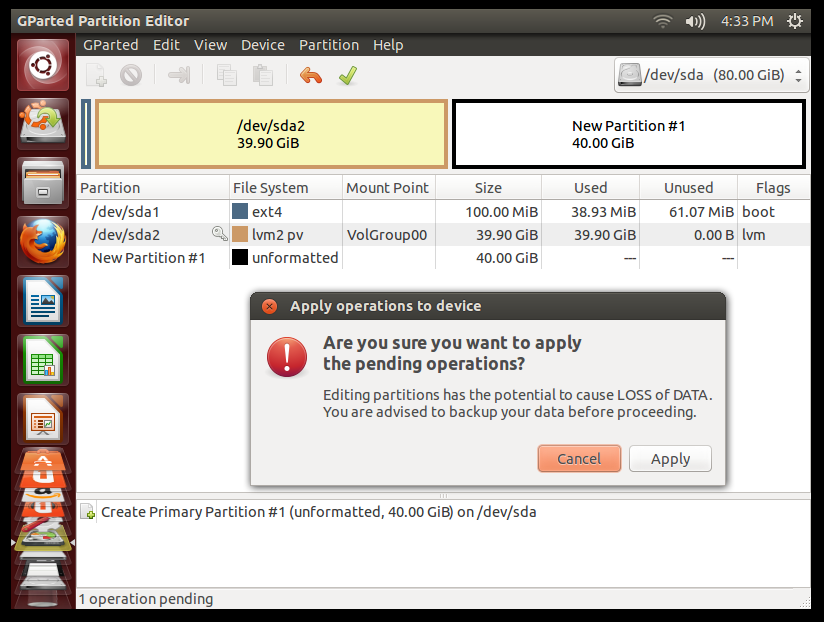
Click Apply.
You should see something like this /dev/sda3
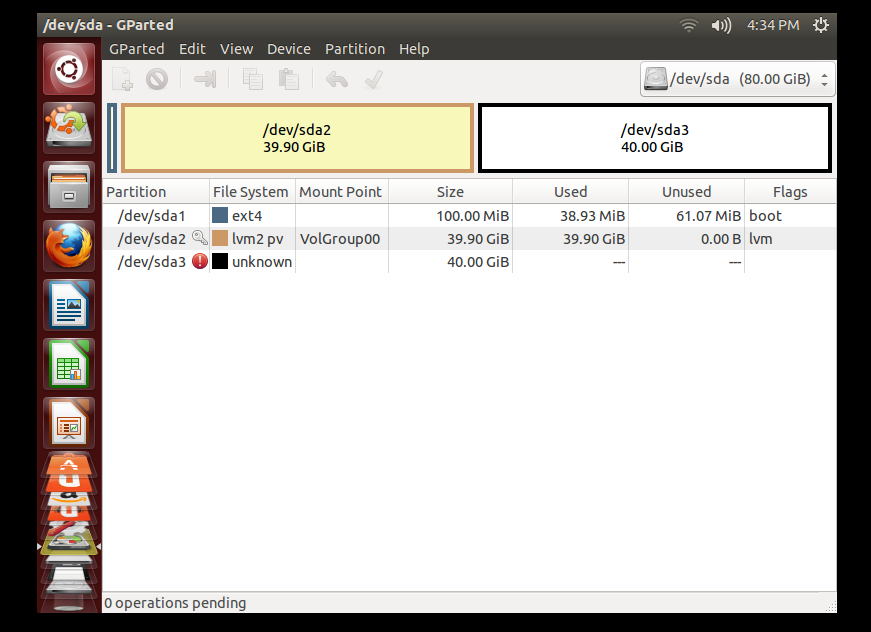
Next step is to add the LVM flag to the new drive.
Right-click and click on Manage Flags
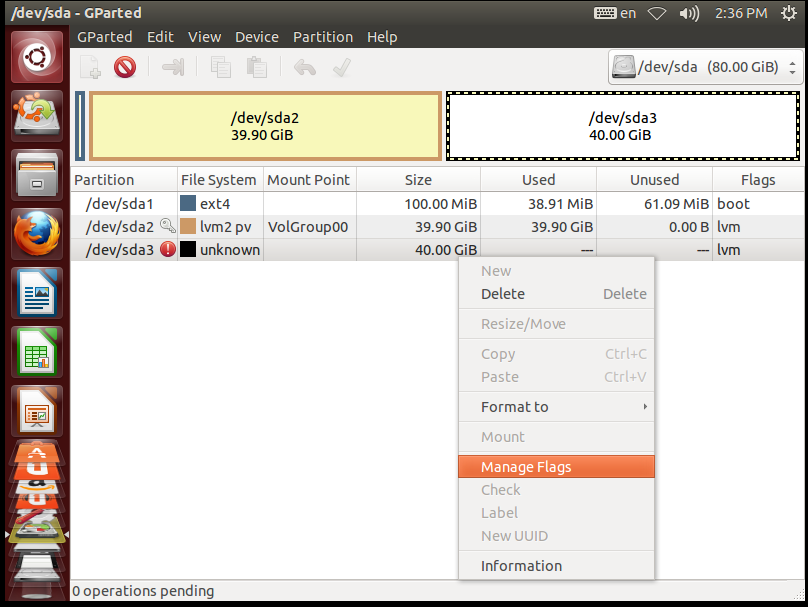
Select the ‘lvm’ flag
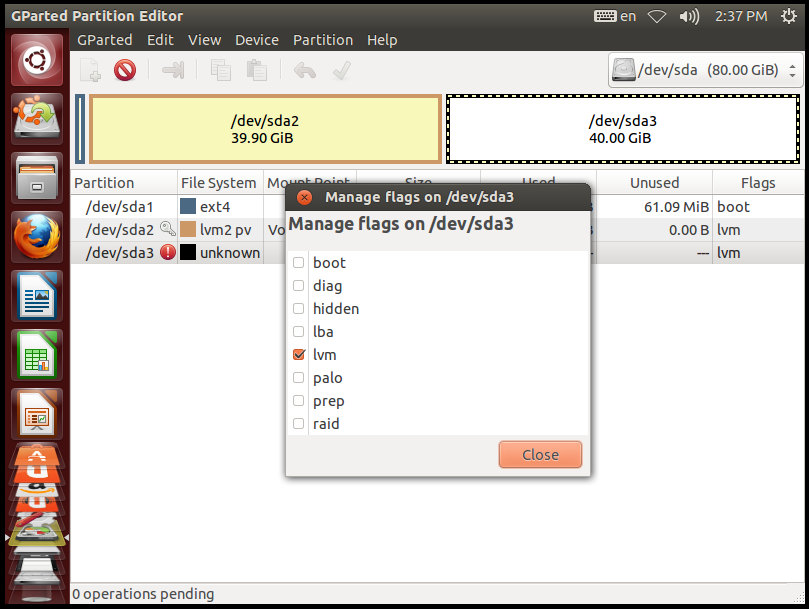
Select LVM and click on close.
At this time, you can shutdown Ubuntu and boot back into AMP (don’t forget to remove the ISO from the CDROM).
4 Configuring CentOS to recognize the new drive
Once AMP has booted up, log in via SSH
Next step is to make sure you see the new drive added
# Confirm /dev/sda3 exists or if it gets another name using ‘fdisk –l’
[root@aw-1 mercury]# fdisk -l
Disk /dev/sda: 85.9 GB, 85899345920 bytes
255 heads, 63 sectors/track, 10443 cylinders
Units = cylinders of 16065 * 512 = 8225280 bytes
Sector size (logical/physical): 512 bytes / 512 bytes
I/O size (minimum/optimal): 512 bytes / 512 bytes
Disk identifier: 0x0009f7c3
Device Boot Start End Blocks Id System
/dev/sda1 * 1 13 102400 83 Linux
Partition 1 does not end on cylinder boundary.
/dev/sda2 13 5222 41839616 8e Linux LVM
/dev/sda3 5222 10444 41943040 8e Linux LVM
Disk /dev/mapper/VolGroup00-LogVol01: 4294 MB, 4294967296 bytes
255 heads, 63 sectors/track, 522 cylinders
Units = cylinders of 16065 * 512 = 8225280 bytes
Sector size (logical/physical): 512 bytes / 512 bytes
I/O size (minimum/optimal): 512 bytes / 512 bytes
Disk identifier: 0x00000000
Disk /dev/mapper/VolGroup00-LogVol00: 81.4 GB, 81436606464 bytes
255 heads, 63 sectors/track, 9900 cylinders
Units = cylinders of 16065 * 512 = 8225280 bytes
Sector size (logical/physical): 512 bytes / 512 bytes
I/O size (minimum/optimal): 512 bytes / 512 bytes
Disk identifier: 0x00000000
[root@aw-1 mercury]#
# SDA3 is our new drive
Now we create the physical volume using the command ‘pvcreate /dev/sda3’
# Create the one physical volume
[root@aw-1 mercury]# pvcreate /dev/sda3
Writing physical volume data to disk "/dev/sda3"
Physical volume "/dev/sda3" successfully created
We then check the configuration of the volume group using ‘vgdisplay’
# Check current configuration of the volume group is 1 physical volume
[root@aw-1 mercury]# vgdisplay
--- Volume group ---
VG Name VolGroup00
System ID
Format lvm2
Metadata Areas 1
Metadata Sequence No 3
VG Access read/write
VG Status resizable
MAX LV 0
Cur LV 2
Open LV 2
Max PV 0
Cur PV 1
Act PV 1 #Actual Physical Volumes = 1
VG Size 39.88 GiB
PE Size 32.00 MiB
Total PE 1276
Alloc PE / Size 1276 / 39.88 GiB
Free PE / Size 0 / 0
VG UUID 56Leag-jwVA-RJOD-0WOm-fltC-2fcI-RAKqB1
Add new SDA3 to the LVM Volume group using ‘vgextend VolGroup00 /dev/sda3’
# 2. Add it to the volume group
[root@aw-1 mercury]# vgextend VolGroup00 /dev/sda3
Volume group "VolGroup00" successfully extended
Validate volume group
# Validate size of the volume group
[root@aw-1 mercury]# vgdisplay
--- Volume group ---
VG Name VolGroup00
System ID
Format lvm2
Metadata Areas 2
Metadata Sequence No 4
VG Access read/write
VG Status resizable
MAX LV 0
Cur LV 2
Open LV 2
Max PV 0
Cur PV 2
Act PV 2
VG Size 79.84 GiB
PE Size 32.00 MiB
Total PE 2555
Alloc PE / Size 1276 / 39.88 GiB
Free PE / Size 1279 / 39.97 GiB
VG UUID 56Leag-jwVA-RJOD-0WOm-fltC-2fcI-RAKqB1
Act PV is now 2 and VG size is doubled
Now let’s resize the volume.
This depends on the ‘FREE PE / Size’. You must use the value contained there.
In this case 1279 as indicated above.
Let’s resize the space using the command below
# Resize the space
[root@aw-1 mercury]# lvextend --resizefs --extents +1279 /dev/VolGroup00/LogVol00
Extending logical volume LogVol00 to 75.84 GiB
Logical volume LogVol00 successfully resized
resize2fs 1.41.12 (17-May-2010)
Filesystem at /dev/mapper/VolGroup00-LogVol00 is mounted on /; on-line resizing required
old desc_blocks = 3, new_desc_blocks = 5
Performing an on-line resize of /dev/mapper/VolGroup00-LogVol00 to 19881984 (4k) blocks.
The filesystem on /dev/mapper/VolGroup00-LogVol00 is now 19881984 blocks long.
And confirm Free PE / Size is now 0
# Confirm the LVM volume group has been extended with the
# new harddrive
[root@aw-1 mercury]# vgdisplay
--- Volume group ---
VG Name VolGroup00
System ID
Format lvm2
Metadata Areas 2
Metadata Sequence No 5
VG Access read/write
VG Status resizable
MAX LV 0
Cur LV 2
Open LV 2
Max PV 0
Cur PV 2
Act PV 2
VG Size 79.84 GiB
PE Size 32.00 MiB
Total PE 2555
Alloc PE / Size 2555 / 79.84 GiB
Free PE / Size 0 / 0
VG UUID 56Leag-jwVA-RJOD-0WOm-fltC-2fcI-RAKqB1
[root@aw-1 mercury]# df -h
Filesystem Size Used Avail Use% Mounted on
/dev/mapper/VolGroup00-LogVol00
75G 4.8G 67G 7% /
tmpfs 3.9G 0 3.9G 0% /dev/shm
/dev/sda1 97M 36M 57M 39% /boot
You have now successfully resized AMP to use the extra HD space