Aruba 802.1X authentication with Clearpass.
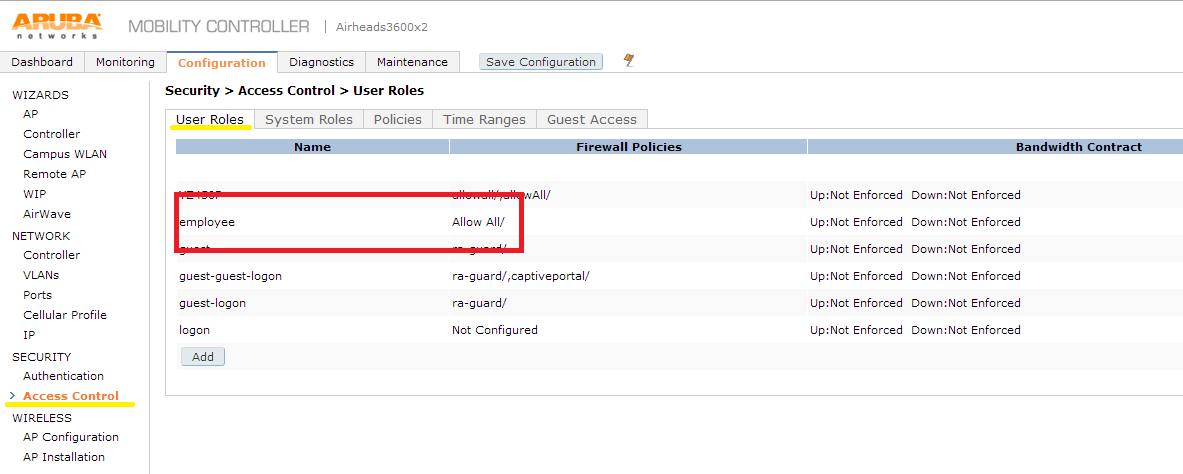
First I like to start with creating the role that we will be returning from Clearpass. We will create a simple employee role and allow all.
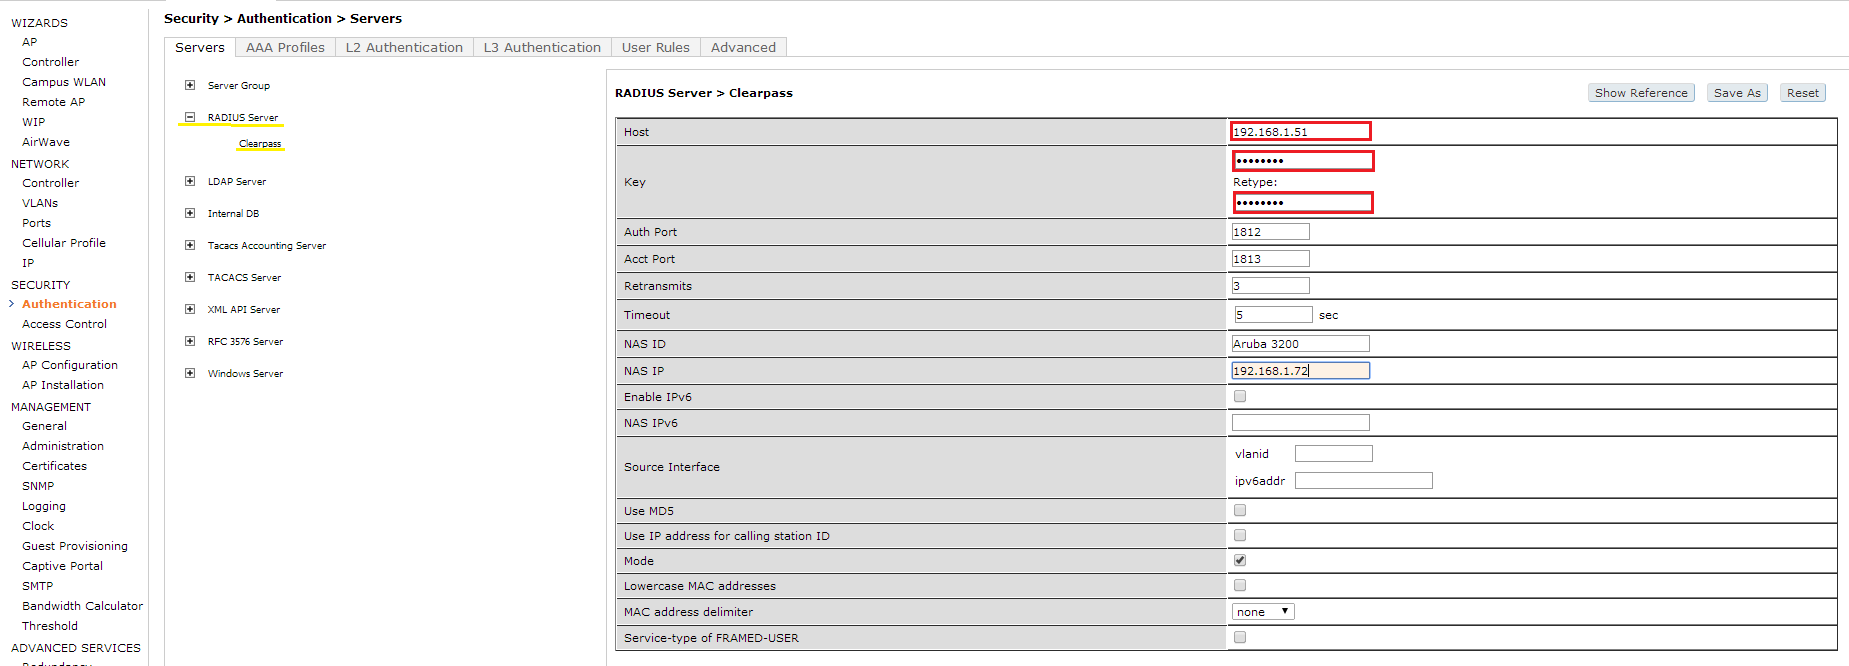
Next let’s define the radius server. You will need to provide the IP of the server and a shared key. We will use this in a few min for the Clearpass portion.
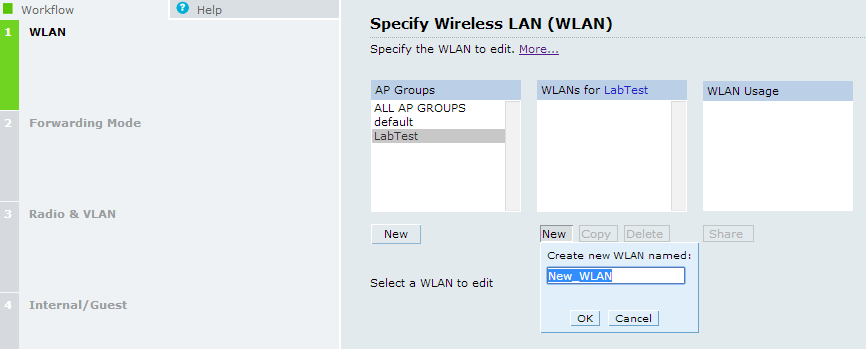
Now we will create the WLAN. I have always had good luck with the wizard so I will use it. Begin by creating the new SSID (802.1x Clearpass) and hit next.
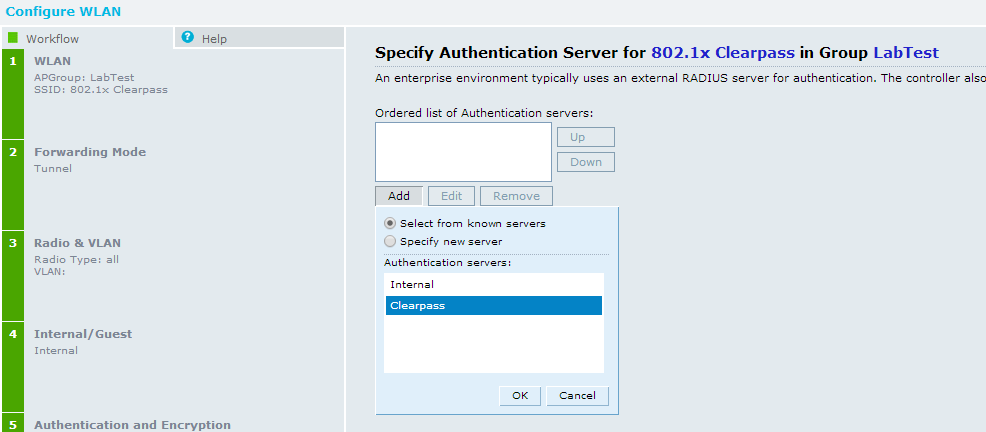
Next option will be to select the forwarding mode for traffic on this WLAN. Next will be to select the radio type, to broadcast the SSID or not, and the VLAN for the WLAN. Next you chose the intentions for the WLAN, guest or internal, for this we will go with internal. The next page you specify your security. We want to choose strong encryption with 802.1x authentication so slide it all the way to the top. Now we select the authentication server we defined earlier. Click add and check the “select from known server” and select the server you created.
Next is role assignment, since we will be returning roles from Clearpass you can leave this alone. That will finish out the WLAN creation.
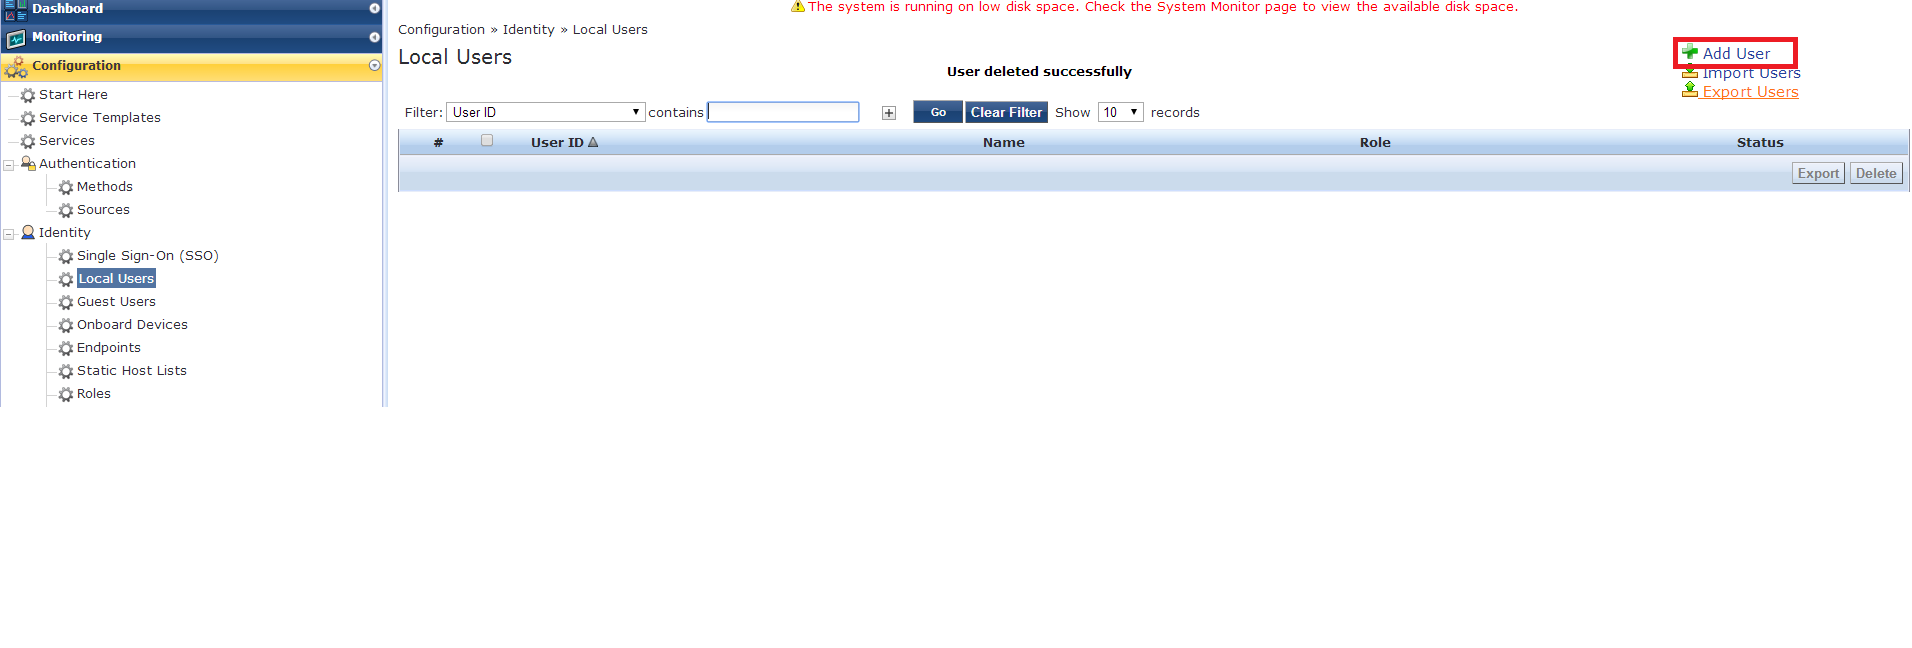
Now to Clearpass, to start we will have to create a local user in the local user repository. Navigate to Configuration>Identity>Local Users. In the upper right click “Add User”
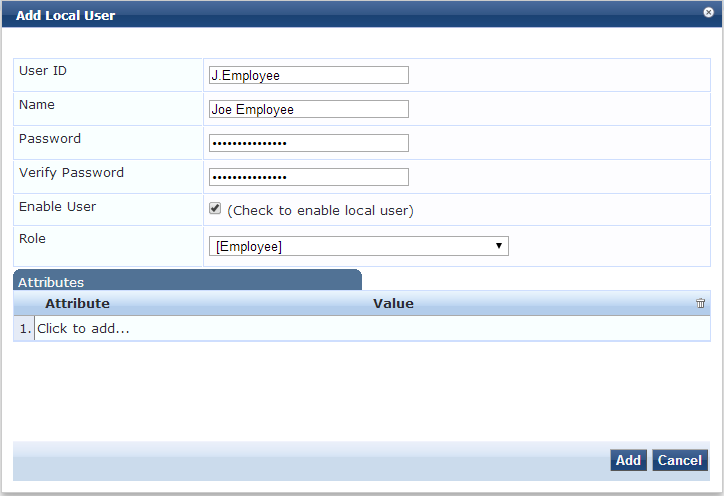
Enter the user ID this will be to log in with. Also fill in for name (first and last) and password. Make sure the user is enabled and select the default role of “employee” and click add.
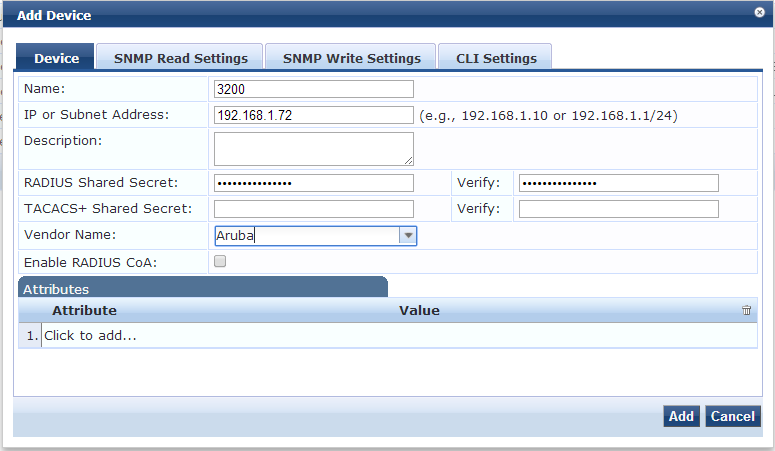
Next we need to add a new network device. Navigate to Network>Devices and select add new device. Enter the name, IP and shared secret used earlier when we defined the radius server and set the vendor to Aruba.
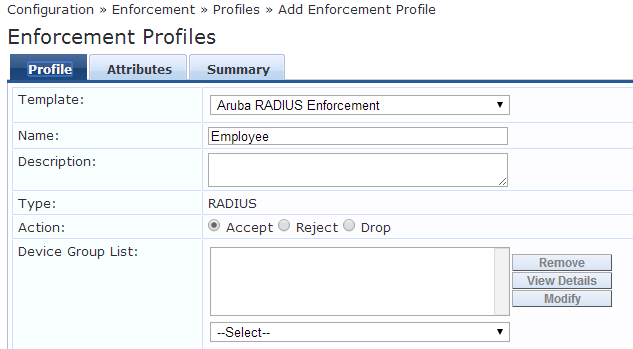
Now navigate to Enforcement>Profiles. In the upper right select “Add Enforcement Profile” Add the name for the profile and for action, check Accept.
For attributes you will need to enter the exact name of the role that was created for the Value. Hit save.
(to change just click under Value)

Now to create an enforcement policy. Click Add Enforcement Policy. Add a name for the policy, set enforcement to radius and for the default profile select the profile we just created.

For rules change Type to Tips, Name to Role, Operator to EQUALS, and set the Value to the employee role on the dropdown list. Set the enforcement profile to the enforcement profile we just created and hit save. (to change just click on the word below Operator)
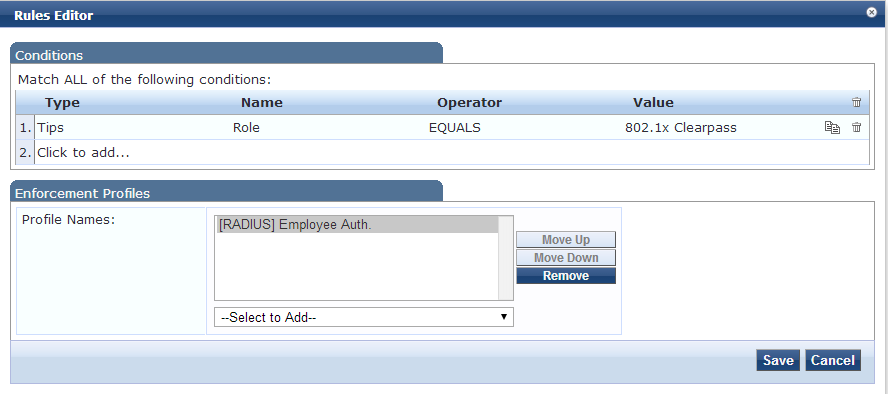
We need to create a Service to use. Click Add Service. Leave the type at Aruba 802.1x Wireless. Enter the name and for service rule 3, change the operator to EQUALS and set the value to the exact name of the SSID created earlier.

Set the authentication source to the local user repository.
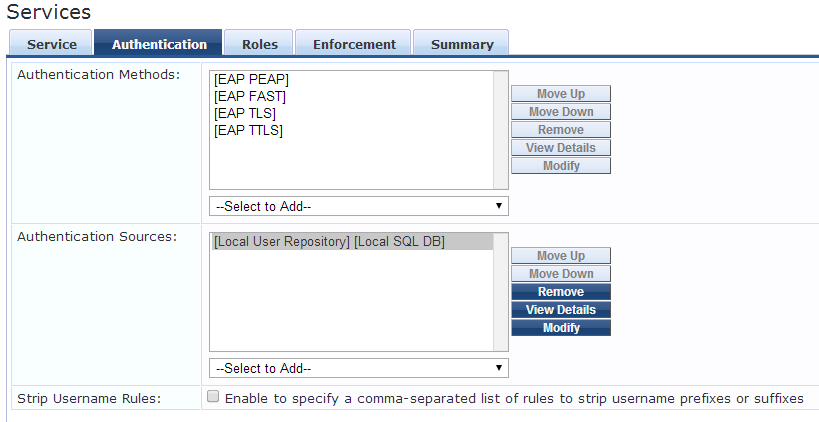
We will skip the Roles tab, on the Enforcement set the Enforcement policy to the one created earlier and hit save. You might have to move the new service up the list if you run into the wrong service when trying to authenticate

Now we are ready to test. By connecting to the new SSID and entering the credientials for the local user created earlier. To check we can navigat to Monitoring>Access Tracker


And to verify the correct role has been returned to the controller, navigate to clients under the monitoring tab on the controller.
