日本だと、Branch GatewayのUplinkにPPPoE接続をしたいケースも多いと思うので、そのPPPoEの設定について解説します。
1. Central側での設定
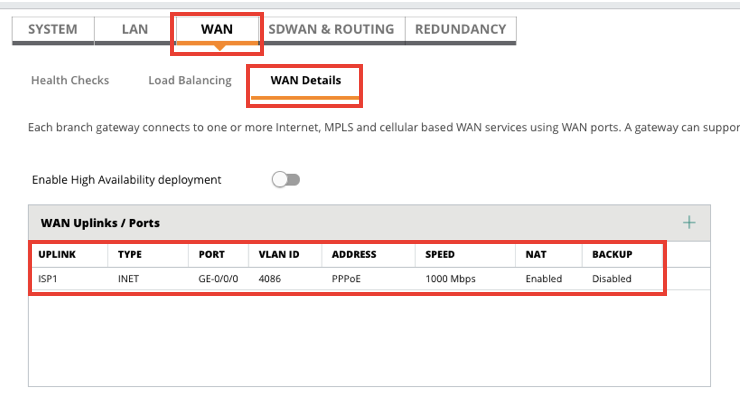
BGWの初期設定も参考にしていただき、Basic Mode でWANのリンクを作成します。ことの時にアドレスはPPPoEを選択しておきます。

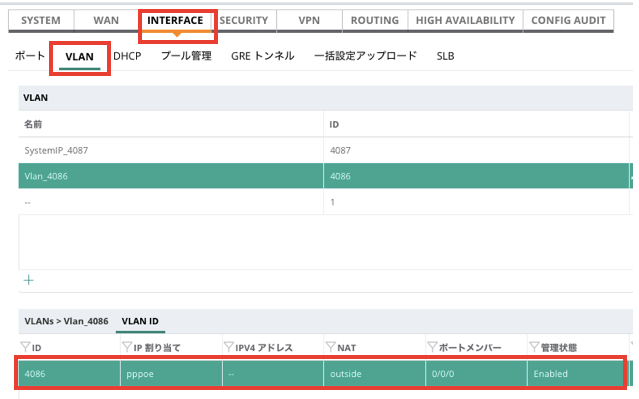
次にAdvanced Mode INTERFACE > VLAN でUplinkのVLANを選択します。

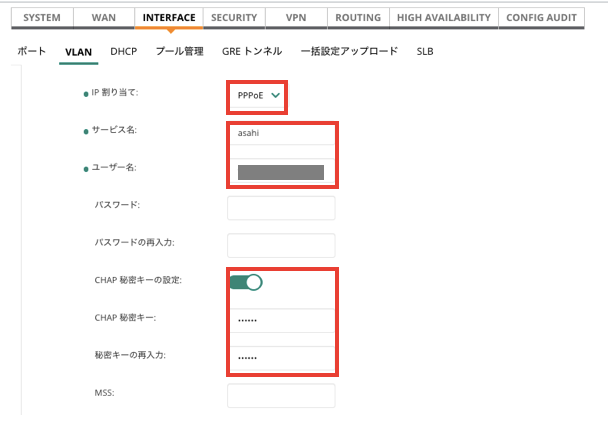
このUplink VLANでPPPoEの設定をします。
サービス名は任意で構いません。
ユーザ名とCHAP秘密キーは、サービスプロバイダの情報を入力します。

Central側の設定は以上で完了です。
2. GatewayのCLIでの初期設定
次に、Gatewayの設定です。インターネットにアクセスできないと、そもそもCentralで設定ができないので、工場出荷状態のGatewayを起動し、static-activateでPPPoEの設定を行います。
起動後、少しすると、設定モードを選択する画面が出てくるので、ここでstatic-activateを選び、以下のようにPPPoEの設定を進めるようにします。
Auto-provisioning is in progress. It requires DHCP and Activate servers
Choose one of the following options to override or debug auto-provisioning...
    'enable-debug'      : Enable auto-provisioning debug logs
    'disable-debug'     : Disable auto-provisioning debug logs
    'mini-setup'        : Start mini setup dialog. Provides minimal customization and requires DHCP server
    'full-setup'        : Start full setup dialog. Provides full customization
    'static-activate'   : Provides customization for static or PPPOE ip assignment. Uses activate for master information

Enter Option (partial string is acceptable): static-activate
Enter Controller VLAN ID [1]: 4086
Enter Uplink port [GE 0/0/0]:
Enter Uplink port mode (access|trunk) [access]:
Enter Uplink Vlan IP assignment method (static|pppoe) [static]: pppoe
Enter Uplink Vlan PPPoE username: <your username>
Enter PPPoE Authentication Mode (pap|chap) [pap]: chap
Enter Uplink Vlan CHAP secret: **********
Re-enter Uplink Vlan CHAP secret: **********
Do you want to configure dynamic port-channel (yes|no) [no]:

Current choices are:

Controller VLAN id: 4086
Uplink port: GE 0/0/0
Uplink port mode: access
Uplink Vlan IP assignment method: pppoe
Uplink Vlan PPPoE Username: <your username>
PPPoE Authentication method: chap

Do you wish to accept the changes (yes|no)yes